
In my previous tutorial, we talked about how SketchUp uses faces to fill in areas within bounding lines. You can read that tutorial by clicking here.
Now that you have a basic understanding of how SketchUp creates shapes using faces, let’s go through and check out some of the tools that SketchUp has for creating and modifying different two dimensional shapes.
The Circle Tool
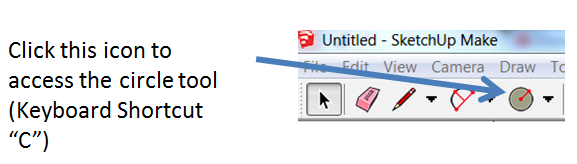
The first tool in the shapes palette in SketchUp is the circle tool. This tool allows you to draw a circle by specifying a center point and a radius. To access the circle tool, click on the circular icon in your toolbar, or press the “C” key on your keyboard.
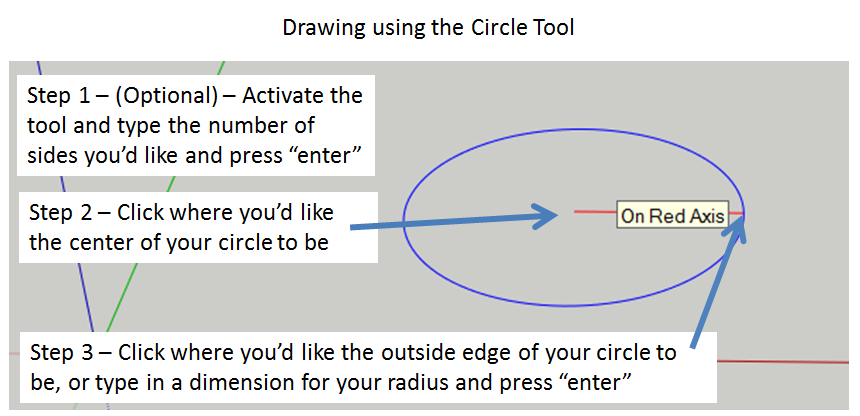
If you look at the measurements bar in the bottom right hand corner of your screen, you’ll notice that it gives you an option to select the number of sides in your circle. It will default to 24, so you don’t need to change anything right now. We’ll talk more about number of sides in circles and model speed in a future tutorial, but for now, just leave this at 24.
The way that you create circles in SketchUp is by setting a center point for your circle, then defining a radius length. The radius of a circle is ½ of the full width of the circle. Once you’ve clicked once and set your center point, you can set the radius of your circle by clicking again on the screen or by typing in the length of your radius and hitting the “enter” key on your keyboard.
The Rectangle Tool
You can access the rectangle tool by selecting the drop down arrow next to the circle on your toolbar and clicking on the rectangular icon, or by using the keyboard shortcut, which is the “R” key.

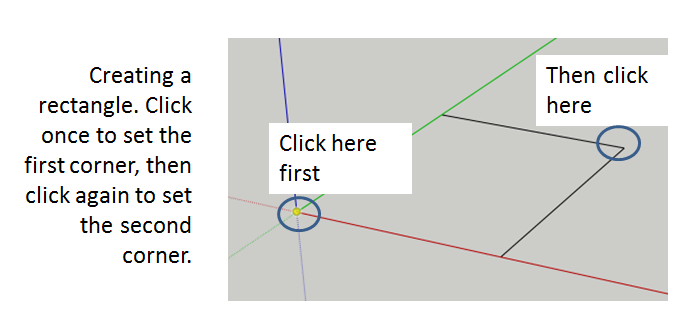
When this tool is active, you can create a rectangle by clicking once on your screen to set the first corner of your rectangle, then clicking again to set the opposite corner.
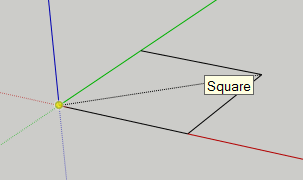
One thing you might notice is that occasionally when you’re setting your second point, SketchUp shows a little dotted line with the text “square” around it. This is the SketchUp inferences engine guessing what you might want. This is useful because sometimes you want to draw a rectangle with 4 equal sides (a square), so this shows you where to click if you’d like to do that.
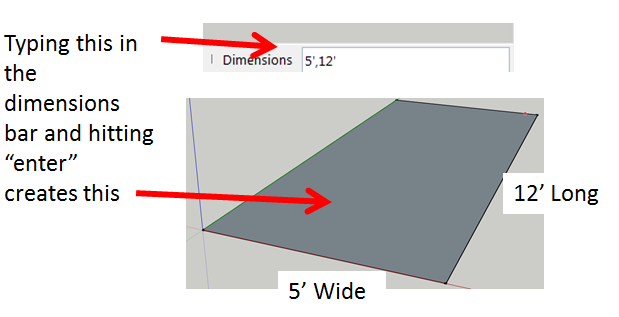
The rectangle tool is unique because it’s the first tool we’ve talked about that requires two dimensions in the measurements bar. Once you set your first corner, if you’d like to draw your rectangle using dimensions instead of clicks on the screen, you can do that by typing in your dimensions separated by a comma. Let’s say I wanted to draw a rectangle that is 5 feet wide, but 12 feet long. I would create this by setting my first corner, then typing 5’, 12’ and hitting the “enter” key.
If you enter negative dimensions in the measurements box, SketchUp will draw the rectangle in the opposite direction of the direction you were indicating with your cursor.
The Polygon Tool
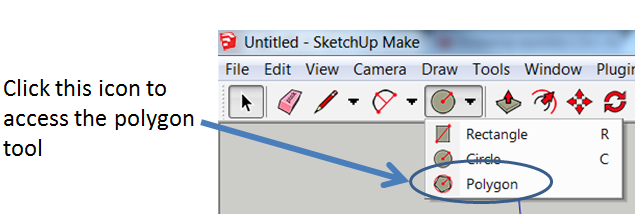
The next shape drawing tool in SketchUp that we’re going to talk about in this tutorial is the polygon tool. This tool allows you to draw a polygon by specifying the number of sides of the shape, a center point, and the distance from the center point to an outside point in your shape. Click the drop down in the shapes palette and select the icon that looks like a little pentagon inside a red circle.
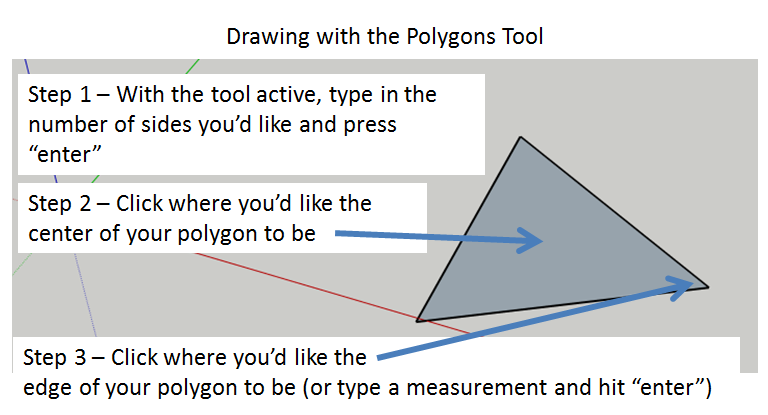
Once you’ve activated this tool, you’ll notice that the measurements bar changes to a box allowing you to indicate the number of sides your polygon should have. You can indicate as many sides as you want, but once you get past about 10, your polygon just starts looking like a circle. This tool is especially helpful because it allows you to draw shapes like triangles, pentagons, hexagons, and octagons. Go ahead and type in the number of sides (in this case I’ve picked 3) and hit enter. Your cursor should change to a triangle. Now click once to set the center point of your triangle, then click again to set an edge point. This will draw a triangle. Like the other drawing tools, you can type a length and hit the “enter” key to specify the distance between your center point and your edge point (letting you set the size of your triangle).
This concludes my tutorial on drawing shapes in SketchUp. In the next tutorial, we’ll use SketchUp’s drawing tools to create a model that has 3 dimensions. You can access that tutorial here.
For more SketchUp tutorials, click here.
_________________________________________________________________________________________________________________
About Justin Geis
Hi, I'm Justin Geis, and I'm the founder of The SketchUp Essentials. I started using SketchUp as part of my work as a general contractor in 2008. I quickly realized the power of the software and started using it for personal projects. I started The SketchUp Essentials as a place to share easy to follow SketchUp tutorials and tips to help everyone harness the power of 3D Modeling in their lives. When not working with SketchUp, I enjoy playing soccer and spending time with my wife and our two dogs.

