
Avoiding Pitfalls in Revit Coordination

I’ll be the first to tell you that Revit coordination within your own internal team and external team takes a ton of work and time. There are certainly ways to make sure that you’re on top of things and not spending your useful time tying to line up everything.
I’ve worked on a project where another architecture firm was designing brick on the concrete panels I was modeling. I’m not sure how much more could go into Revit coordination but if you take some of the below precautions you’ll avoid some of the pitfalls I spent a fair amount if time correcting.
Coordinate Early
It’s so very important to have a meeting and get everyone on the same page early. Talk about who’s responsible for what and agree on a common origin from the civil plan. Make sure everyone’s working from the same base elevation, and I’d recommend making a floor plan called “Revit Coordination Plan” that has an annotated crosshair that everyone can use as a reference to place their model.
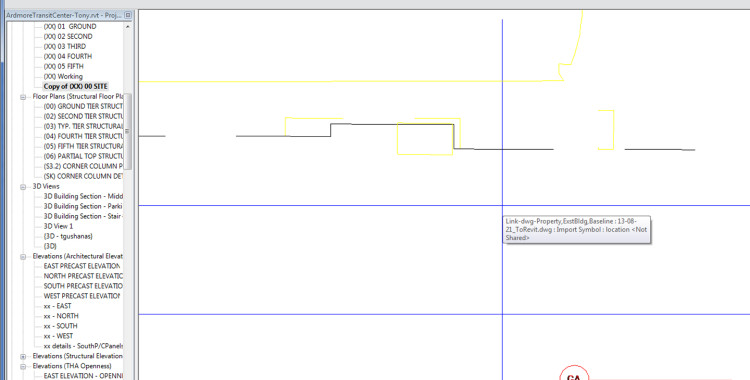
What about Revit shared coordinates? It’s likely that someone on your team doesn’t understand shared coordinates and you might not have the time to teach them. It’s also probable they don’t understand but won’t admit it. Using a cross hair makes it dummy proof and is at least a good way to check that everyone lines up. I will also tell you that I’ve used Revit’s shared coordinates to locate models before only to find out down the road that they’re off .001 degree and I can’t take dimensions between the two. Don’t trust Revit’s auto scaling or auto positioning for imports.
Coordinate Often
Setup a minimum of bi-weekly revit model sharing. It is really a great way to ensure everyone’s on the same page and kept in the loop. The first time someone told me that’s what we were going to do I pretty much rolled my eyes. It really made a big difference though and I found myself sending weekly updates more so than bi-weekly ones because of their value. Open lines of communication are so very important when you’re working closely together.
Log & Document
When you see something off in the model that one of your team members did take a screen shot, keep a log of where it is in the model, and a description of what you saw. Every 5-10 of them send your log along with the screen shots to make sure everything’s getting picked up. If your team cares about quality and getting things right, they’ll appreciate it and by sending them in batches you won’t annoy them with little changes all the time.
Additionally, keep a little log for yourself of your own major updates to send along to your team with your coordination uploads so they know where they can expect to see changes.
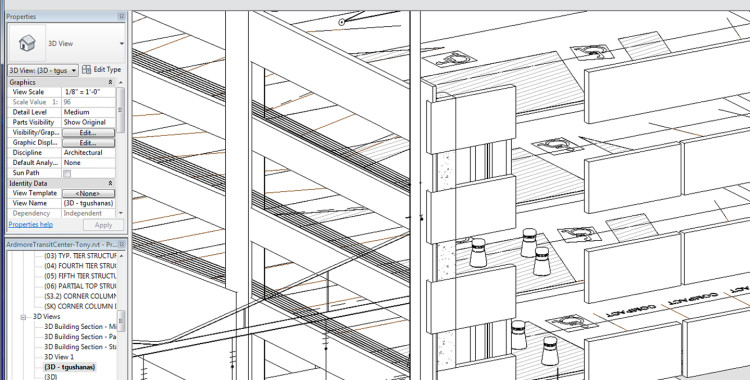
Model
It’s much easier to make sure everyone’s on the same page when you’re looking at a 3d model that is representative of how it will be built. Just by rotating your model around you can see potential conflicts and get a feel for what needs to be developed and refined. I’ve gone down the path of using drafting views instead of modeling only to find out how annoying it is later when things change and I have to spend a ton of time fixing things. Spend the time making awesome families that make your job easier in the long run. Don’t take short cuts that aren’t going to increase your efficiency in the future.
Revit Coordination. Not Unlimited Access To Your Entire Library
Protect the detail and Revit libraries so spent countless hours developing by saving your model as a separate file, detaching it from the central, and deleting all your details.

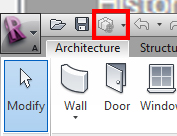
If they want to see your details, make them look at your PDFs. Swap out any of your awesome families with simple dummy ones. As an added bonus, deleting out all of those details and heavy families will make your file size smaller and make it easier to send along to the team. Just take real good care to make sure you’re not deleting details in your central model. Before hitting delete make sure the synchronize button in the top right is greyed out.
Once & Done
Don’t reinvent the wheel if you don’t have to. Share titleblocks and font styles… and for goodness sake let the lead team link in all the models into their own model. Simply keep their same naming conventions to hold the links.
Hope this helps! Happy coordinating!
Have your own tips for coordination in Revit? Leave a comment below!
No comments yet.