
Creating a Curved Cutout in Sketchup | Sketchup Q&A

In this Sketchup Q&A session, we’re going to tackle how to make a curved cutout in Sketchup. Aunt_marge on Reddit asks:
“Can I achieve the curved face on this table leg with Make2017?”
-aunt_marge
The answer is yes! Keep reading and we’ll show you how in just a few simple steps!
Draw rectangle. To mimic the original geometry, let’s start by drawing a rectangle. Use the “push/pull” tool to extrude it up.
Draw an arc. Use the arc tool to draw an arc on one of the faces. Close off the arc with a line to create a shape and a draw a straight line along the blue axis. We close off the arc because Sketchup doesn’t allow us to flip lines by themselves.
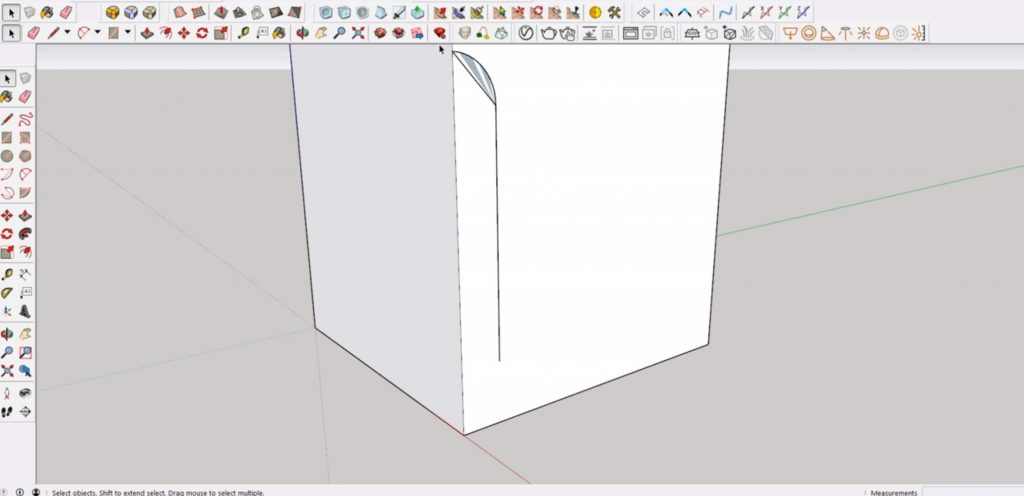
Press “m” and then “ctrl” to move a copy of the arc along the blue axis. Right-click on the shape you just copied and moved and select “flip along” > “blue direction.” Make any final adjustments for where you’d like your cutout. Now we can delete the extra lines we used for closing off the arcs.
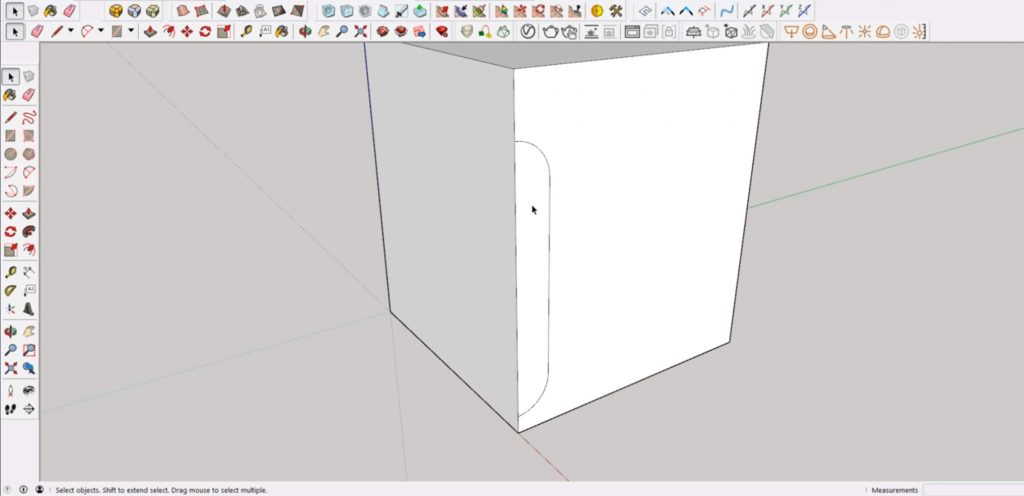
Reverse face. If your new geometry doesn’t look the same as the rest of the model, you’ll want to reverse its face. Right-click on the shape and select “reverse face.” If the shape does not have a face after you delete the extra lines, simply draw a line connecting the top arc to the bottom arc.
Copy. Copy and paste the shape to the adjacent face of the rectangle. Right-click on the shape and select “flip along” > “red axis.” Move the shape so that it lines up with the first one.
Create the Cutout in Sketchup
Now that we have the basic shape, we can create the actual cutout. There are a few different ways you can achieve this.
Connect the Endpoints
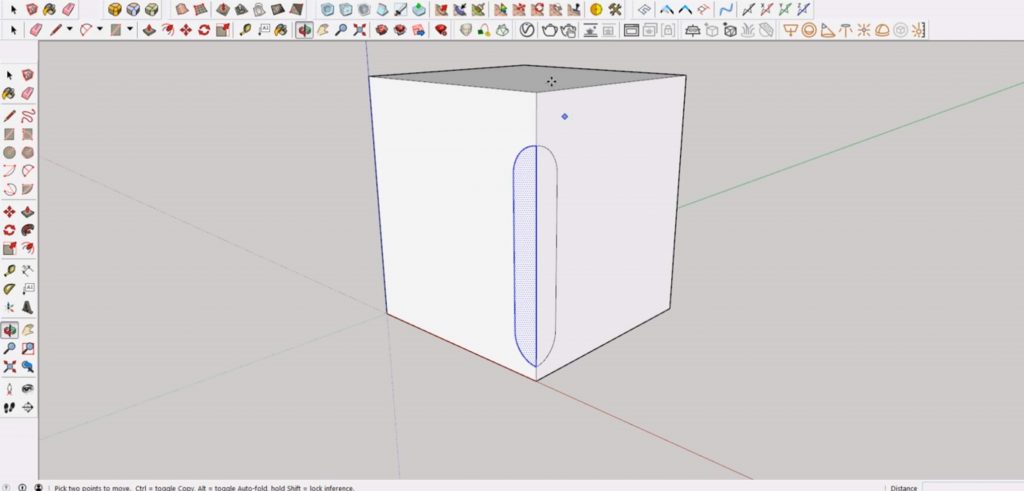
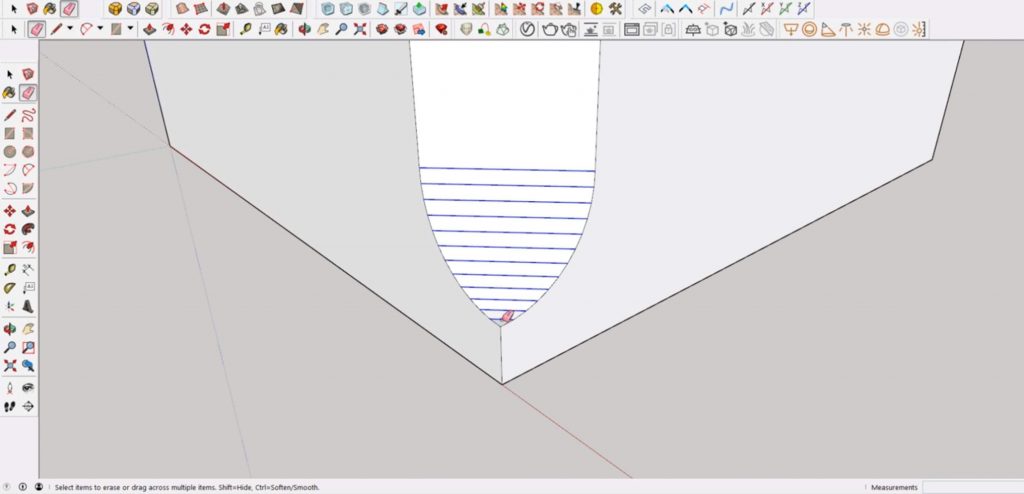
Delete. The first method is to delete the faces of the shape you just created. Then, find the endpoints between the edges of the cutout shape and connect each one.
Erase. Use the eraser tool to hide the lines on the curve. Hold “ctrl” while using the eraser tool and drag it over the lines you want to hide. This will smooth out the geometry and give you a soft curve.
Cut into the Shape
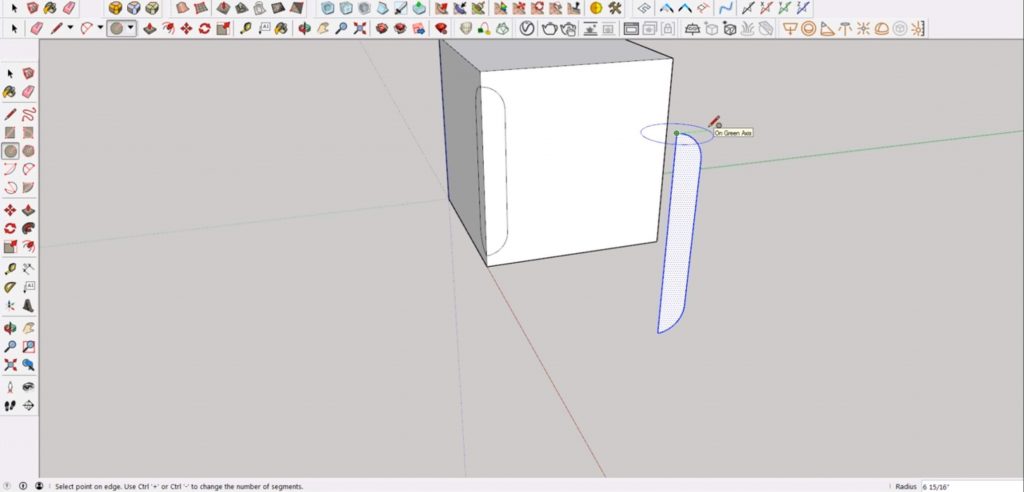
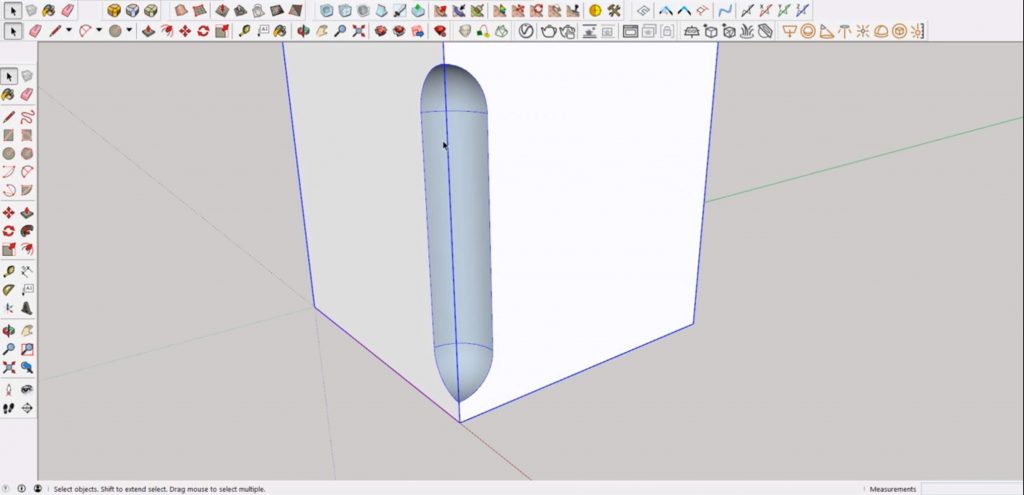
The second way to create a curved cutout in Sketchup is to use the shape you created to cut into the rectangle. Copy one face of the shape you drew and place it next to the rectangle.
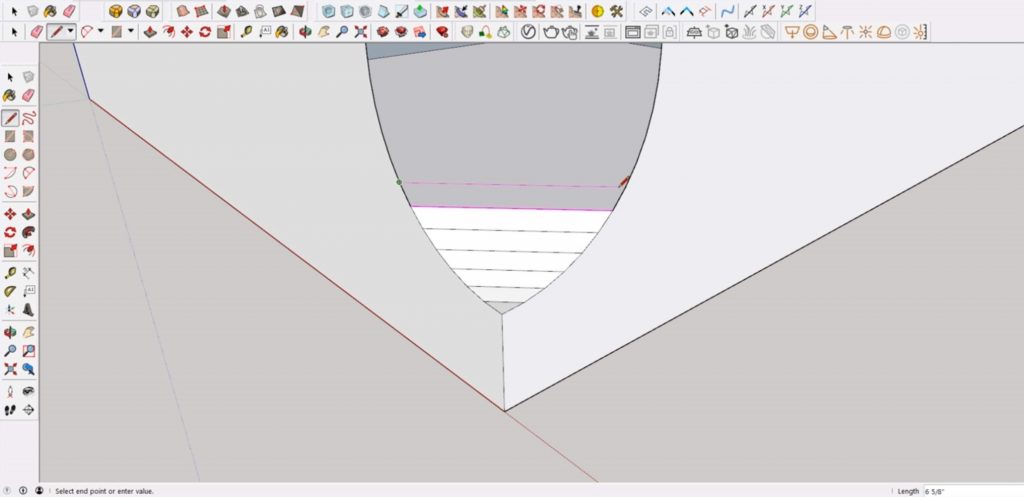
Draw a Circle. Hit “C” to open the circle tool. Click the top of the shape and drag the mouse to draw a circle on the green axis. Delete the face of the circle.
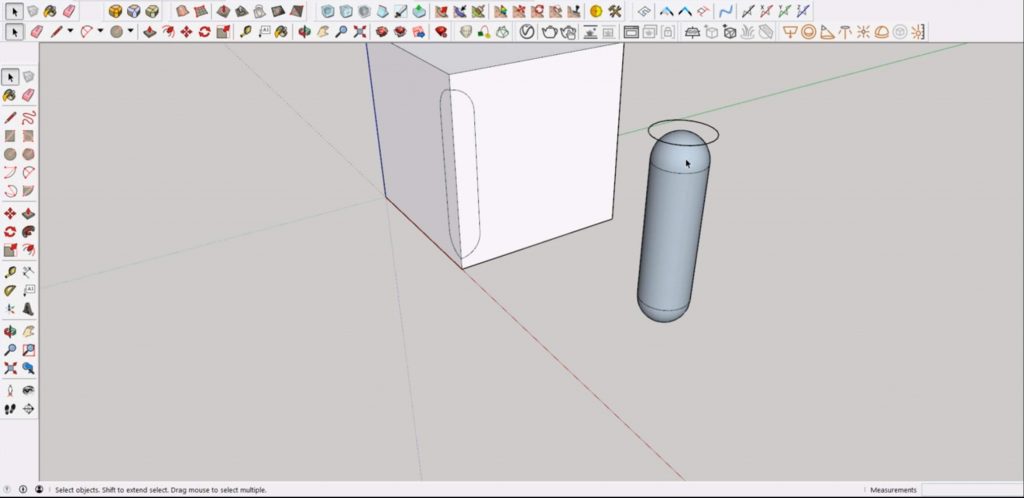
Follow Me. Select the circle outline, click on the “follow me tool” and then select your shape. Double click on the shape and select “make group.”
Select the endpoint at the top of the shape and drag it to connect with the top endpoint of the arc in the rectangle. Double click on the rectangle and select “make group.”
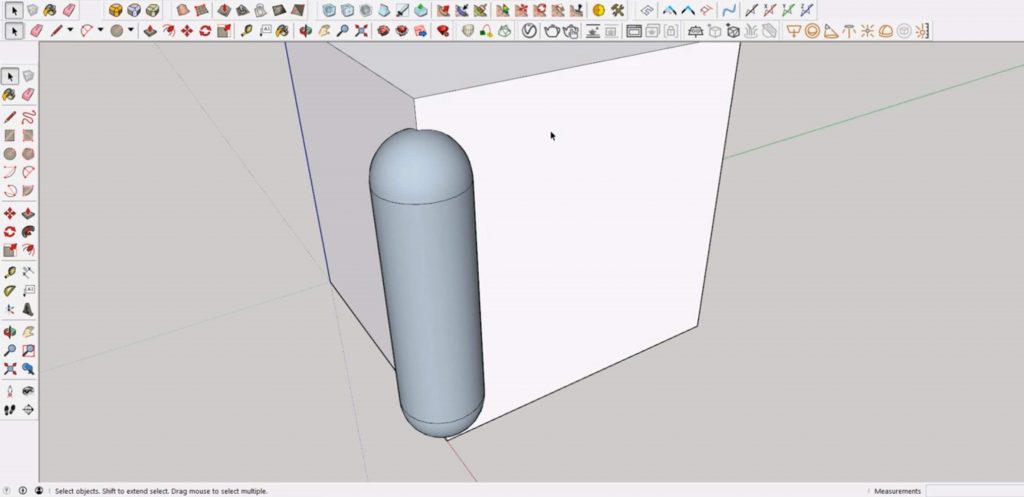
Subtract. Right-click somewhere in the top menu bar and make sure “solid tools” is selected. Click on the “subtract” tool from the “solid tools.” Select your cylinder shape and then select the rectangle. If the subtract tool isn’t working, it could be that there is a line intersecting with the shape somewhere or the geometry isn’t closed.
Erase. Hold “ctrl” while using the eraser tool to hide the extra lines.
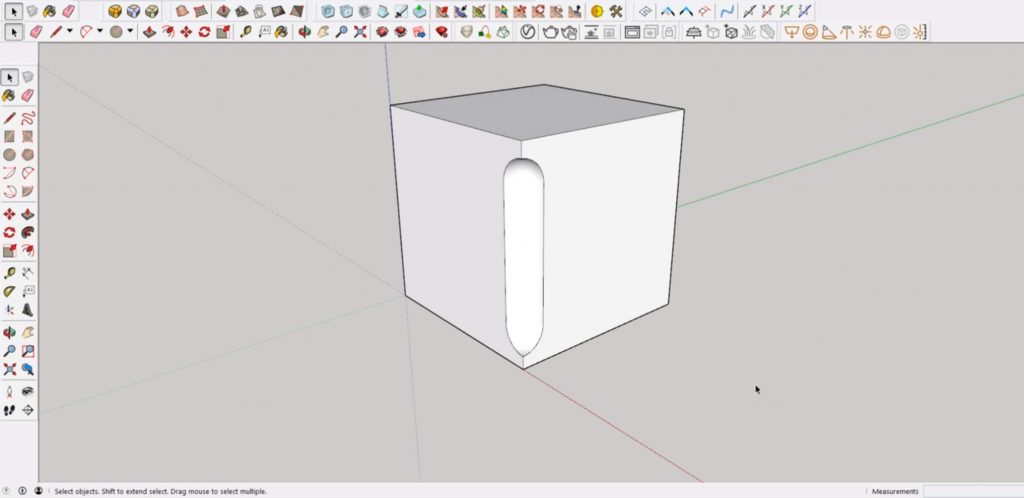
The first method can be a bit tedious, but for a small shape, it will give you the smooth curve you are looking for. If you have to create the same curve on all four corners, using the subtract method may be the better option for creating a cutout in Sketchup. Be sure to check out the rest of our tutorials for more great tips!
Happy Hacking!
No comments yet.