
How to Import from Blender to Sketchup

In this tutorial we’ll show you how to import a model from blender to Sketchup. Sketchup is a great tool for modeling, but sometimes it can be difficult to achieve the level of detail you want. We’ve discovered that using a program like Blender to model small details and then importing into Sketchup can sometimes be the best option.
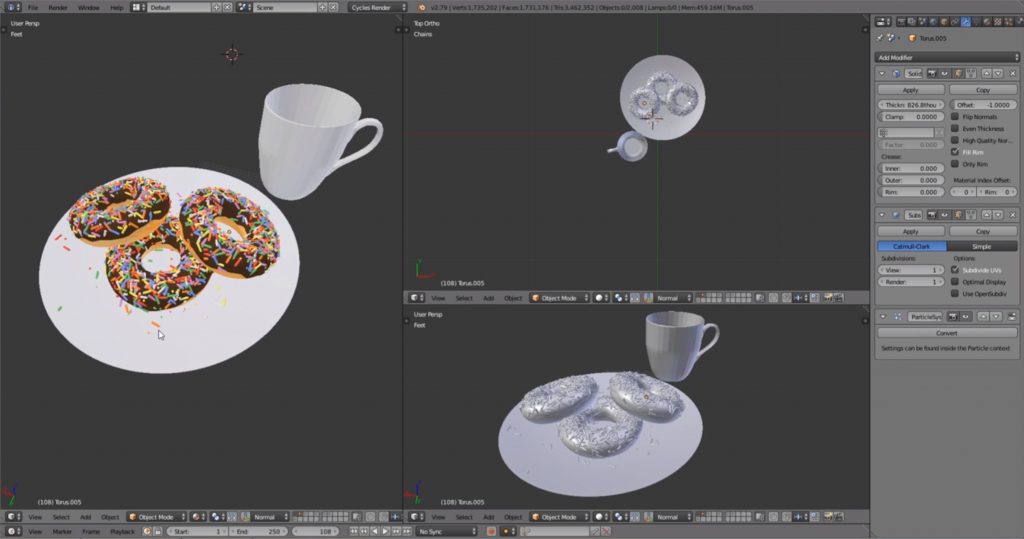
Start by opening up your Blender model. We’ve set ours up by placing things on separate layers to make exporting a little easier.
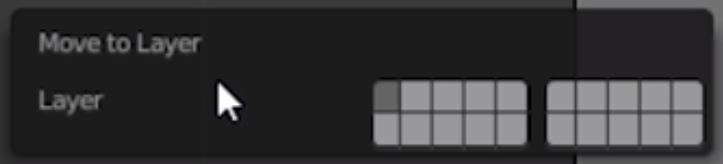
Select a New Layer. If you want to move something to a different layer, select the object. Then hit “M” on your keyboard. A toolbar will pop up with a set of boxes representing each layer. Select one of the boxes to assign the object to a layer.
Show Layers. To select which layers to show in your model, use the grid and hold “shift” to click on what layers you want to be visible.

Before you select your objects to export, make sure you apply the particle system modifier to smaller details like the sprinkles in our donut model.
Select Objects to Export. Hit “B” on your keyboard and click and drag over the objects you wish to export to select.
File > Export > STL. To export your file, navigate to “file” > “export” and select STL. In the lower left corner of the export window, there are settings you can customize. Make sure “apply modifiers” is selected. Just a heads up, this will increase the import time into Sketchup. If “batch mode” is set to “object” it will export each object as a separate STL file. This may be useful if you want to rearrange your scene, but for this scene we are going to keep it set to “off.”

Import from Blender to Sketchup
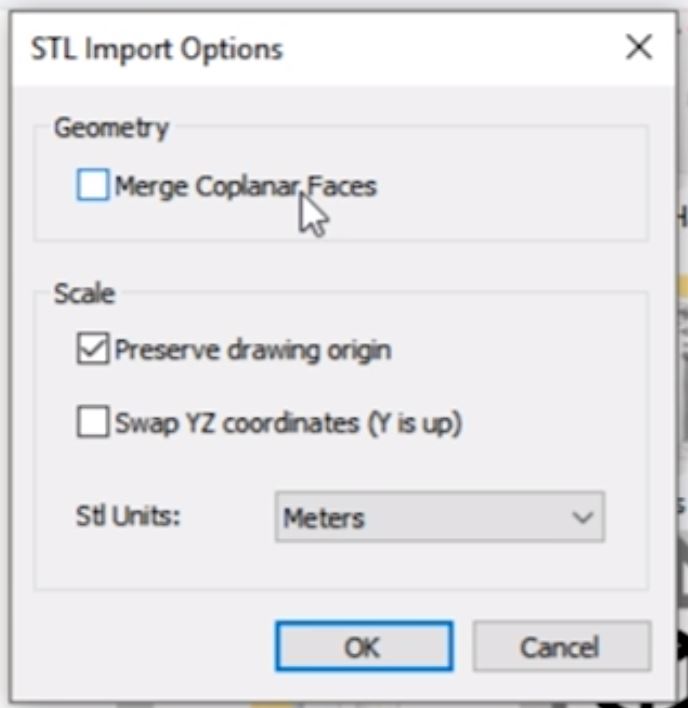
File > Import. To import your file into Sketchup, open Sketchup and go to “file” > “import.” Make sure the file type dropdown is set to “STL.” Click on “options.” If you are not using modifiers, you can check the “merge coplanar faces” box to maintain the same type of face in your Sketchup model that is in your Blender model. Also, make sure the “preserve drawing origin” box is selected. Then, use the drop down to select the correct units you modeled in. Once you have the correct settings, click “ok.”
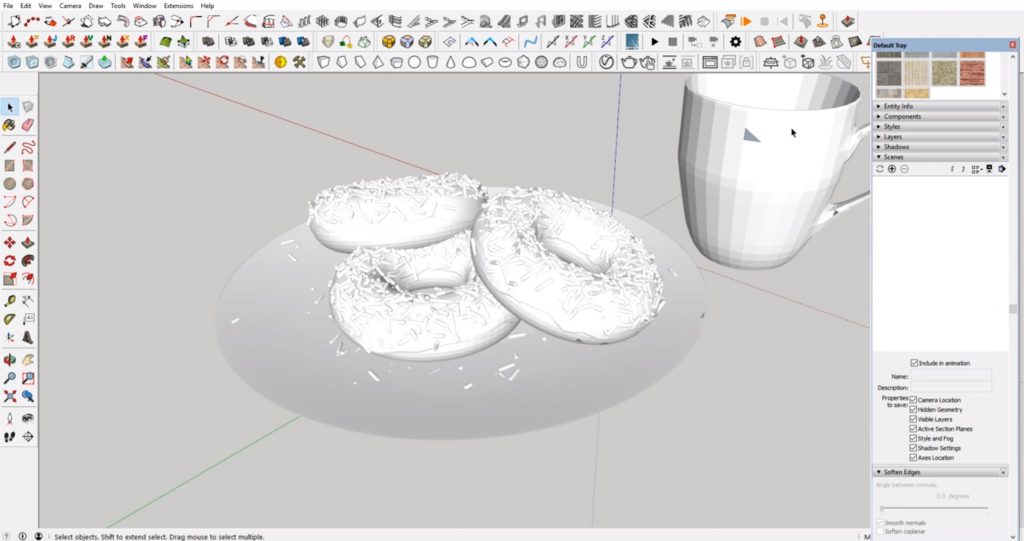
Once you import your model from blender to Sketchup, you may notice some areas that need some work. You can experiment with the export options to see if you get a better result, but most of the time you might just have to resort to doing a small amount of cleaning up!
Moving around your Sketchup model may be really slow. To speed it up, go to “view” > “edge style” and deselect “edges” and “profiles.” You also want to make sure you turn shadows off by going to “view” and deselecting “shadows.” Under the “styles” tab in the default tray, make sure you select a rendering style that has a small stopwatch in the corner because these indicate faster rendering styles.
You can always edit the faces, use a plugin like Artisan to smooth faces, or play around more with the Sketchup model, but these basics will give you all the tools you need to import a file from Blender to Sketchup!
What modeling program do you use the most? Have you tried importing a Blender file to Sketchup before? Let us know in the comments, and be sure to check out all of our latest Sketchup tutorials!
Happy Hacking!
No comments yet.