
How to Soften Edges and Round Corners in Sketchup

When modeling and rendering objects in Sketchup, it’s important to add details that will create a realistic final product. In this tutorial, we’ll take a look at how to soften edges and round corners in Sketchup! This can be useful when trying to make three-dimensional objects look more realistic and less computer-generated. Simply curving an edge or corner will give an object more depth and make it look more convincing than a perfectly square edge. With a few easy steps, we’ll show you how you can turn a flat looking surface into a more realistic looking object!
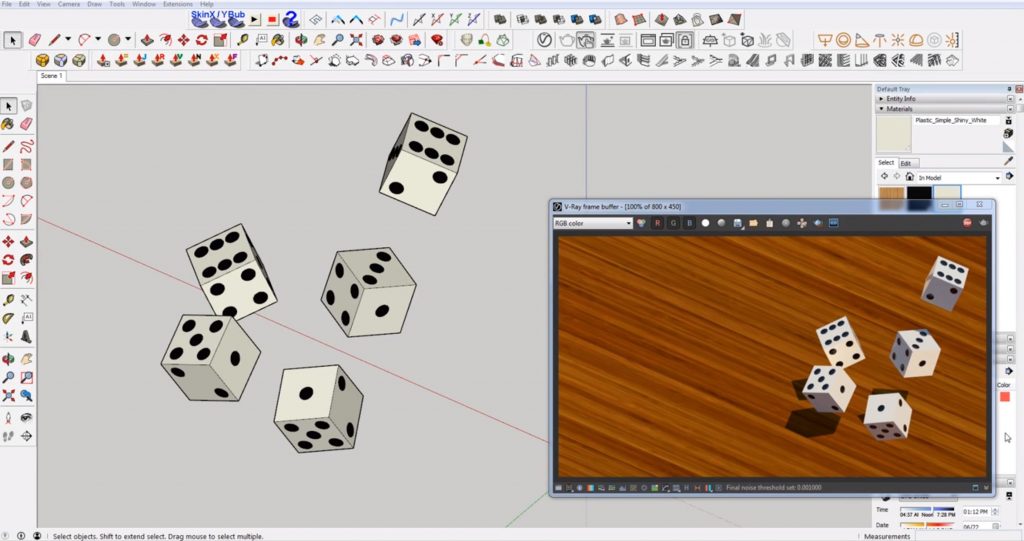
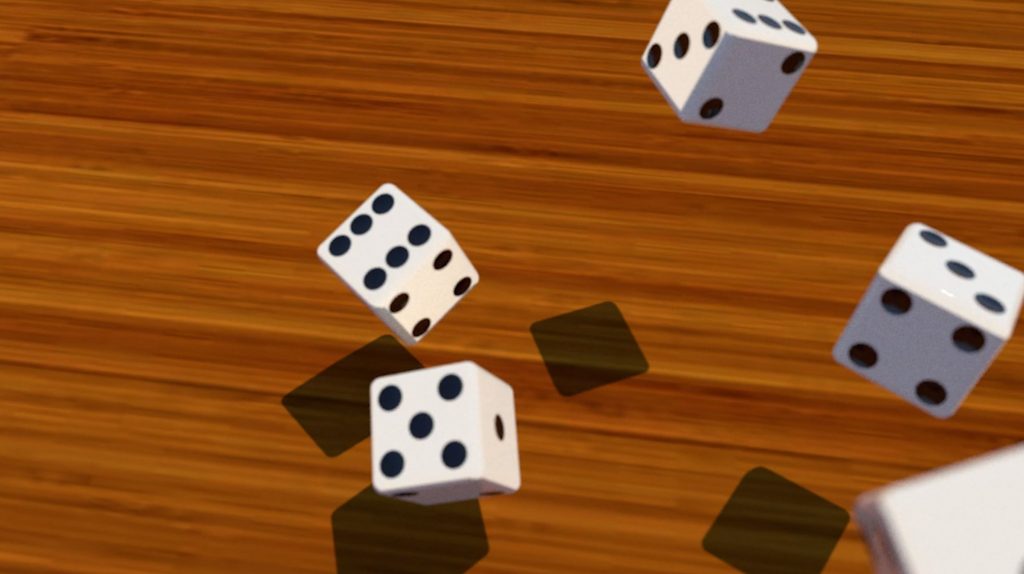
For this example, we used a basic cube (disguised as dice). You can see in the rendering before we round the corners the shapes look flat and hard. Adding a rounded corner and edge will give the dice a more realistic look that we are familiar with.
Adding Round Corners in Sketchup
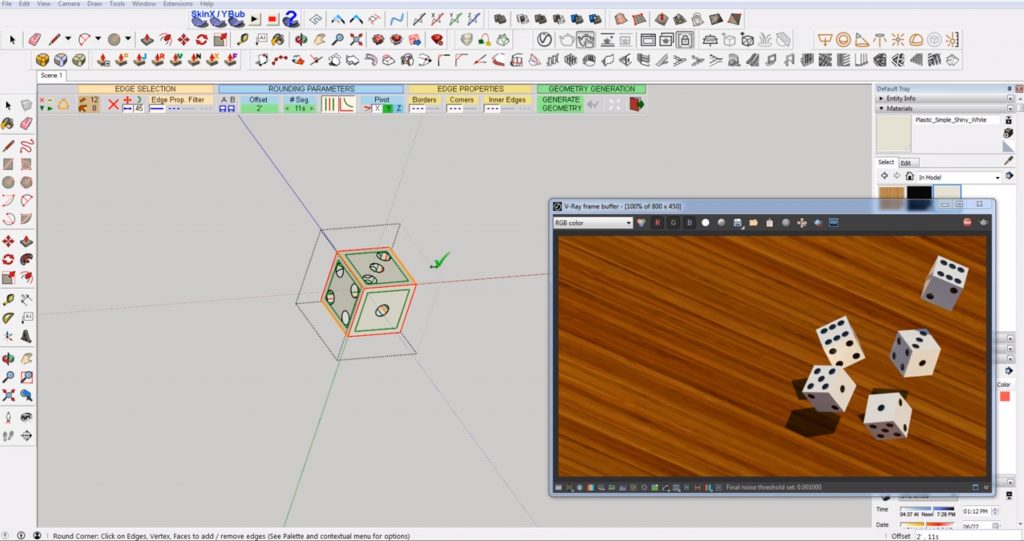
Round Corner. We did this by using a Freedo6 plugin called “round corner.” This plugin is useful for quickly rounding corners in Sketchup and adding unique beveled edges. If you don’t have the plugin installed, follow these steps:
- Window > Extension Warehouse. Navigate to the “window” tab and select “extension warehouse” from the dropdown menu. The extension warehouse window will appear. From here, use the search bar to search for “Freedo6” plugins or “round corner.” When you find the right plugin, click on it to install.
- Install. When you select a plugin, you will notice a red “install” button in the upper right corner. Click on that to install the plugin. Once you have the plugin installed, you can access it from the top left corner of your toolbar in Sketchup.
The plugin comes with three different options, a beveled corner, a sharp corner, or a round corner. In order to add round corners in Sketchup, we are going to use the round corner option. You may use the other options for more complex shapes like a counter top, wood trim, or picture frame edge.

Rounding Parameters > Offset. Double click on the object you want to round the corners of. Then select the “round corner” button from the Freedo6 plugin. Under the “rounding parameters” options select the “offset” button to set the offset amount. Type the desired amount you want to offset the corners by and hit enter. You may have to experiment with higher or lower values until you get the look you want. Left-click to exit the “round corner” tool.
Render. If you are using Vray to render your objects, you can use the Vray window to see how the objects in Sketchup will look when rendered. You may have to re-render the image after rounding the corners to get a more accurate preview.
Now that you know how to create round corners in Sketchup you can add even more detail to your Sketchup models. If you’re looking for more useful plugins, check out the other Freedo6 plugins, or go to our full list of tutorials for even more Sketchup tips and tricks!
What objects do you use the round corner tool for? Let us know in the comments!
Happy Hacking!
No comments yet.