
Creating a Parametric Design in Sketchup with Viz Pro

Using Viz Pro to create a parametric design in Sketchup can seem daunting, but in this tutorial, we’ll show you how to create a parametric cylinder in Sketchup easily. We will go over the basics of creating nodes, using sliders, and exporting your final design. There are quite a few steps, and it may seem confusing if this is your first time using Viz Pro, but take your time and watch the video below if you need help! Ready to jump in? Let’s get started!
Open Viz. To begin creating your parametric design in Sketchup, you’ll first have to open the Viz window. Select the Viz Pro icon in the upper left corner of your toolbar. The left side of the window is the node area, and the right side is the preview area. If you don’t have Viz pro you can get a 15-day free trial here: http://www.designerhacks.com/vizpro (support us by using this affiliate link)
Primitive > Cylinder. To begin, hover over the “primitive” tab and select “cylinder” from the dropdown menu. A cylinder will appear in your preview area and a node will pop up in the node area. This node gives you options to customize such as preview, plane, radius, height, and cylinder output.

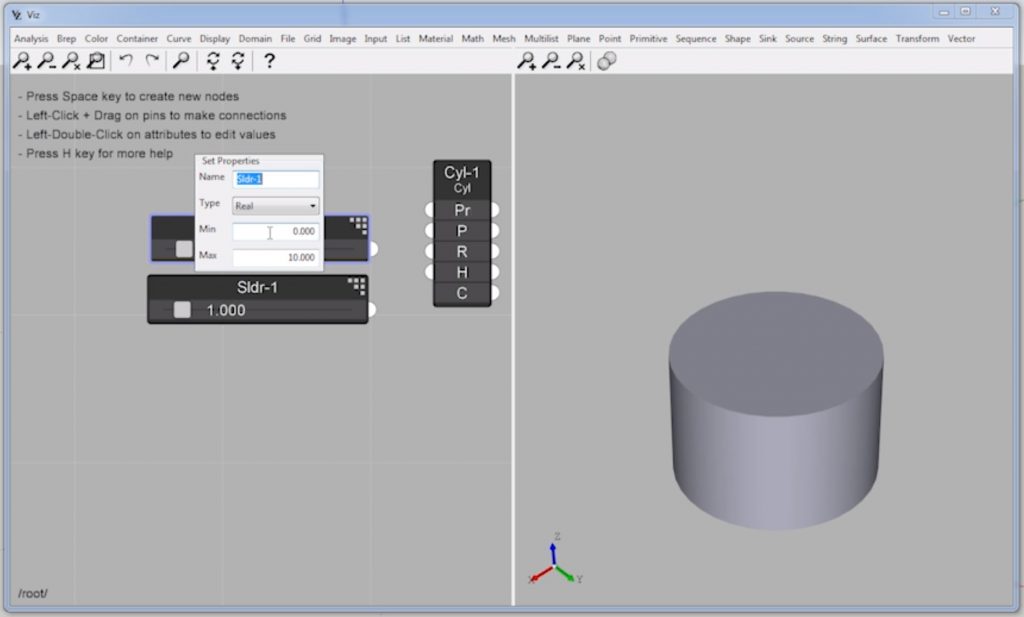
The next thing you want to do is change the radius and height so they will dynamically change with the cylinder. If you double click on the “radius” or “height” button in the nodes area, you can use the slider to increase or decrease the size of each. Another way to do this is by adding sliders into the node area.
Input > Slider. Navigate to the “input” tab and select “slider” from the dropdown. A slider box will appear in the nodes section that you can now customize. Copy and paste the slider. Double click on the first slider and rename it “Radius.” Do the same for the second slider and rename it “Height.”
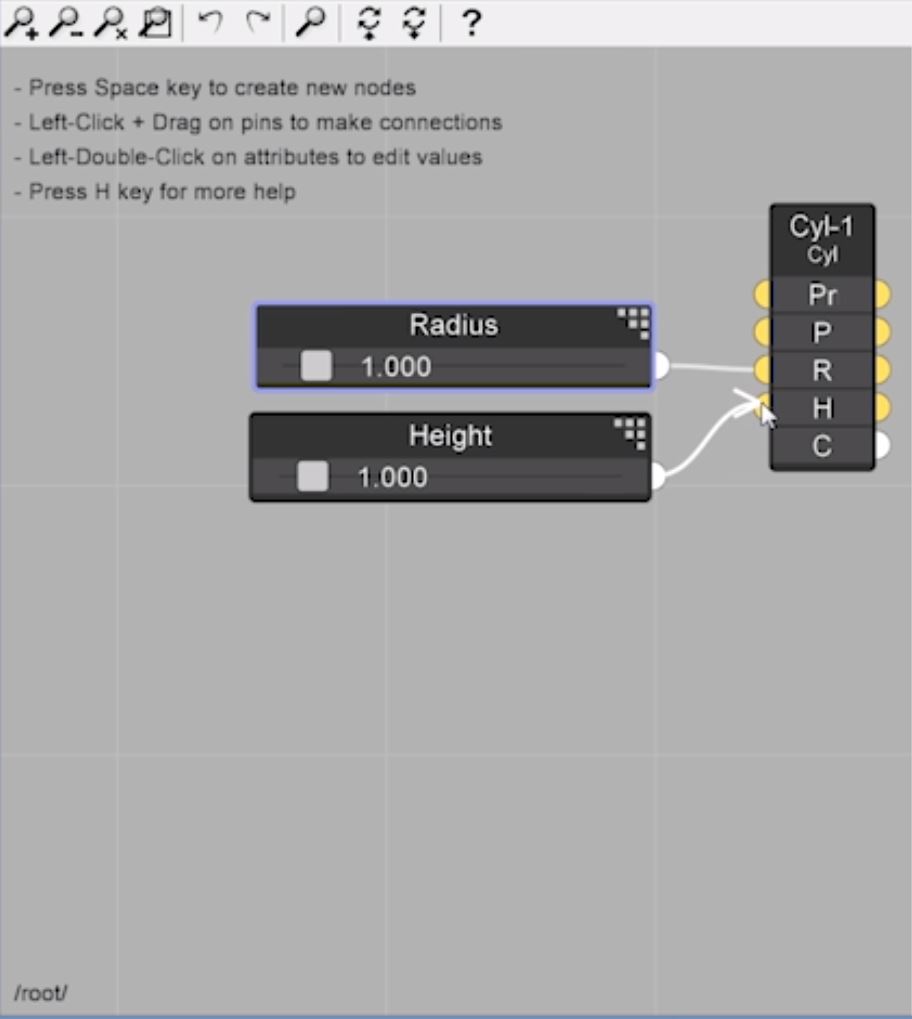
Click and drag the white semicircle from each slider to its respective button on the cylinder node.
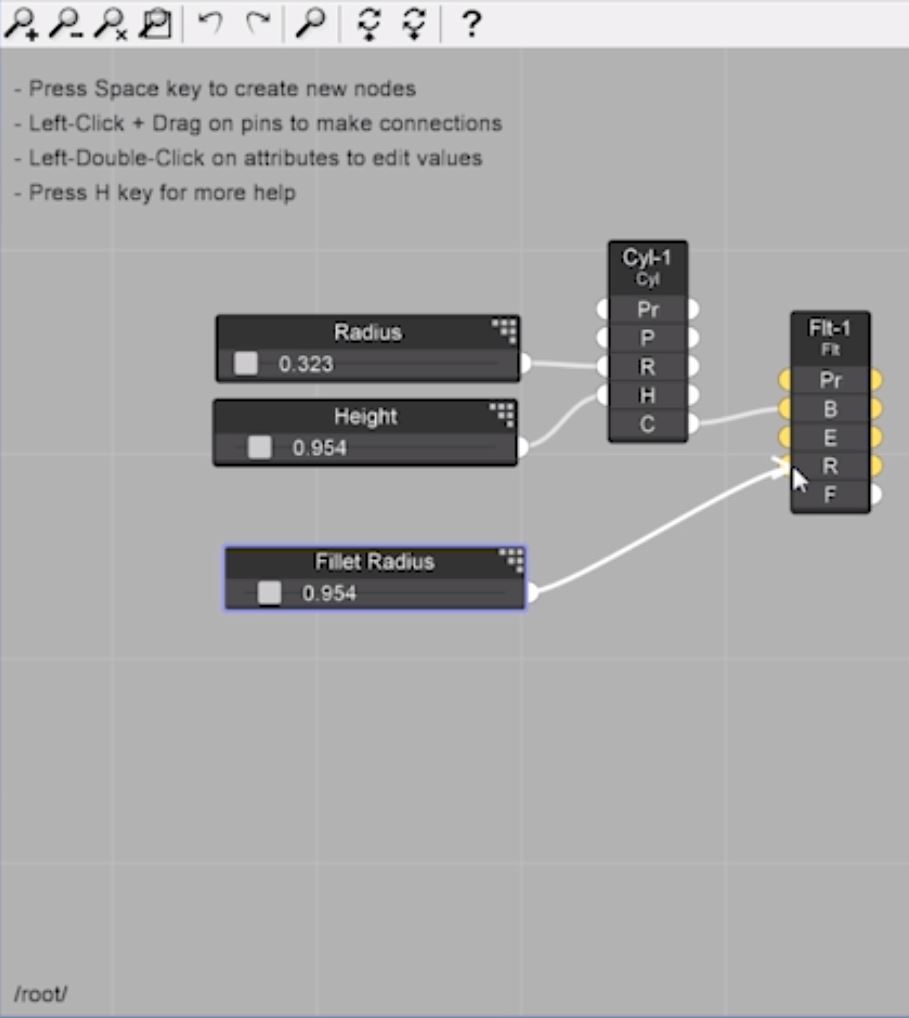
Create Fillet Node. Hit the spacebar on your keyboard to create a new node. Type “fillet” into the search bar and double click on the “fillet” option. Click on the “cylinder” node and drag it to the “Brep” (B) section on the “fillet” node.
Create Fillet Slider. Copy and paste one of the previous sliders you created and click once on the white line to get rid of the node link. Rename this slider by typing “Fillet Radius” in the name box. Click and drag this slider to the “radius” (R) section on the fillet node.
If you drag the “fillet radius” slider now, nothing will happen to your cylinder. To fix this, you will need to add another node.
Create a Brep Node. Hit the spacebar on your keyboard to create a new node. This time, type “Brep” into the search bar and select “Brep components.”
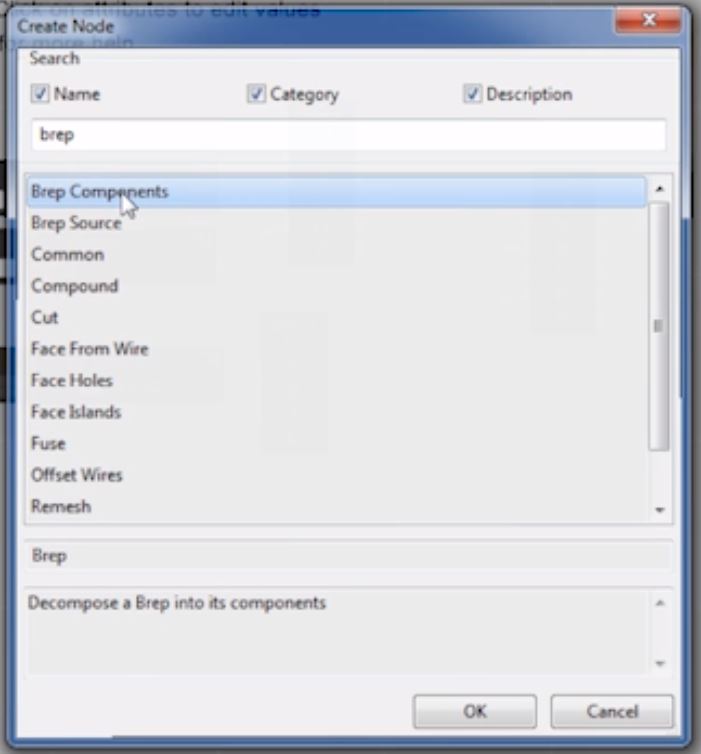
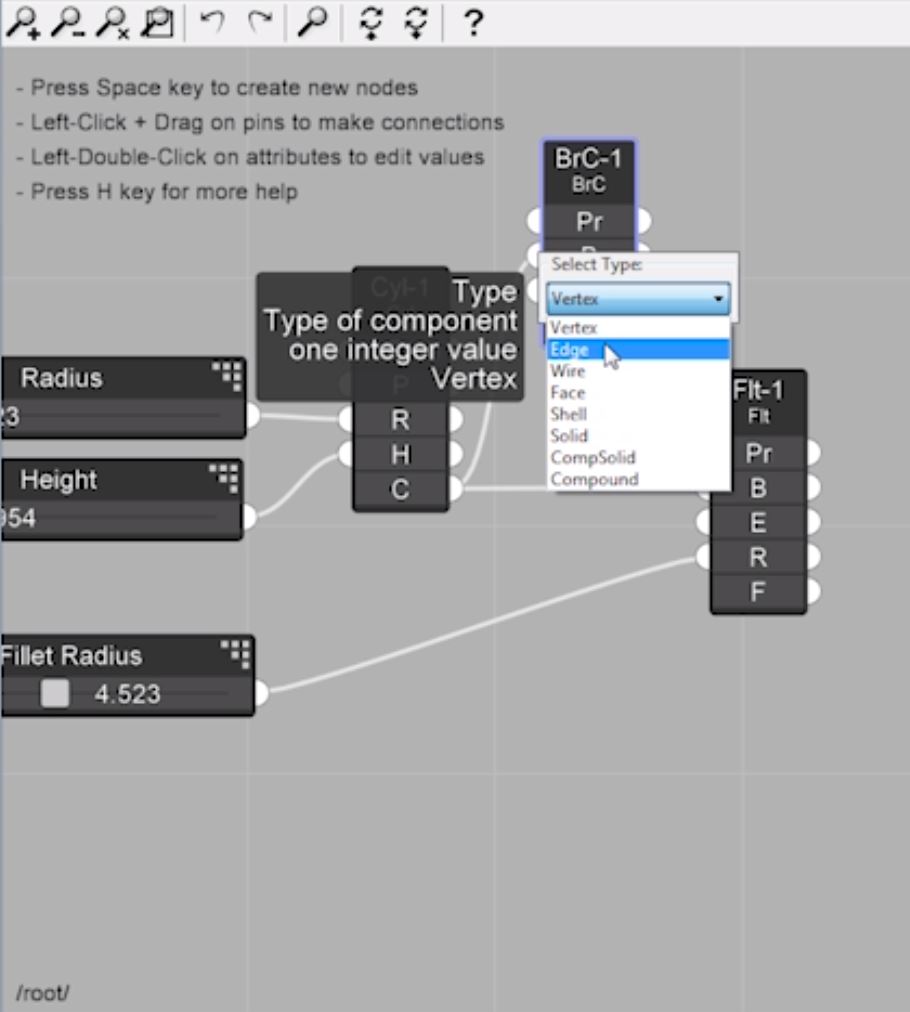
Click and drag to attach the “C” on the cylinder node to the “B” on the Brep node. Then, change the “type” on the Brep node by double clicking on the “T.” Select “edges” from the dropdown menu.
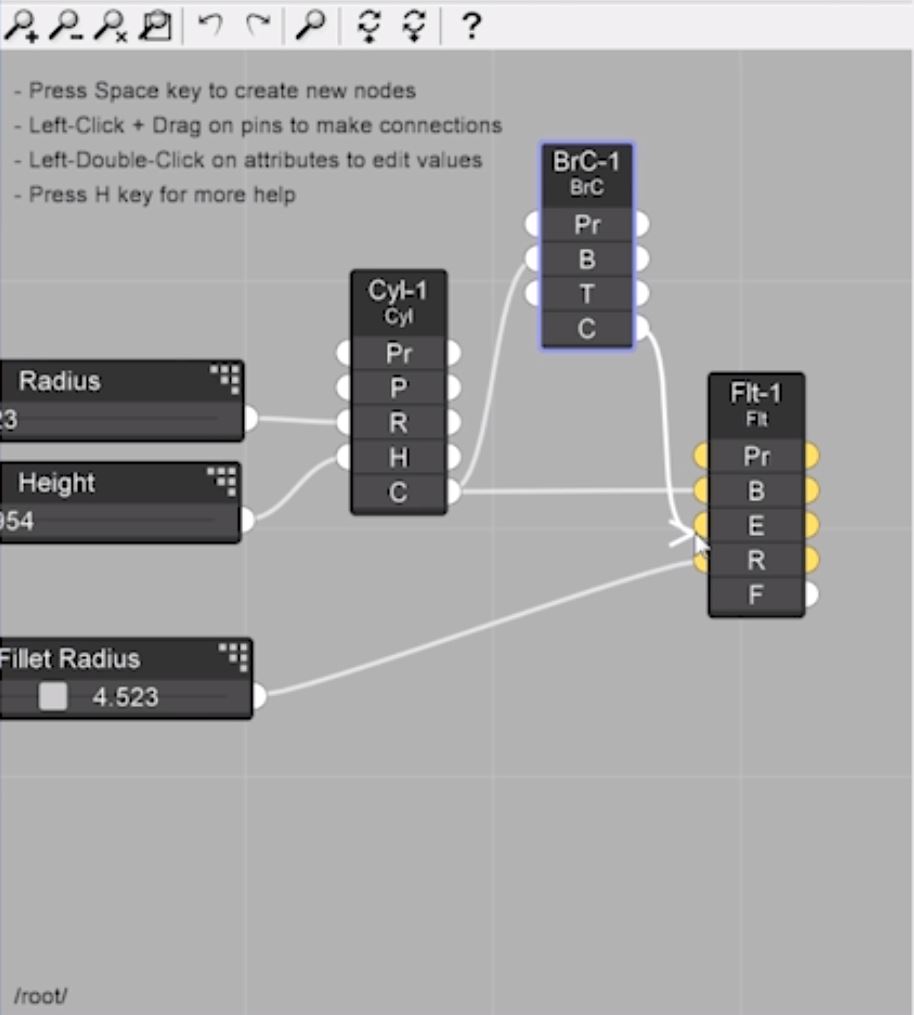
Then click and drag the “components” (C) section on Brep to the “edges” (E) section on the fillet node.
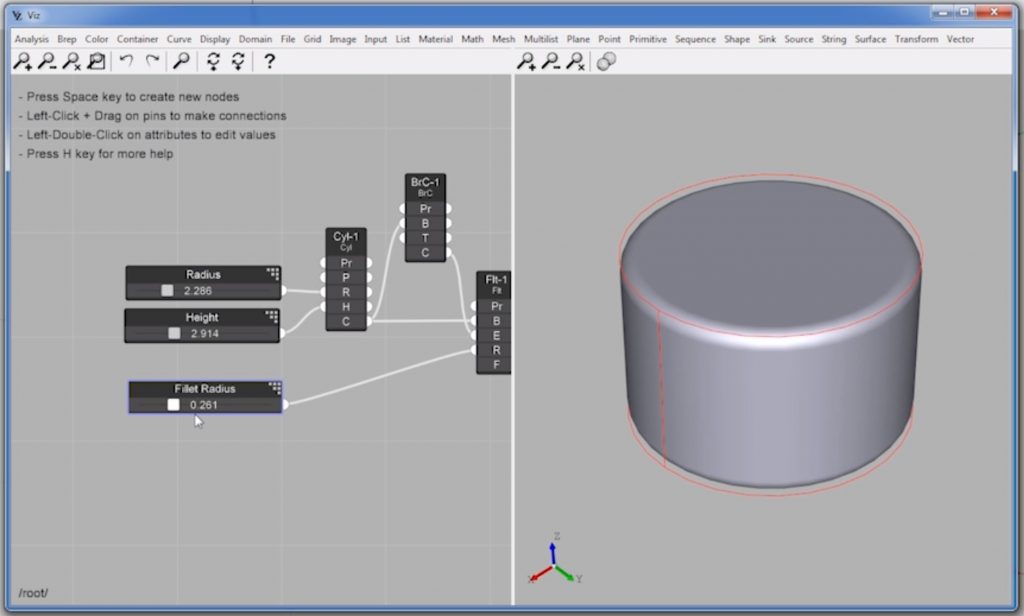
If nothing happens when you use the fillet radius slider now, it’s because Viz is generating a preview for both the filleted and unfilleted cylinder and the filleted cylinder may be too small to see.
Double click on the cylinder node and adjust the fillet radius slider so it has a different radius. If you want to make the fillet smaller, click on the slider to edit the properties. Try typing a “1” or “2” into the “max” box to change the maximum amount your slider will fillet to. If you want to get rid of the red line in your preview, double click on the “preview” (PR) button on your Brep node.
Exporting Your Parametric Design in Sketchup
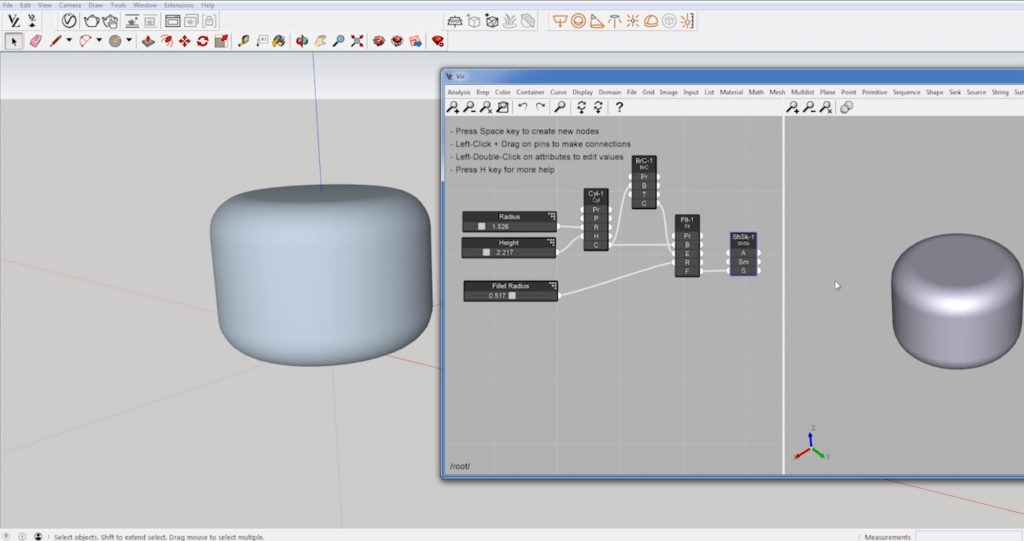
Sink > Shell Sink. The final step is exporting your parametric model into Sketchup. To do this navigate to “sink” and select “shell sink.” A new node will appear. Click and drag the “filleted” (F) button from the fillet radius node to the “shell” (S) node. Now, when you look at your Sketchup window, your parametric model will appear there. When you change the width or height in the Viz window, it will also change in Sketchup.
Make sure you only create the shell sink when you are done creating your parametric design in Sketchup! Bad parameters are a surefire way to crash SketchUp.
If you’re looking for more helpful Sketchup tutorials, check out our full list here!
Happy Hacking!
No comments yet.