
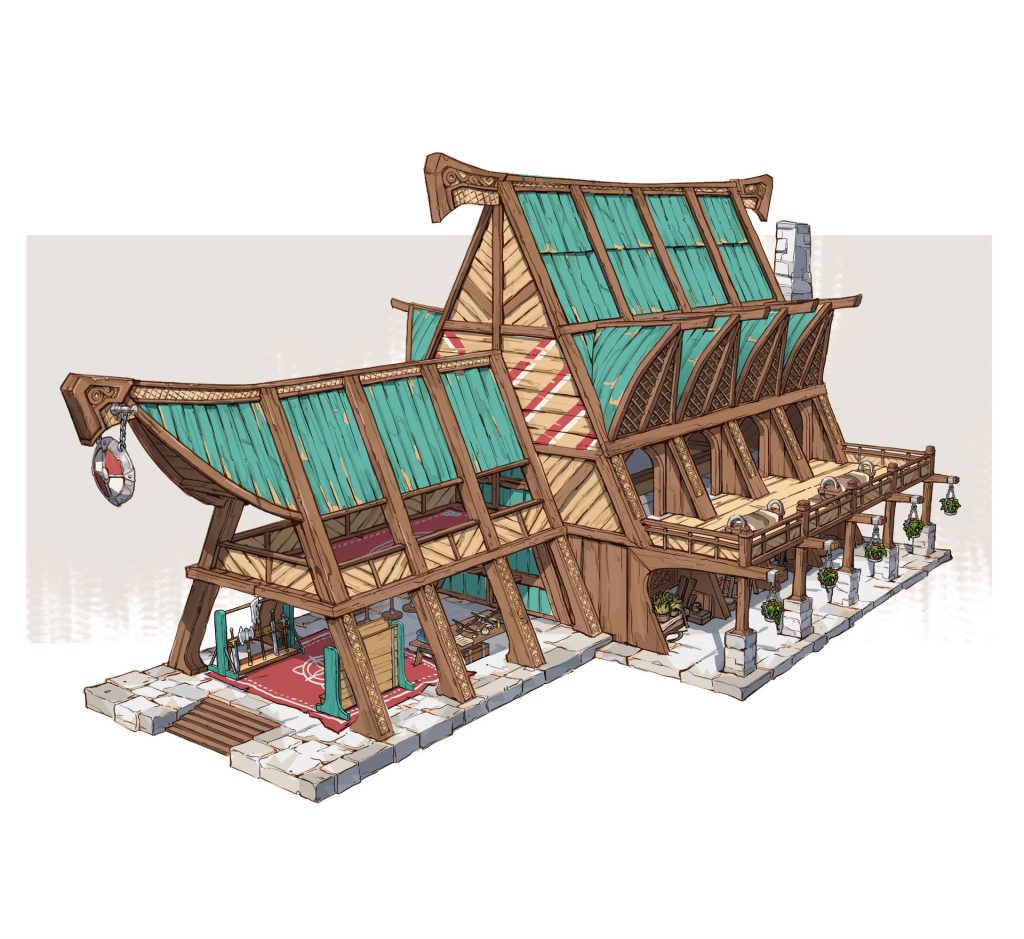
From Concept to 3D in Sketchup

If you’ve seen any of our speed model videos, you may be wondering how it all gets done. In this tutorial, we’ll go over the process of taking a concept to 3D in Sketchup. This is a long one, but if you stick with us you’ll be able to transform your own concept art into a 3D model!
A few key points to keep in mind…
-Focus on the overall shapes before getting into the details
-Double check your geometry
-Save yourself the time with symmetrical objects by only modelling half
-Save often!
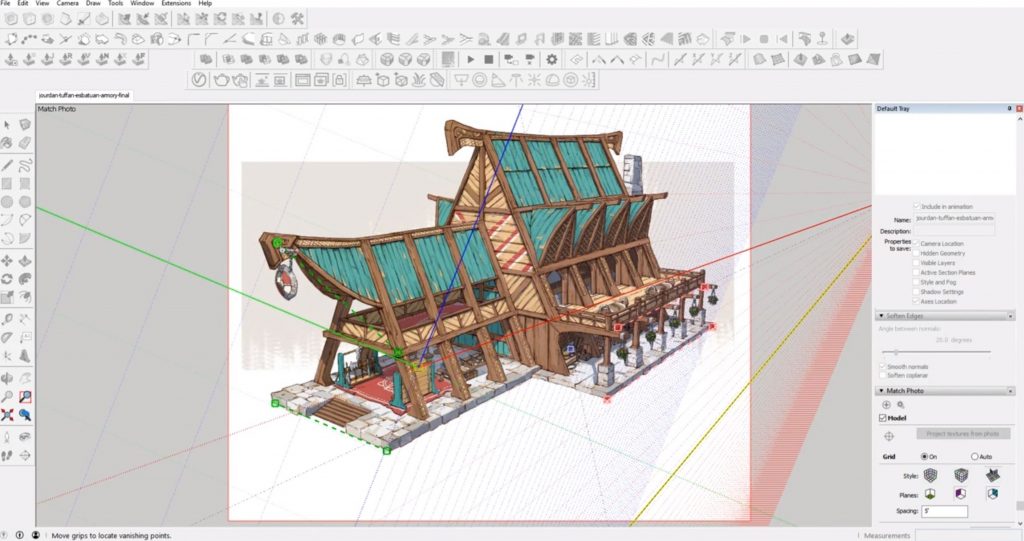
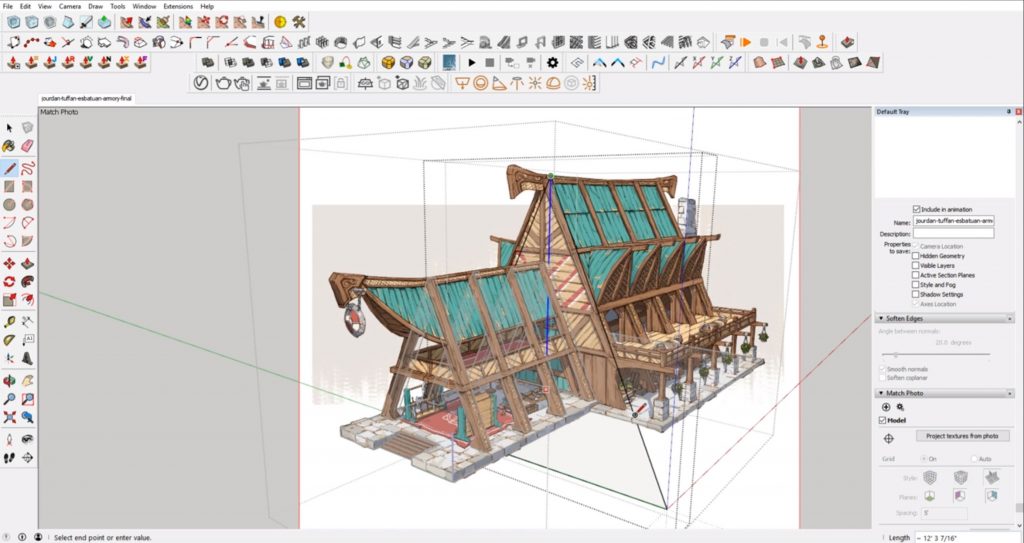
Import the Image
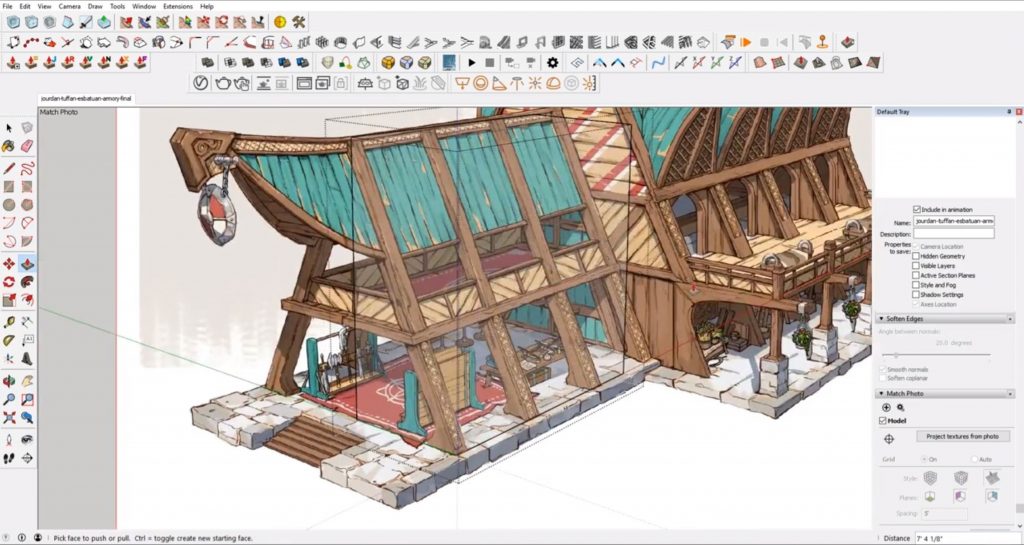
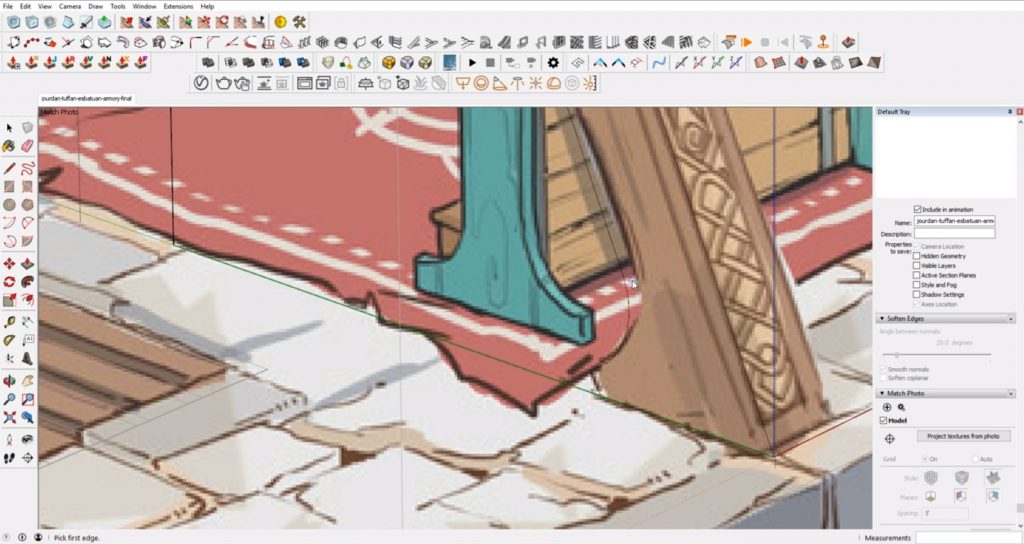
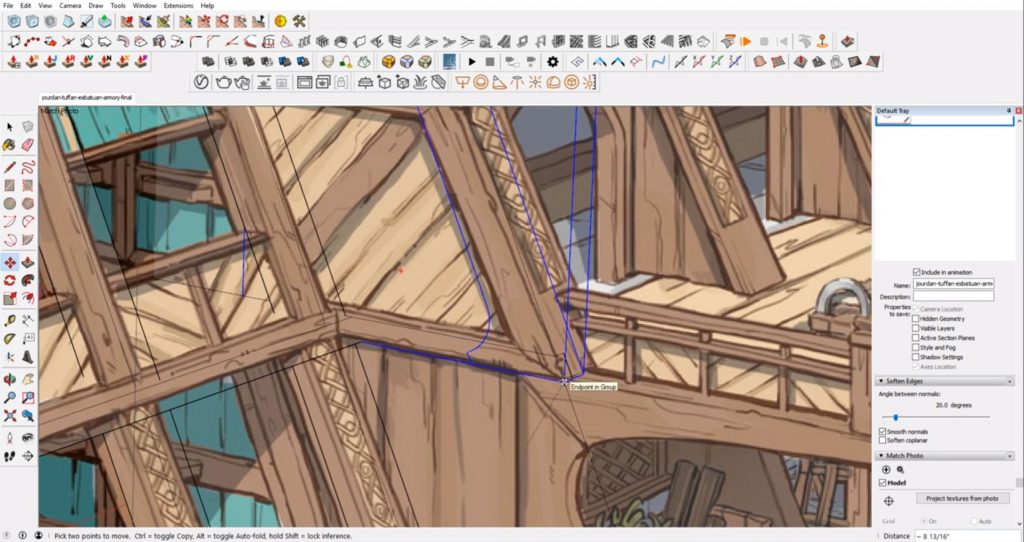
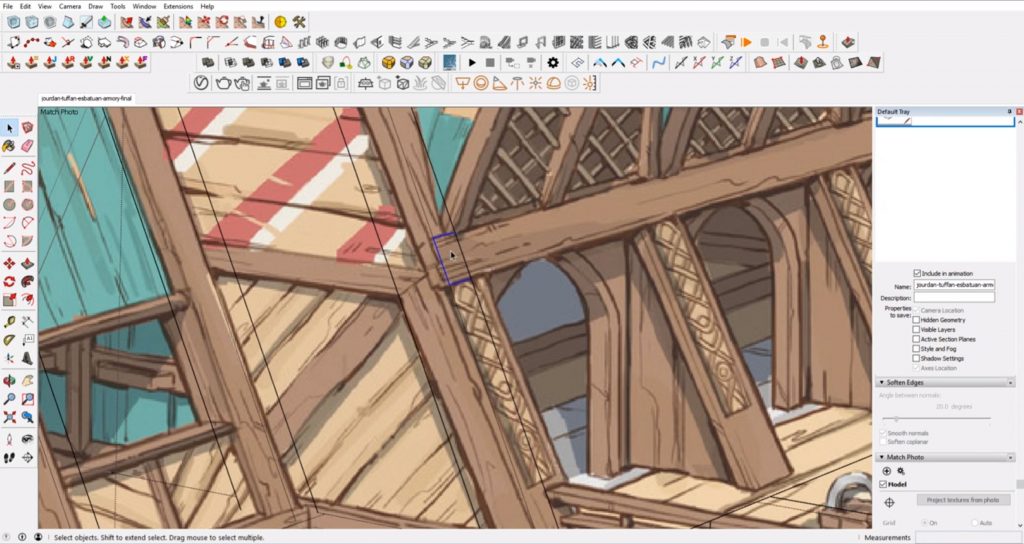
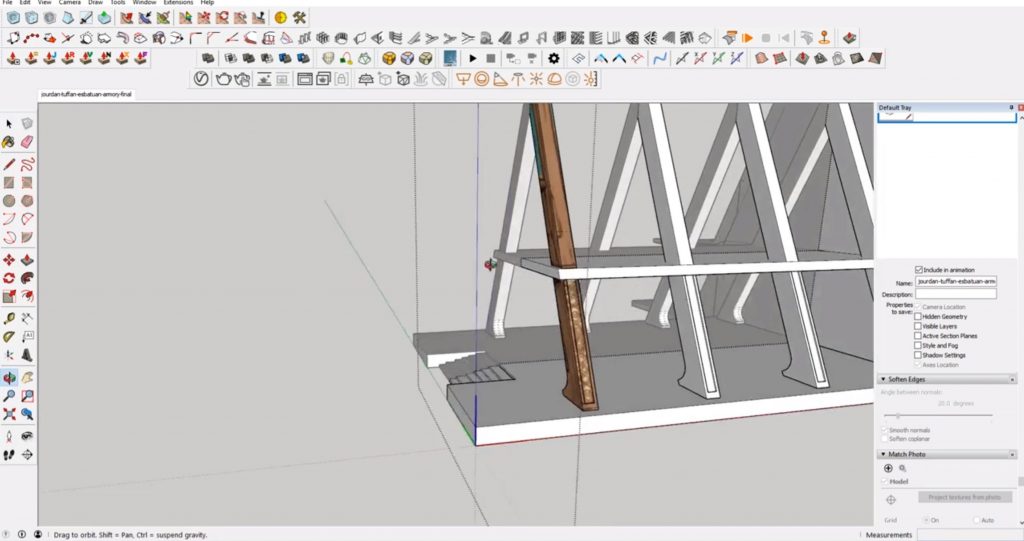
Before you get started, you’ll want to import your concept reference image. Click on “import” from the “file” dropdown menu. Make sure you have “new matched photo” checked in the import window. Once you find you’re reference image, select “import.”
Next, click and drag the perspective points so they match up with those in the drawing. Make sure your horizon line is straight and each line goes to the same vanishing point. When you are happy with that, right-click on the drawing and hit “done.”
Begin Modeling from Concept to 3D
At this point, you just want to worry about the overall shapes. Don’t get caught up in the small details like textures and entourage. You may notice some architectural features are the same, so you will only have to model them once as a component and then copy and paste- that’s a relief! For this example, we are going to make life a little easier and only draw half of everything and then mirror it to the other side.
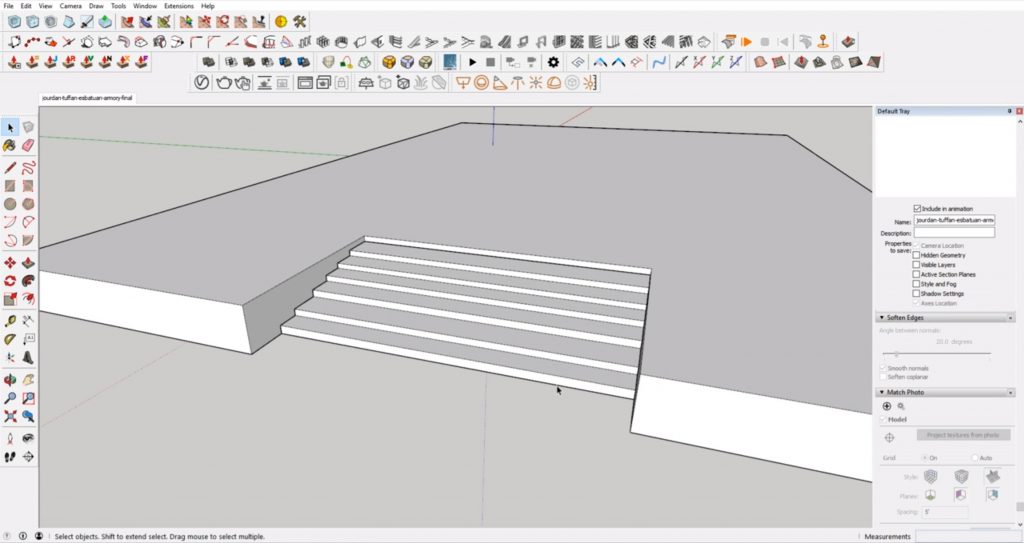
Create the Platform
Draw the front platform and use the push/pull command to extrude the shape up. Then, since we only want to use half, use the line tool to divide the shape in half. Use the eraser tool to erase one half of the platform.
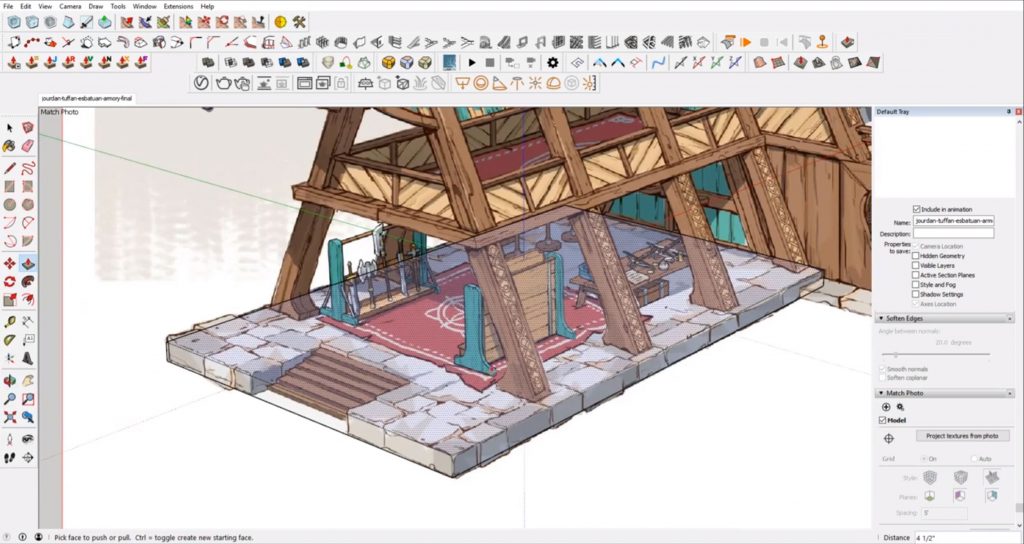
Right-click on the shape and select “make group.” Then right-click again and select “make component.” Rename the component in the “definition box.”
Hit “ctrl” and click and drag the platform to make a copy. Right-click on the copy and select “flip on green axis.” Then click and drag the copy you made to align it with the first one. To get rid of the center line, simply click on the line and select “hide.”
Disable Scene Transition Animations
When you switch between your model and photomatch, there may be a short animation. To edit this setting, click on “window” > “model info.” Then, in the “animation” tab, uncheck the box that says “enable scene transitions.” Now you’ll be able to quickly transition from the concept to 3D without any delay.
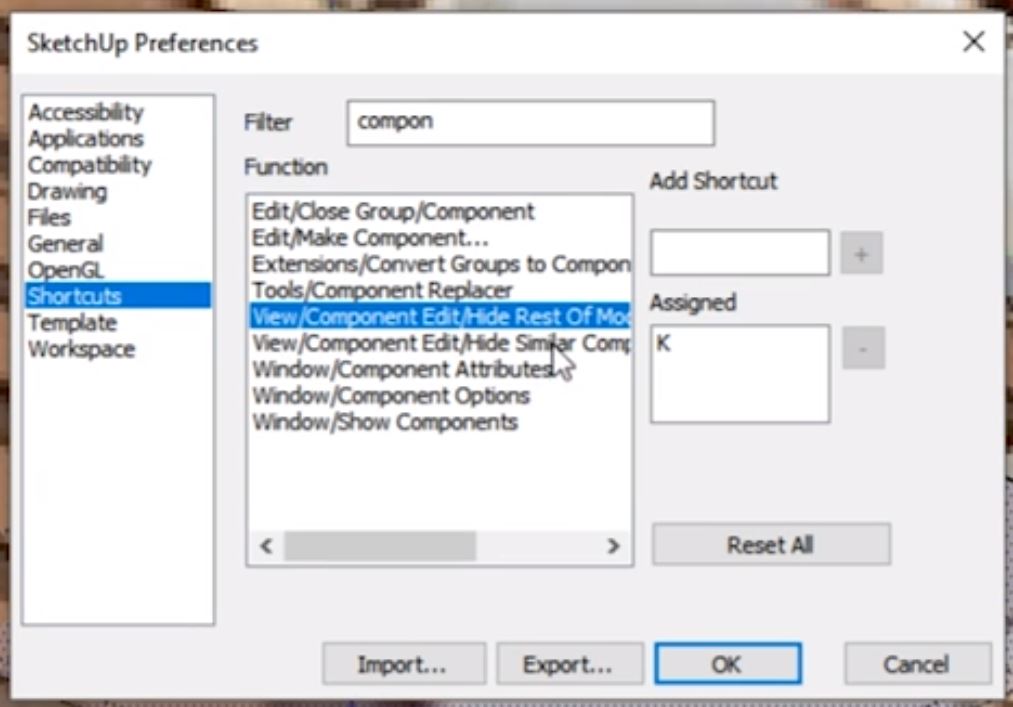
Create a Shortcut
To make this a little easier, you can create a command that will allow you to hide all other groups when you are editing a certain one. Go to “window” > “preferences.” In the “shortcuts” tab, search for the “hide rest of model” command. Here, you can customize or add a new shortcut command.
Make the Stairs
Use the line tool to carve out the stairs. Then, use the rectangle tool to make the stone face. Draw a rectangle for the base of the stairs and make it a group. Make sure it is aligned with the base of the platform first, and then you can drag it back to where the edge of the first step begins.
The stairs will be easier to make if you model it together as one piece. To do this, use the line tool to click and drag along where the tread and riser of each step meet. Then, push/pull the step up from there.
You may have to go back and alter the height of your stairs so that they align with the rest of the model. Make sure you hide your centerline and get rid of any unnecessary faces!
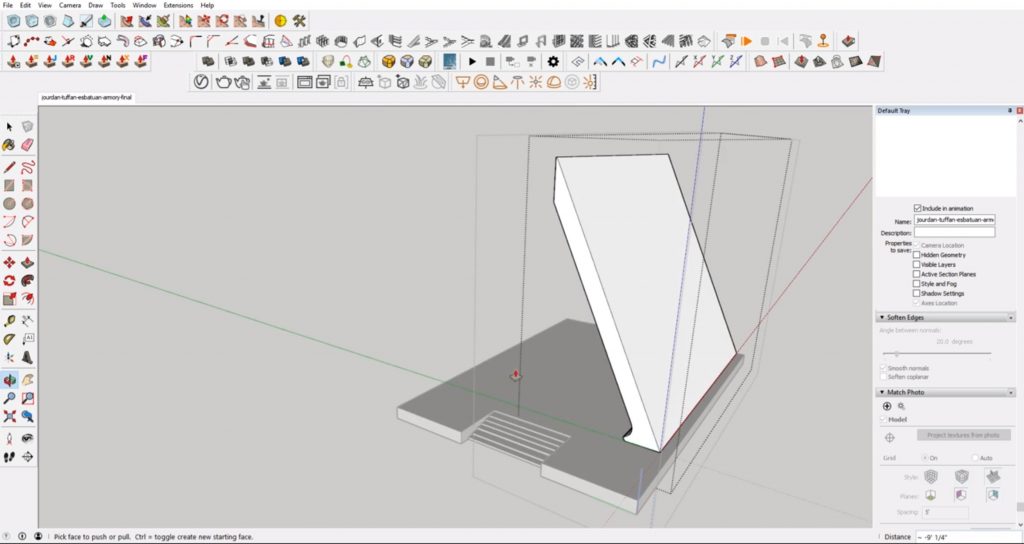
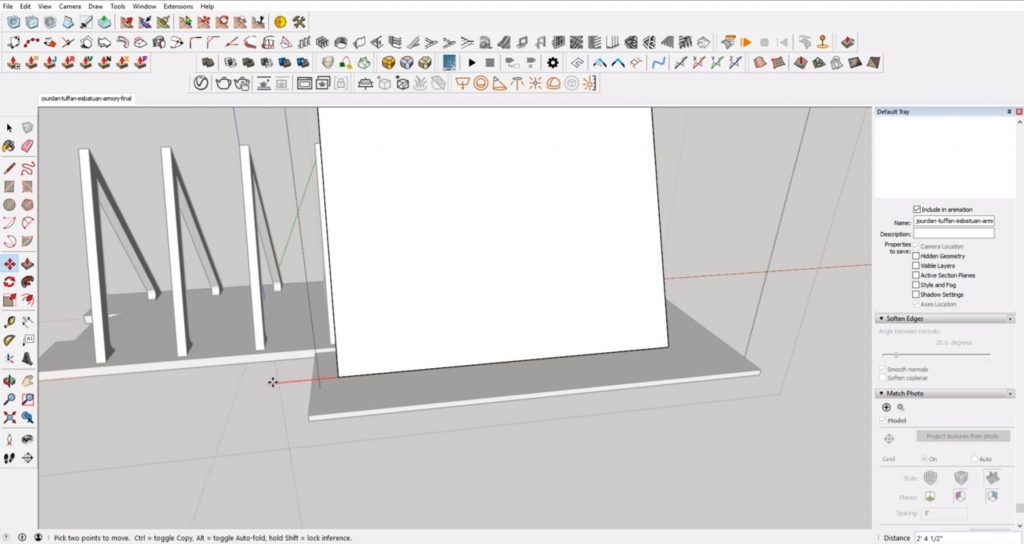
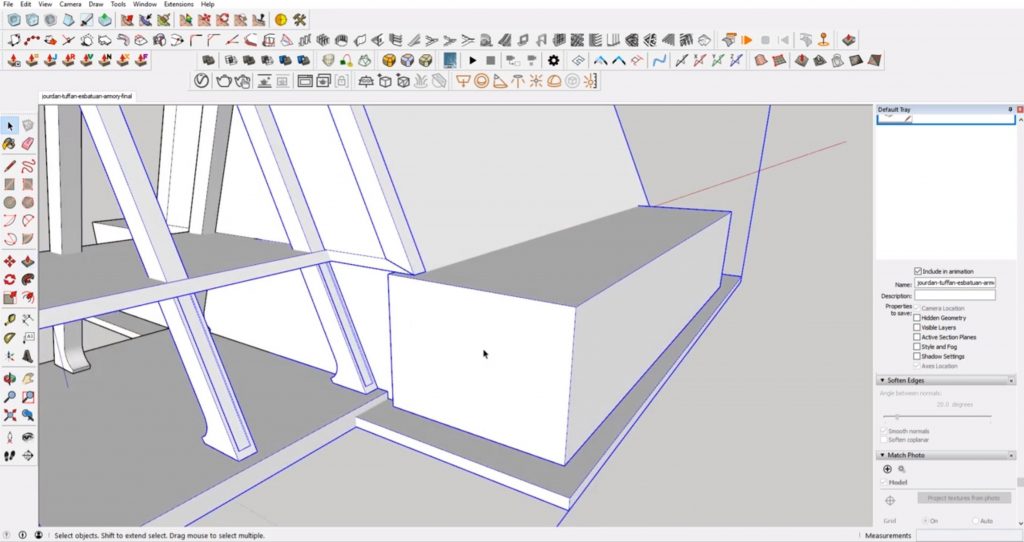
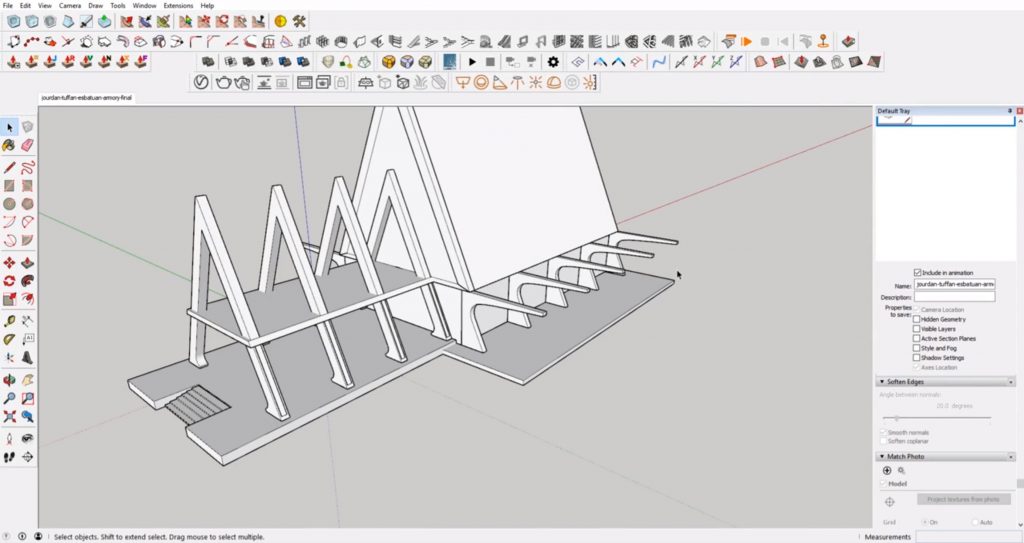
Make the Front Supports
To make the front supports, use the rectangle tool to draw the overall shape of the area the supports cover. Use “shift” or the arrow keys to lock to the green axis. Once you have your rectangle drawn, right-click and make it a group. Extrude the rectangle up until you reach the center ridge.
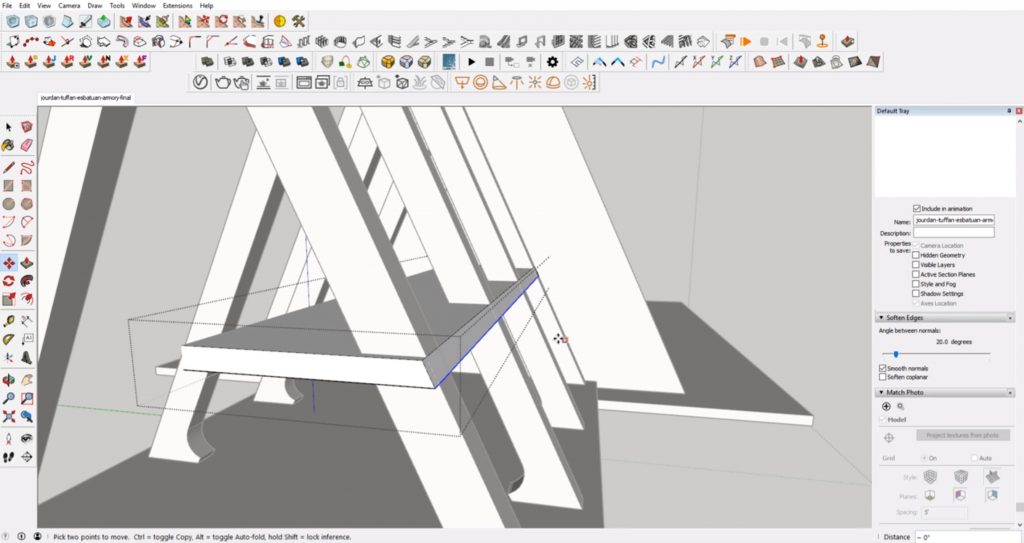
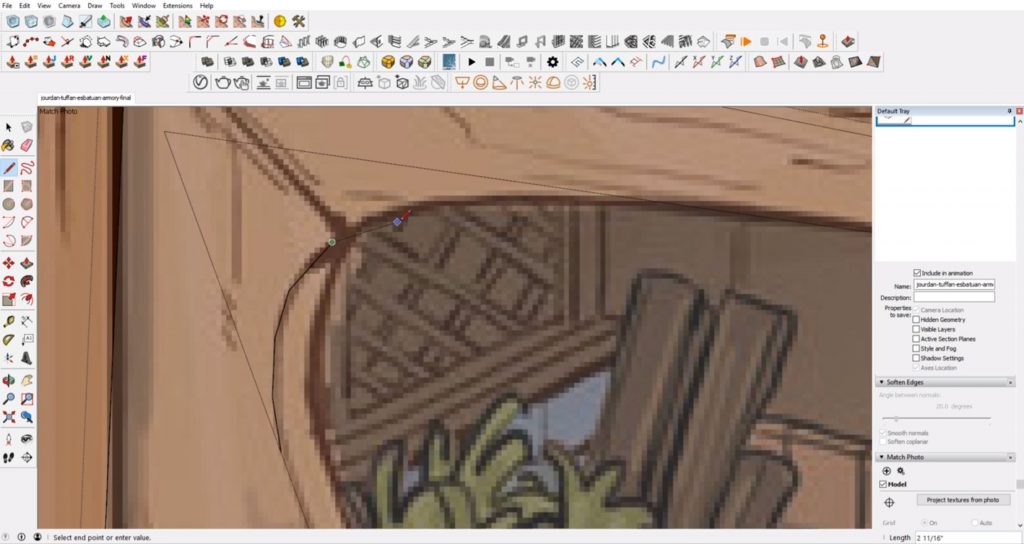
Take the top outer edge of the rectangle you just extruded and drag it to the outer edge of the front support so it is at an angle. Make sure you are locked to the green axis.
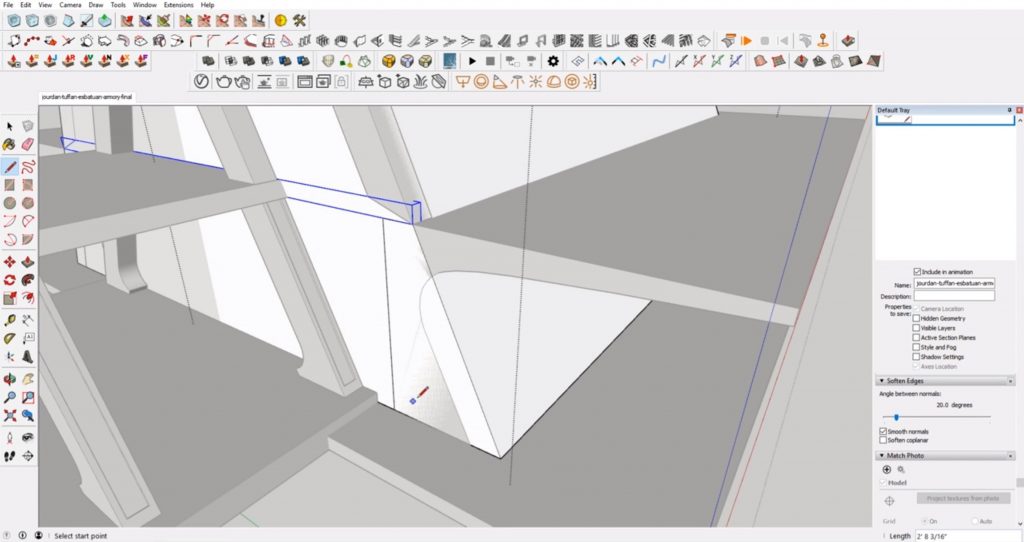
Begin tracing the profile of the front support. You can use the “fillet” tool to create a smooth edge where it curves. Push the front face all the way to the back so you have an angled shape. Then, drag the back face of the shape you made to align with the back edge of the front support. Make this shape a group and then make it a component called “front supports.”
Copy the front support and drag it to the end point of the platform. Then type “/3” so you have 4 supports that are evenly spaced out. Hide the face where the center of the supports meet.
Draw the Side Platform
Use the same steps you did to make the first platform to draw the side platform.
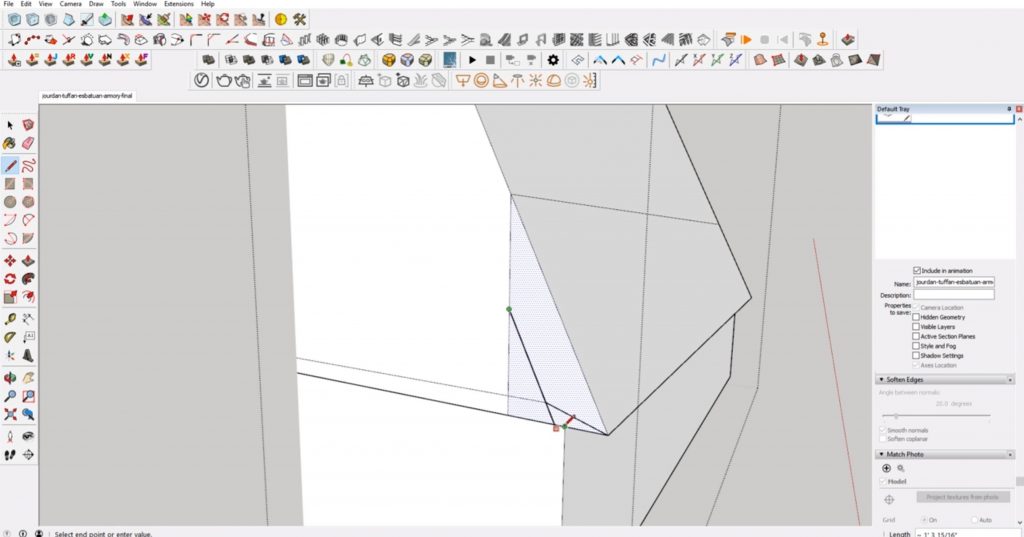
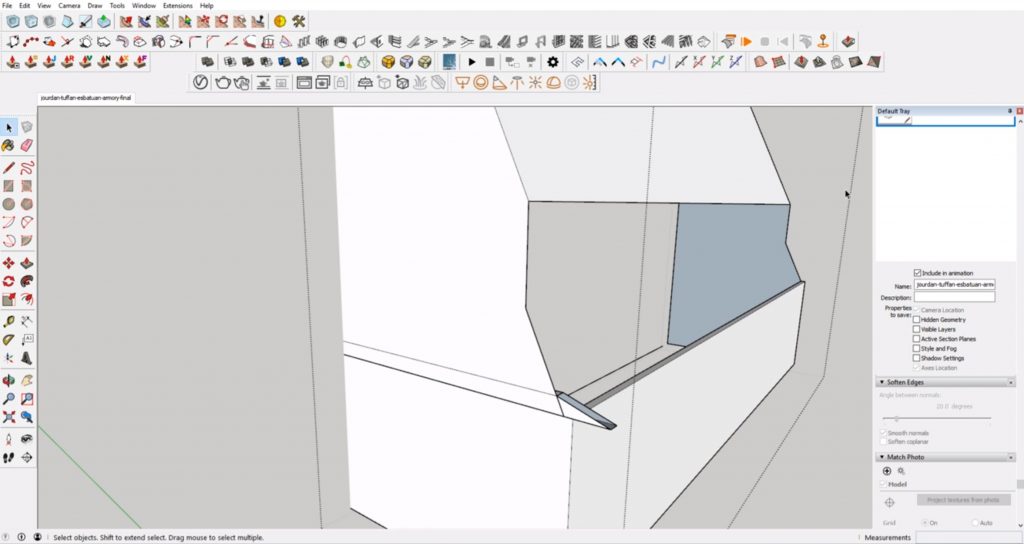
Make the Roof
Draw a triangle using the outline of the beams you just made. Hit “S” to use the “scale” command and make the triangle larger. Try your best to align it with the roofline of the second floor.
Make it into a group and then cut it down the middle using the line tool. Extrude the face to the back edge of the model. To make sure the shape is evenly spaced on the platform, select the back face of the shape you just extruded. Then, make sure it is locked to the red axis and use the front corner to align it evenly.
Add the Second Floor
Copy and paste the front platform up to the second floor. Push/pull the faces until you get it roughly aligned with the edges.
Use the line tool to add the wood board that meets the second level. Make it a group. Drag the inside point to meet the centerline, making sure you are locked to the red axis.
Create the Second Floor Supports
Copy and paste the first beam you made to the second floor, aligning the outer corners. Right click on the beam and select “make unique.”
Add Deck Supports
Begin by blocking out where the supports are. Make the box a group.
Use the line tool to draw the curved face of the deck supports. You can use the fillet tool or hand draw the curved edge, but be careful to stay on the correct axis and face.
Copy and paste the shape you just drew and make it a group. Trace the edge of the deck support face to cut into the front wall. Drag the back face of the deck support to align with the back edge of the first support in the sketch.
To erase the lines you drew along the curved edge, hit “E” and hold “ctrl” as you drag over the lines. Make the shape a component. Copy and paste the front support to the back and type “/4.”
Add the Horizontal Roof Beam
Draw a rectangle along the front beam on the second floor. Drag it up so that it aligns with the horizontal beam. Make it a group. Click push/pull the face to the back end of the roof.
Add Second Floor Door Opening
To create an opening for the second floor doorways, trace the edge of the front support and push/pull the face all the way through. Then, delete the side faces of the wall.
Add the Deck
Copy and paste the side platform you made and align it with the deck supports. Drag the corners until it lines up with the rest of the model.
Apply Textures
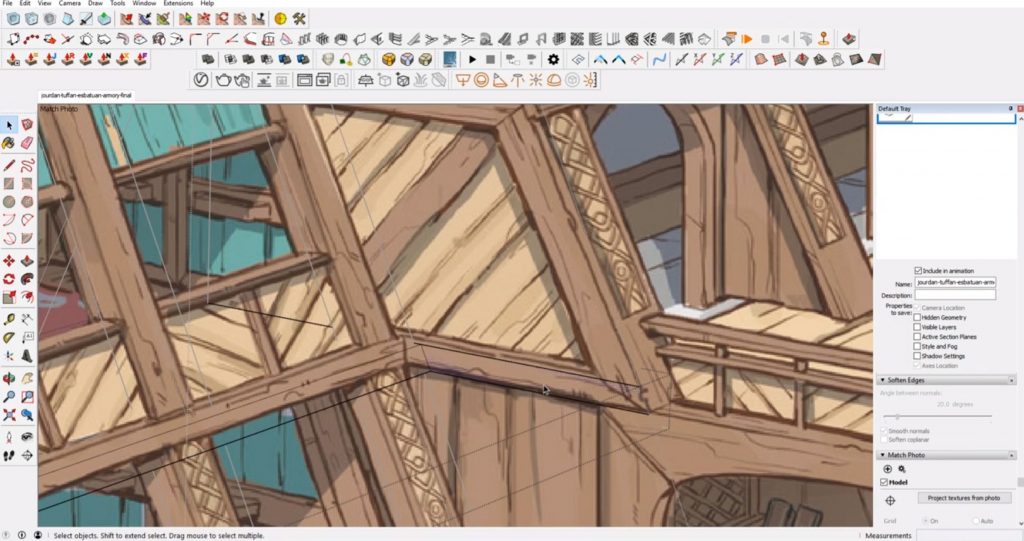
If you want, you can apply some of the photo’s textures to your model. Right-click on a piece of your model and select “project photo.” A message box will appear, select “yes.”
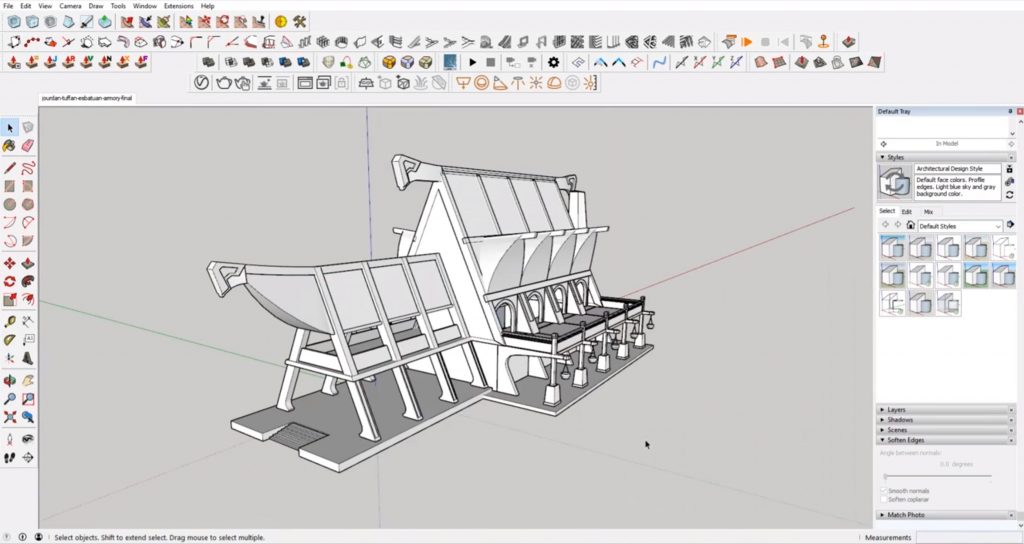
That’s pretty much the basics of how to block out your model! You can use the same techniques above to finish converting your concept to 3D in Sketchup. Was this article helpful? Do you want to see more tutorials like this? Let us know in the comments!
Happy Hacking!
No comments yet.