
Creating Engraved or Embedded Text in Sketchup

Simple details like text can add some dimension and depth to your Sketchup models. In this tutorial, we’ll go over how to make engraved or embedded text in Sketchup. We’ll use the 3D text tool to add a name and date to a headstone that we modeled in Sketchup. You can follow along, or add text to one of your own models!
Open Large Toolset Toolbar. Before you get started you want to make sure you have the correct toolbar open. Right-click in an open area on the left side of the screen and make sure that you have “large toolset” checked. It may open in a separate window, but you can just click and drag it to the left side of the screen to dock it with the rest of the toolbars.
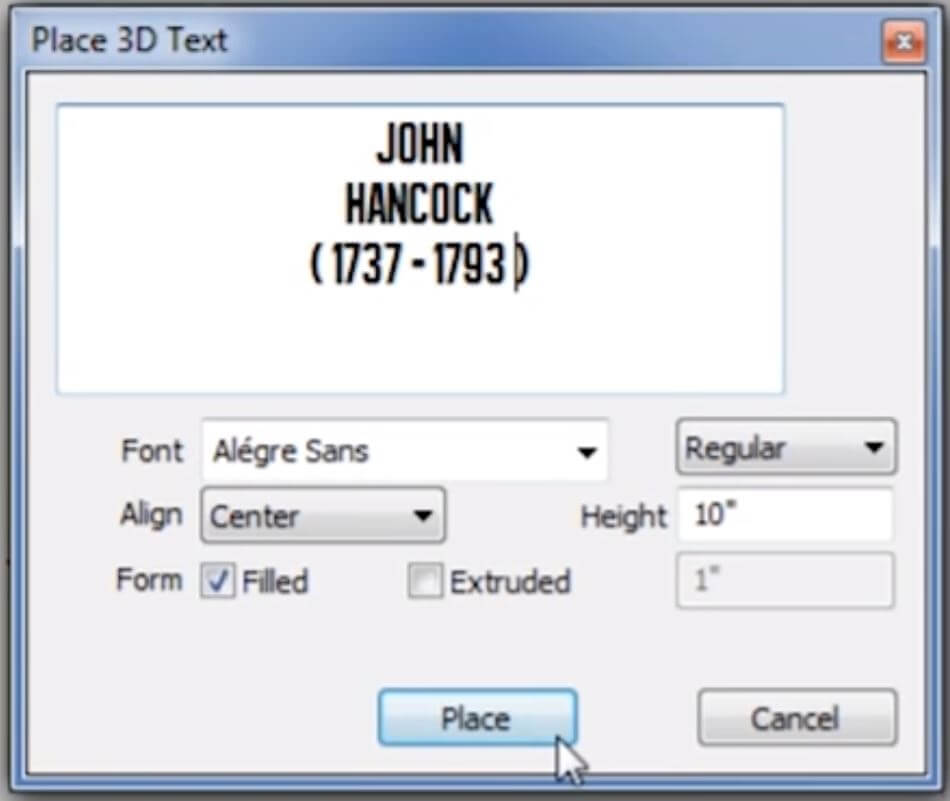
Edit 3D Text. In the “large toolset” toolbar, navigate to the “A” icon that says “3D text” when you mouse over it. Click on the icon to open the “3D Text” window. From here, you can select the font, size, and alignment. We chose “alégre sans” for the font, “center” for the alignment, 10 inches for the height, and “filled” for the form. A filled form just means that SketchUp will try to create geometries from the text instead of just giving you edges. Type the words that you want in the space. Click “place.”
Place. Drag the text and place it on the face of the object where you want it to be. Make sure it is directly on the face of the object you are trying to apply it to! You will not be able to create embedded text if it is not placed directly on the object’s surface.
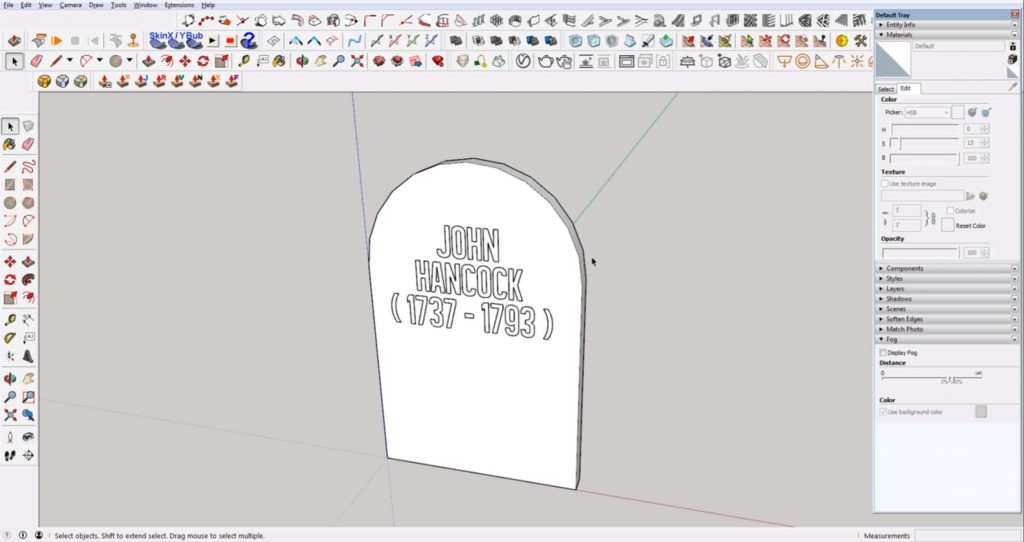
Ctrl + A > Reverse Faces. If the face of the letters appears blue, you will have to reverse the face so that you are looking at the front side. To do this, press “Ctrl + A” to select all. Then right click on the face and select “reverse faces” from the dropdown menu. Now the text should appear white like the rest of your model.
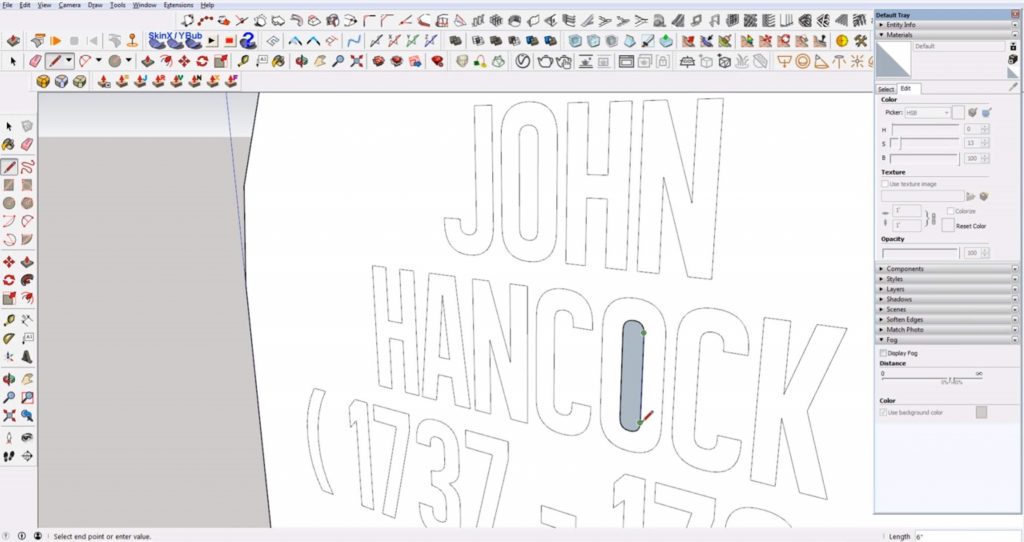
Explode. Once you place the text box, you can’t go back and edit it, you just have to make a new one. We like the way our font is right now so we’re going to make it a part of the other geometry to edit it further. To do this, you first need to explode it. Right click on the text, then select “explode” from the dropdown menu.
Fill in the Gaps. Depending on the font you use, you may have to fill in the voids between closed off letters. Use the line tool to close off any voids between the letters.
Create Embedded Text Depth
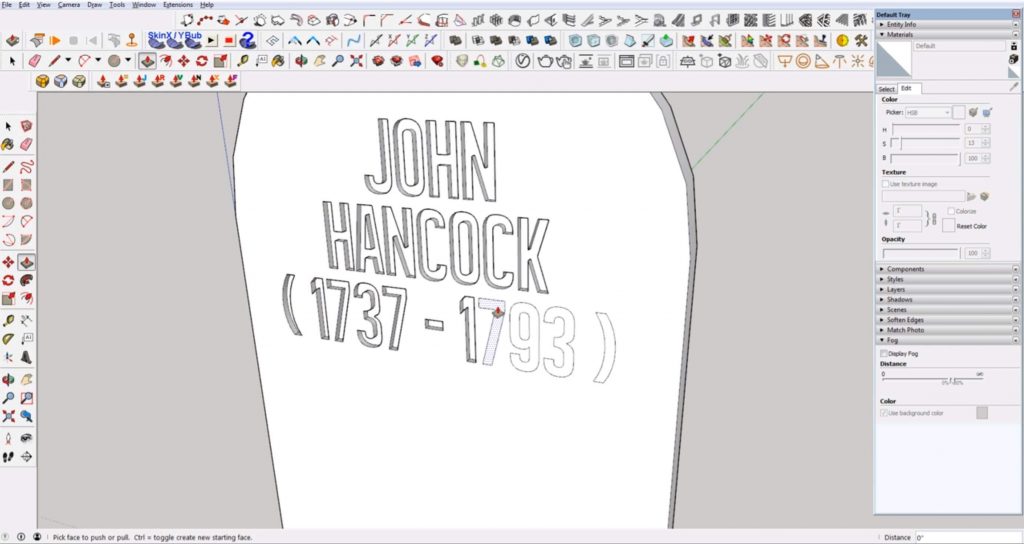
Add Depth. Next, to make the letters dimensional, you will use the extrusion tool. Select the “push/pull” tool and then click on the letter you want to push in. Type the distance you want the letter to be pushed in by and hit enter. For the rest of the letters, you can just double click with the push/pull tool enabled so that each one is pushed in by the same amount.
Once you’re finished, you can add details like texture and shadow to really make your words pop. As you can see, the embedded text is simple to make but it adds a bit of dimension to your model. What do you use 3D text for in your models? Let us know in the comments!
Be sure to head to our tutorials page to check out the rest of our Sketchup tips!
Happy Hacking!
No comments yet.