
How to Align Objects in Sketchup (the easy way)
")
In this tutorial, we’ll go over how to easily align objects in Sketchup! If you use the rotate tool, it can be difficult to get the angle just right. Even if you are off by the slightest degree, your object may look out of place and it can affect the rest of your model. This is especially important if you are modeling something that needs to be extremely accurate. One wrong measurement and everything snowballs from there and then suddenly you’re left with a model that is inaccurate and can’t be used! To avoid making a mistake like that, follow these steps and use this simple method to align objects in Sketchup!
The Easy Way to Align Objects in Sketchup
For this example, we are using a drafting table model downloaded from the 3D Warehouse. We will be aligning the construction drawing to the slanted drafting table top.
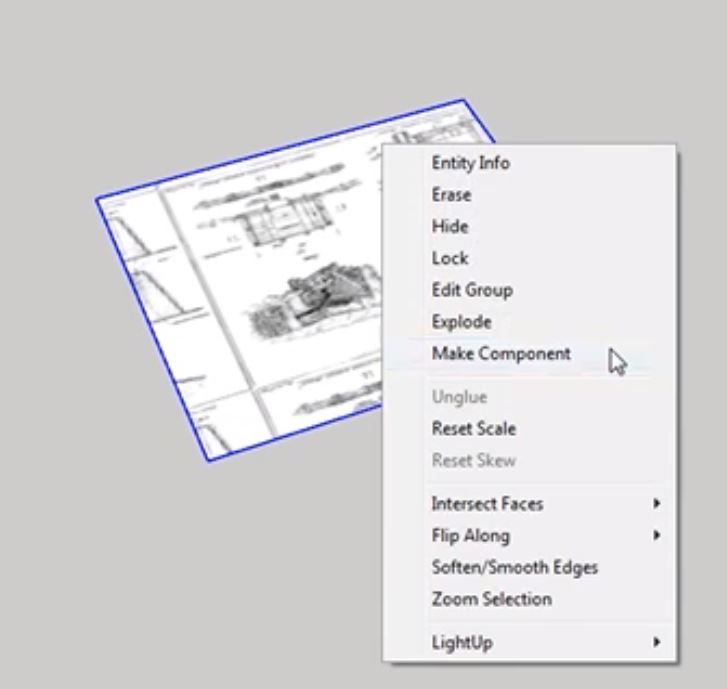
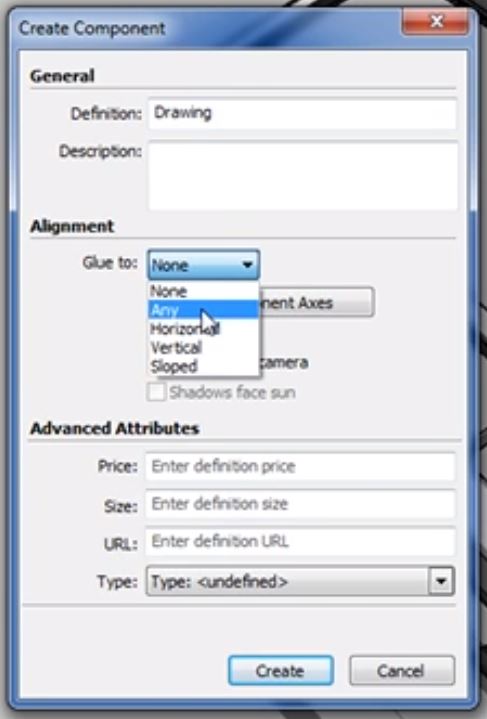
Make a Component. Select the object you want to align. Right click and select “make component.” The “create component” window will open. If you want, rename your object by typing into the “definition” box under “general.” This will be helpful if you have multiple components in your model and you want to easily identify between them.
Align. Under “alignment” there is a dropdown that says “glue to.” From here, select “any.” You can also select “horizontal,” “vertical,” or “sloped” if you want your object to align only to a specifically oriented surface.
Select Component Axes. Once you have selected the general and alignment settings, click the button that says “select component axes” in the “alignment” section. Sketchup will give you an axis to select. You want to be sure that you select the same axes as the global axes. If you switch any of the axes, your object will turn upside down. If you try to move your object from here, it won’t glue to anything. To properly align your object, you’ll need to use the default tray.
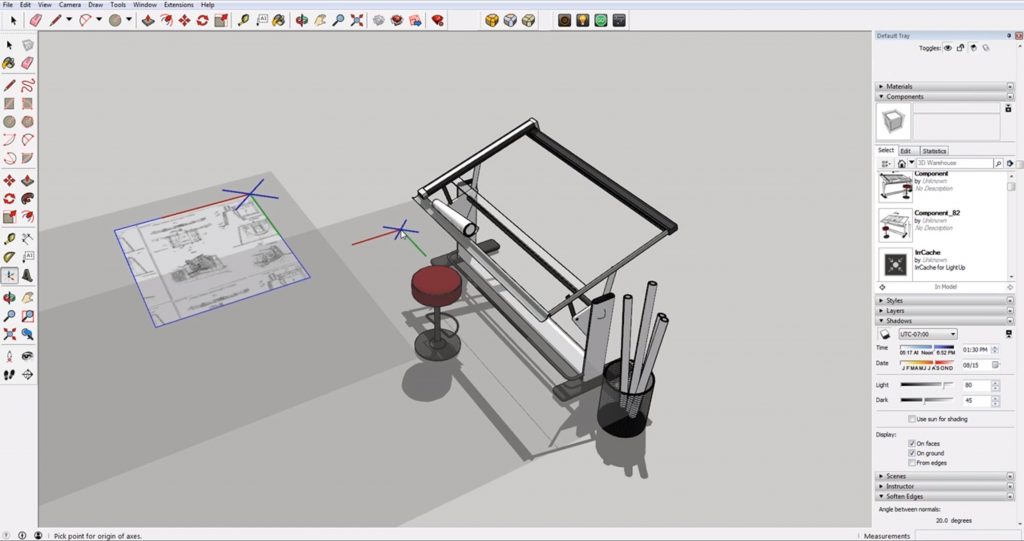
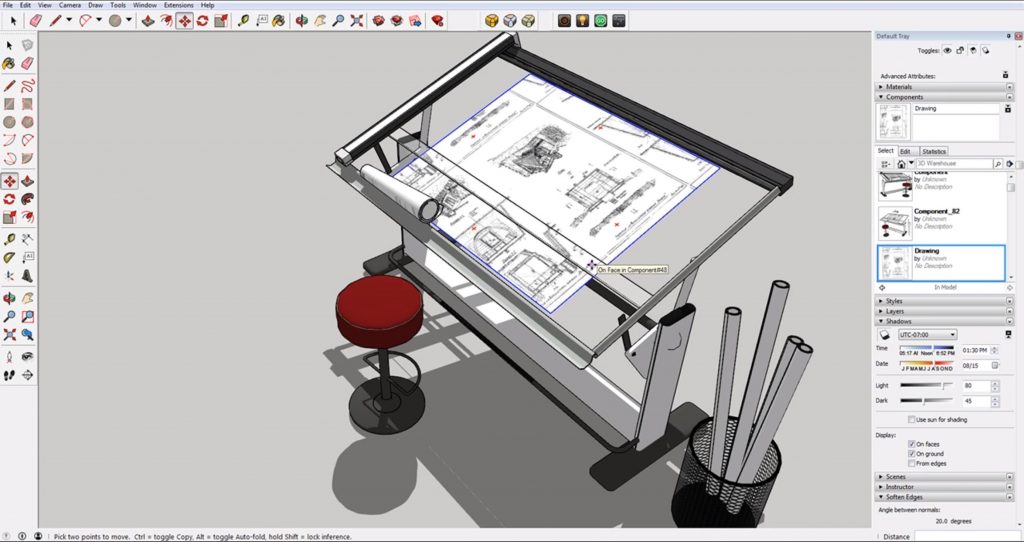
Open Default Tray. If you do not have the default tray open already, you’ll want to go ahead and open it now. To do this, simply navigate to “window” > “default tray” and select “show tray.” From this dropdown, you also want to make sure “components” is selected. Now, select your object from the “component” dropdown in the default tray and drag it to the object you want to align it to. Once you have it aligned to the surface, you can use the rotate tool to turn the object horizontally or vertically if you wish. From here you can snap to a corner or edge of the surface because it is properly aligned.
Now that you know how to easily align objects in Sketchup, you won’t have to worry about inaccuracies or spending forever trying to perfectly align your objects! Did you find this tutorial helpful? What other quick tricks do you want to learn? Let us know in the comments!
If you’re looking for other Sketchup tips, take a look at out our tutorial on how to scale objects in Sketchup or check out our full list of tutorials here!
Happy Hacking!
No comments yet.