
How to Create Sections in Sketchup

If you’re an architect or designer, it’s essential to know how to create sections in Sketchup. They are found in almost any set of construction documents and they show detail to help you or your client better understand the vertical relationships within a building. In this tutorial, we’ll show you how you can easily create section views for your Sketchup models.
Create Sections
View > Section Planes. Once you have your model open, the first step is to make sure your section planes are turned on. Navigate to “view” and select “section planes” so that it is checked.
On the left side of your screen, there is a toolbar with some section tools. If you don’t have this toolbar simply right-click in a white space and select “large tool set.” Alternatively, you can go to “tools” and select “section plane” if you don’t want to add the toolbar.
Section Plane. Click on the “section plane” icon to open the “place section plane” window. Before you begin placing sections in Sketchup, it’s important to think about naming them in a way that makes sense for your model. Type in a name and symbol for your section and hit “enter.”
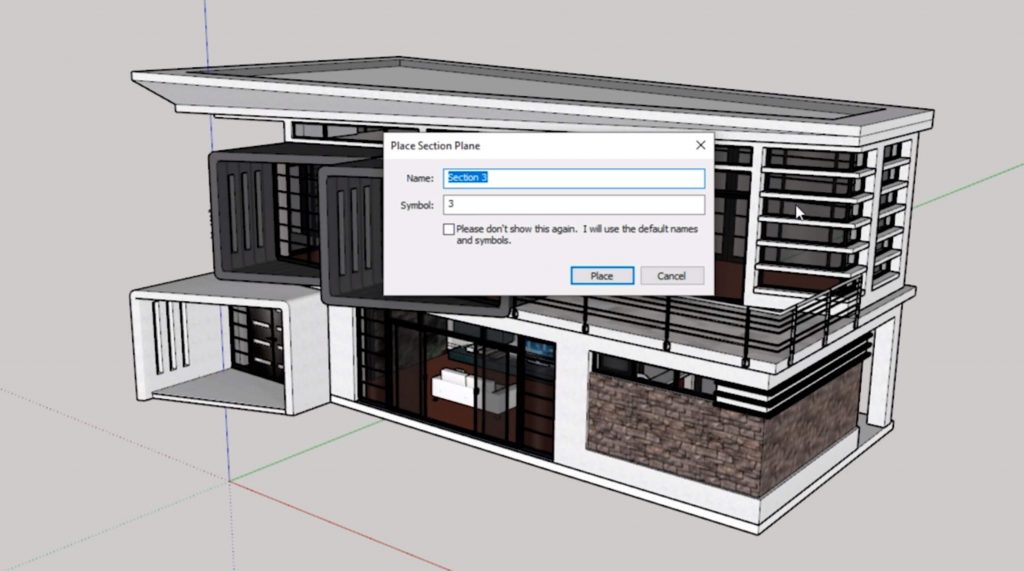
Place Section Plane. When you move your mouse around your model you will notice the plane shift based on whatever plane you mouseover. You can use your arrow keys to lock to a certain axis to make sure you have a straight cut. For example, “up” locks to the blue axis, “right” locks to the red axis, and “left” locks to the green axis. Click on a point somewhere in the center of your model while holding the “right” arrow key.
Scenes for Sections in Sketchup
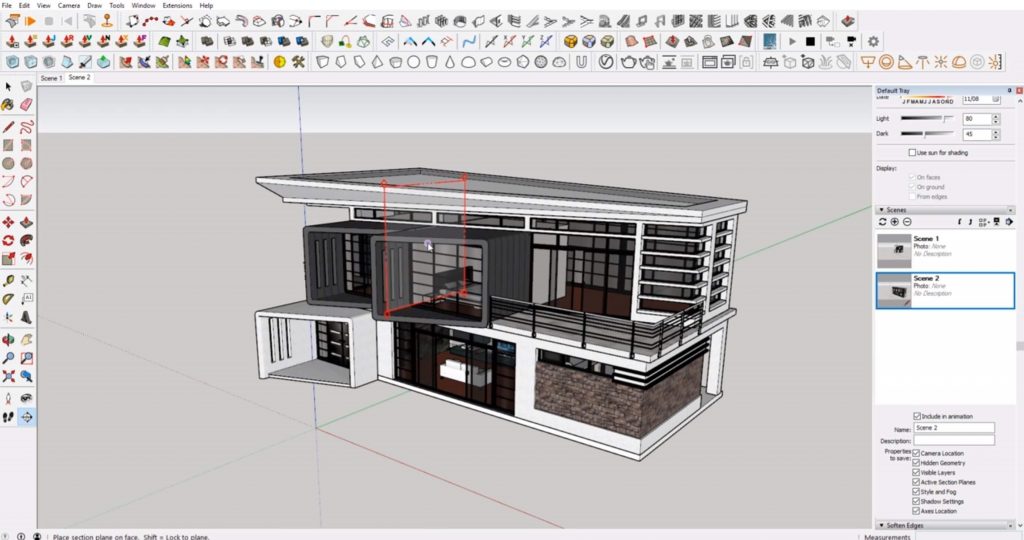
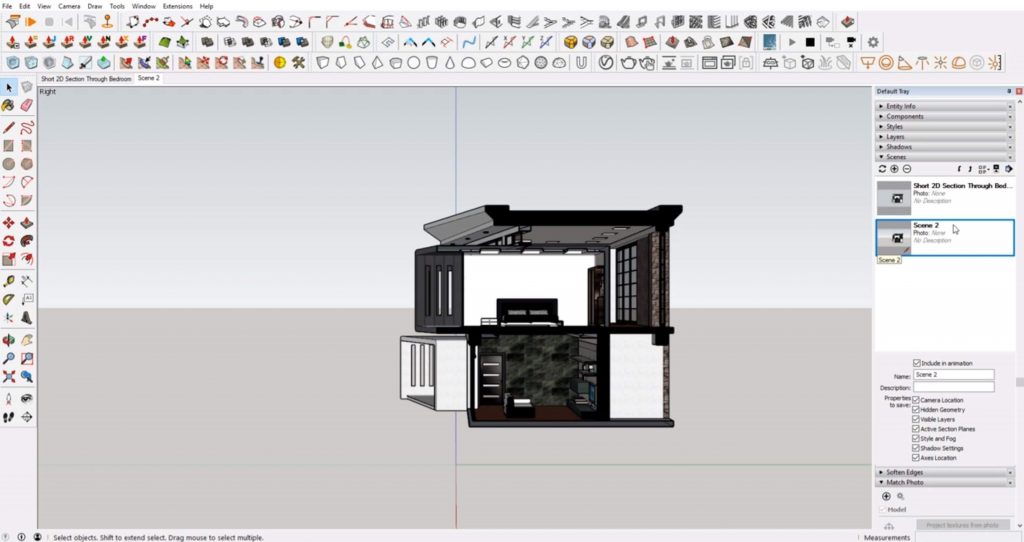
Window > Default Tray > Scenes. If you plan on making a lot of sections, you may want to create separate scenes for each view. To open the “scenes” tab, go to “window” > “default tray” and select “scenes.” In the “scenes” tab, click on the “+” to add a scene. Below the scene thumbnails, there are a lot of options you can select. The most important one you want to have selected is “active section planes.” This will allow you to switch back and forth between what you’re seeing. To make the section cut active, right-click on the section plane and select “active cut.”
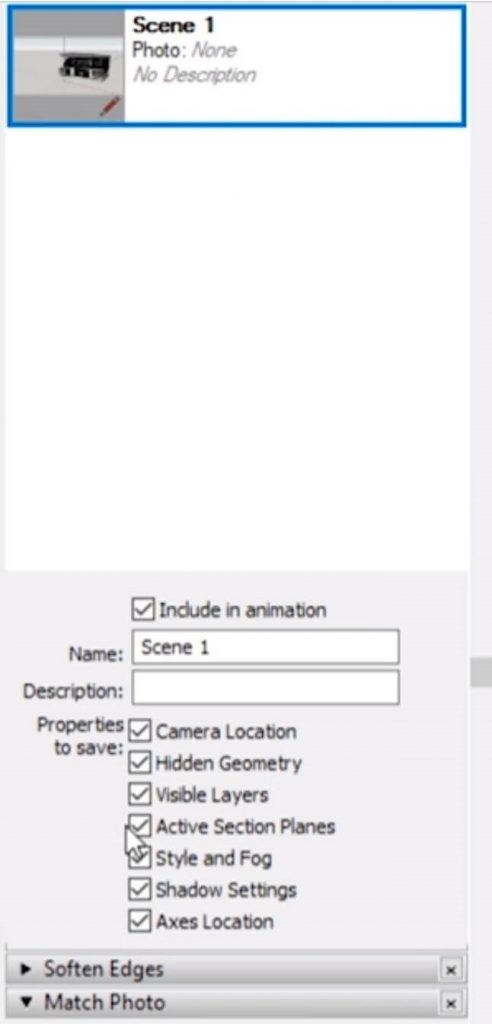
Standard View. To get a standard, straight-on view, go to “camera” > “parallel projection.” Then go to “camera” > “standard views” and select “right.” If you mouse over the “view” tab you will notice a few different options you can select. “Section cuts” refers to the actual section cut and “section planes” gives a bit of a hue to everything in the background. Once you have the view you want, right-click on your scene in the “scenes” tab and select “update scene.” A window will pop up with update options. Leave everything checked and click “update.” Make sure you don’t forget to type a title for your scene in the “name box!”
Add Scene. If you want to add a scene with a bit more depth, right-click on your existing scene and click “add scene.” Then, navigate to “camera” and select “perspective.” Right-click on the second scene and select “update scene.”
Create Group from Slice. Another neat feature you can use when you have “section planes” turned on is the “create group from slice” tool. Right-click on your section plane and select “create group from slice.” This will automatically create a line drawing of your section. If you want, you could easily import it into Illustrator or AutoCAD and easily create a detailed line drawing! Before you create any sections though, you may want to turn off any extra items like furniture and accessories. Good layer management comes in handy here!

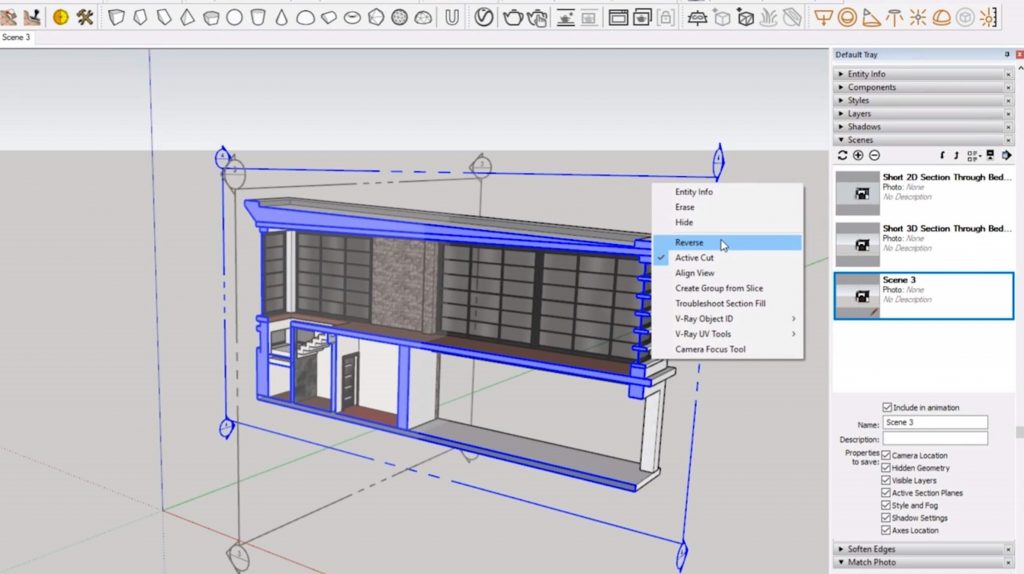
Add Section in Another Direction. Select “+” in the “scenes” tab to add another scene. Make sure “section planes” is turned on. Right-click on the section plane and turn off “active cut”. Select the “section plane” tool again. Hold the “left” arrow key to lock to the green axis and select a point in your model to make your section cut. If you want to change the direction of your section cut, simply right-click on the plane and select “reverse” to see the other side of your building.
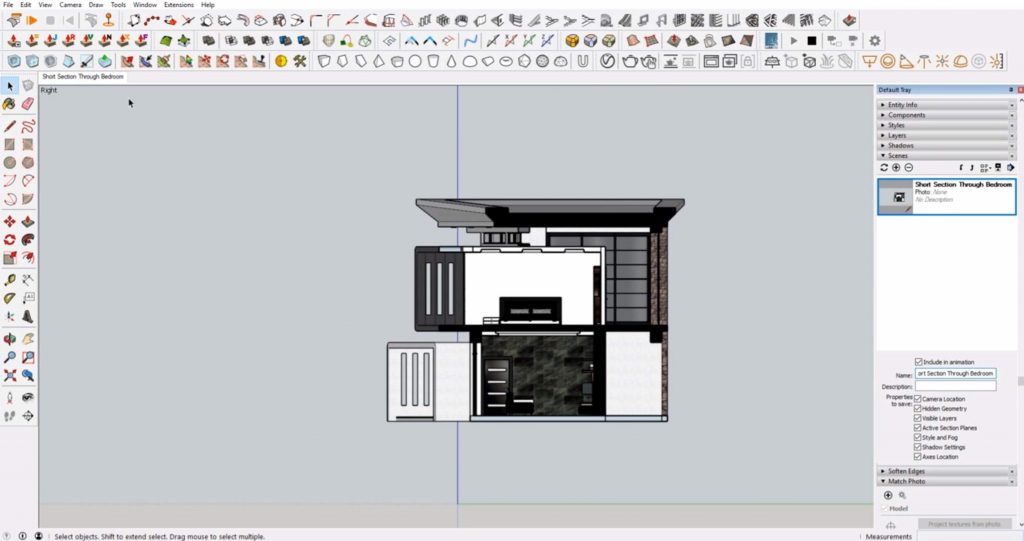
View > Section Planes. Go to “view” and turn off “section planes.” Go to “camera” > “standard views” > “left.” Right-click on the third scene and click “update.”
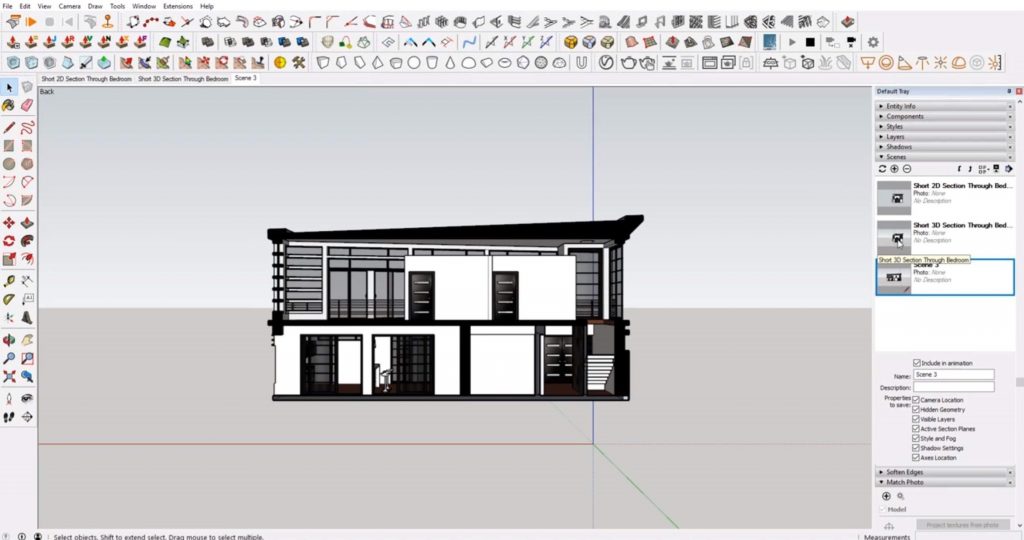
Now you have three unique scenes that you can easily switch between! If you want a more in-depth tutorial on creating scenes, take a look at this article. Or if you’re looking for even more Sketchup tips, check out the rest of our tutorials here! We hope this tutorial was helpful in showing you how to create sections in Sketchup! Let us know in the comments what other tricks you want to learn.
Happy Hacking!
No comments yet.