
How to Get Essential Site Information for Architecture Projects

One of the most important steps in an architecture project is gathering site information. In this tutorial, we’re going to show you how to get information about the site when you don’t have a survey. A quick note to keep in mind is that this is a very rough estimate! You don’t want to use this information in place of getting an actual survey. For example, you might only use this if you’re roughing out a concept for a proposal or you just want to get a quick estimate of what information the surveyor might need specifically for you. But don’t ever use your own survey instead of getting an actual survey because you’ll regret it!
Assessment Map
One way to get the property line information is to look at an assessment map which is basically the tax information for a property. Some counties make this information available online, but if not, you can go to the city and ask for an assessment map. If you are lucky enough to find the assessment map online, you can often then use the measuring tool from the site to measure the property line.
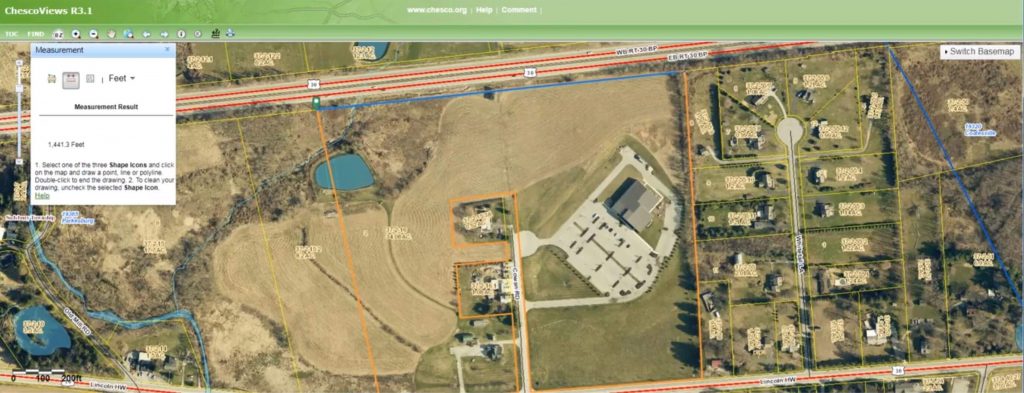
Import Image. Zoom out of the assessment map so you can see the entire property line. Take a screen capture and save it as a jpeg. Then, go back to Sketchup and import your image. Place it in your Sketchup model with the uploaded geo-location of your site.
Gathering Site Information in Sketchup
Scale. Use the line tool to trace the property line. Select the image and the line you just drew and right-click. Select “make group.” This way when you scale the image you won’t be scaling the entire model. Double click on the group. Hit “T” to open the tape measure tool. If your tape measure tool has a “+” symbol in the bottom right, hit ctrl to get rid of it. Then click and measure the property line. Type the actual measurement you got from the assessment map. Make sure you include the feet or inches increment. Hit “enter.”
A message will pop up asking if you want to resize the active group. Click “yes.” Your imported image should now be the same size as the original map.
Camera > Parallel Projection. Navigate to the camera tab and select “parallel projection” from the dropdown.
Camera > Standard Views > Top. Go to the camera dropdown again and select “standard views” > “top.”
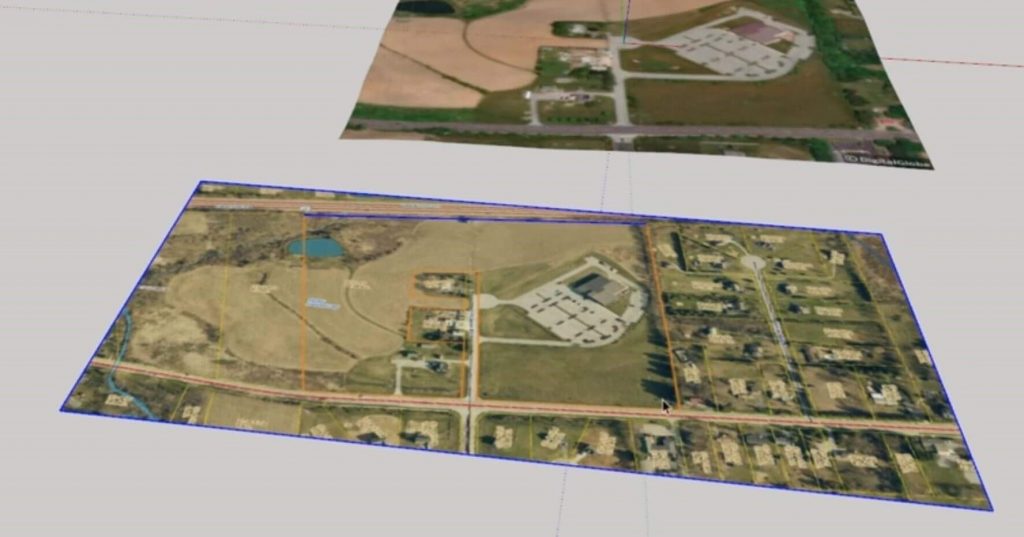
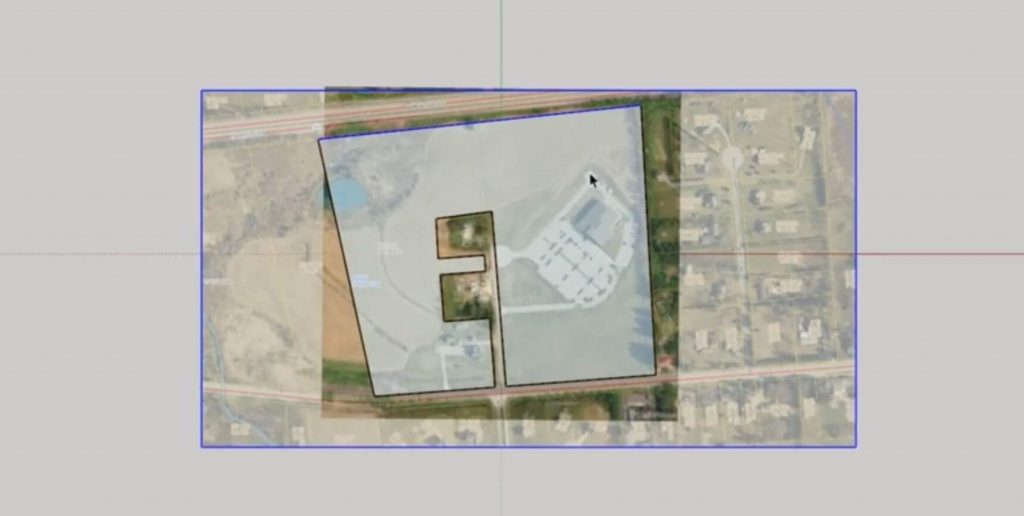
Select the assessment map, press “m” to move it, and then tap the “up” arrow key to move it in the Z (blue) direction above the original map. Then move the assessment map along the green and red axis so that it covers the original map.
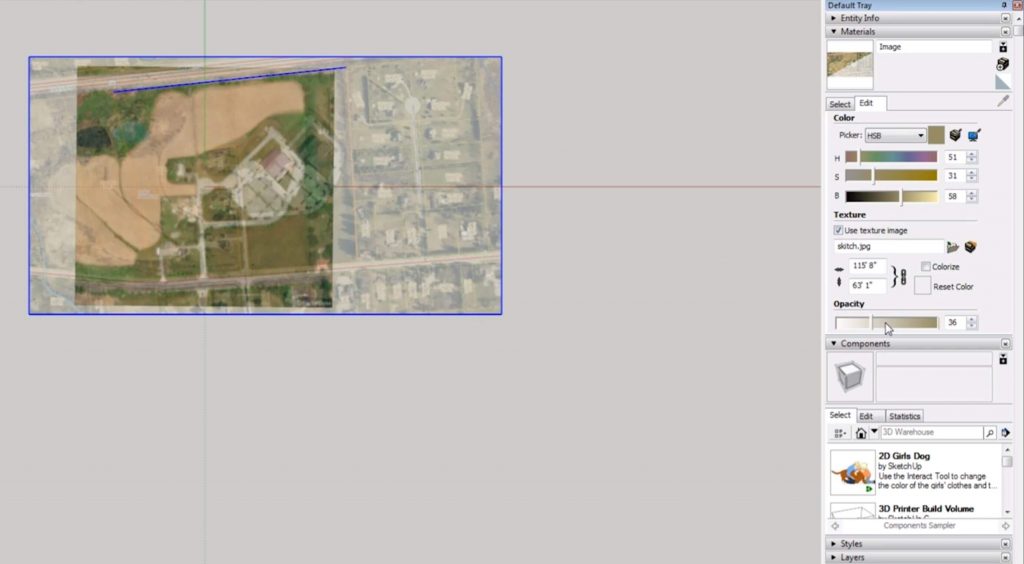
Window > Default Tray > Show Tray. Navigate to “window” and select “default tray” > “show tray.” Make sure “materials” is selected.
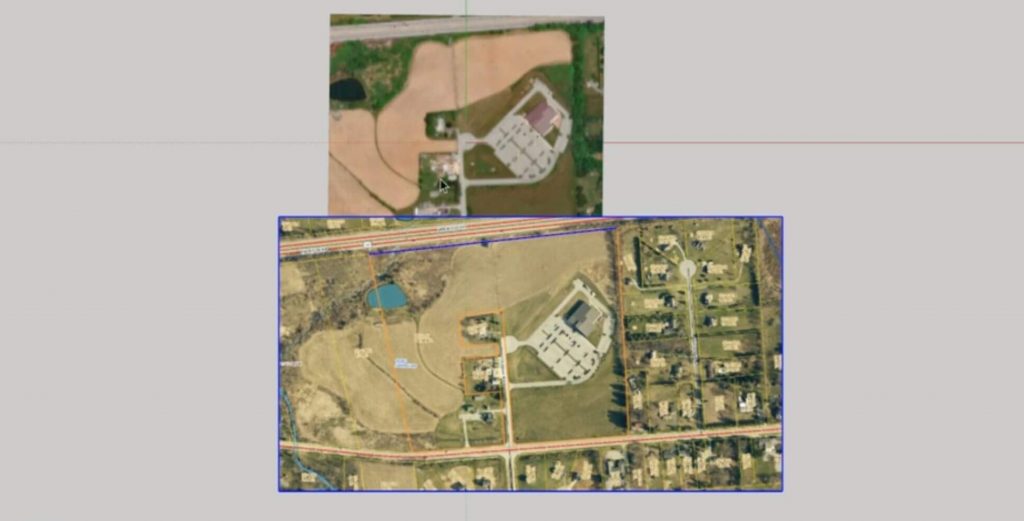
In the default tray, go to the “select” tab. Use the eyedropper tool to select the assessment map. Go to the “edit” tab in the materials tray and adjust the opacity so you can see through the image you imported. From here, you can position it so that it lines up with the image below. It won’t match perfectly but just line it up as close as you can!
Trace. Trace the entire property line. Right-click on the assessment map and select “hide.”
Explode. Click on the original map and select “unlock.” Then right-click again and select “explode.”
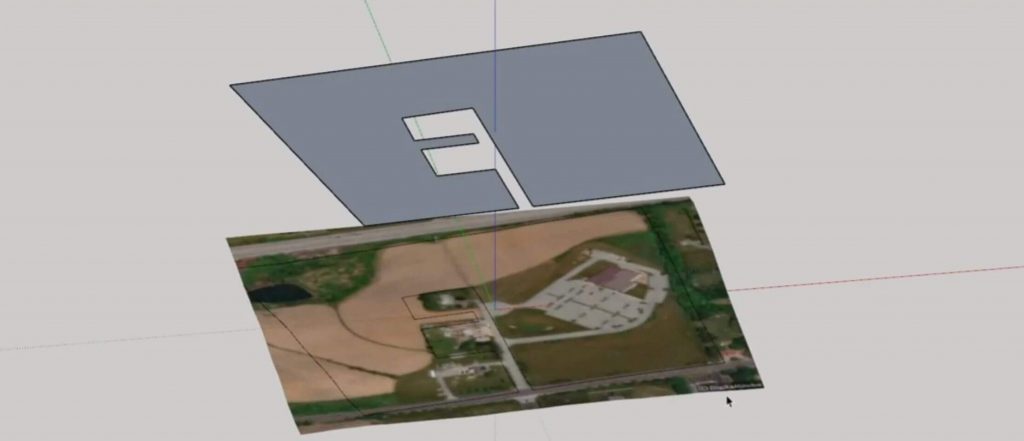
Make Group. Select the property shape that you traced and right-click to select “make group.”
Tools > Sandbox > Drape. Select the property outline. Navigate to the “tools” > “sandbox” and select “drape.” Click on the original image. Now, you can see that the property line is being projected on the original image.
Now that you have the property line visible on your site, you have some fundamental site topography and property line information for your project! If you found this tutorial helpful, be sure to check out our other hacks on our tutorials page.
Happy Hacking!
No comments yet.