
How to Convert Objects to Low Poly in Sketchup

In this tutorial, we’ll be showing you how to convert a high poly object to low poly in Sketchup. Aside from just going for a low-poly look, this can be useful for condensing the size of your model or placing an object in the distance that doesn’t necessarily need to be as detailed as something up close. This way, you can have both high poly and low poly versions of your object. In this tutorial, we’ll be using the plugin called Artisan, because it really simplifies this process. Once you have that done, you’ll be able to convert your high poly objects in no time!
High Poly to Low Poly in Sketchup
We started by importing this high poly apple from the 3D Warehouse. If you go to “view” and select “hidden geometry” you will see all of the facets that make up the 3D model. If you double click into the group you can see that there are two halves that make up the apple and a separate group for the leaf. Essentially, there are multiple groups within the component. For the method we’re going to use, we need to make sure everything is connected.

Explode. Now that we know there are multiple groups in the component, the first step is to explode the object. Click on the apple to select it. Right-click and select “explode.”
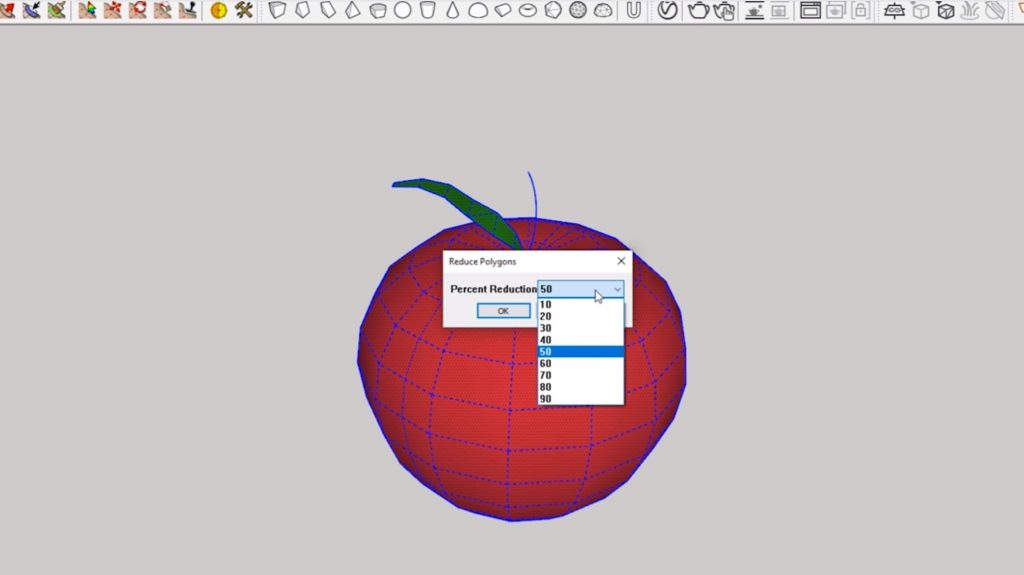
Reduce Polygons. We’ll be using a plugin called Artisan to make the object low poly in Sketchup. Click here to learn how to install new plugins into Sketchup. Once you have that done, you will have an icon that says “reduce polygons” in the top menu bar. Click on the icon. A box will appear with the option to select the percent reduction. This will control the percent of faces that the object is reduced by. If you are placing the object somewhere in the midground you may choose a percentage between 40-60%. If you want a really low poly object, select 90%.
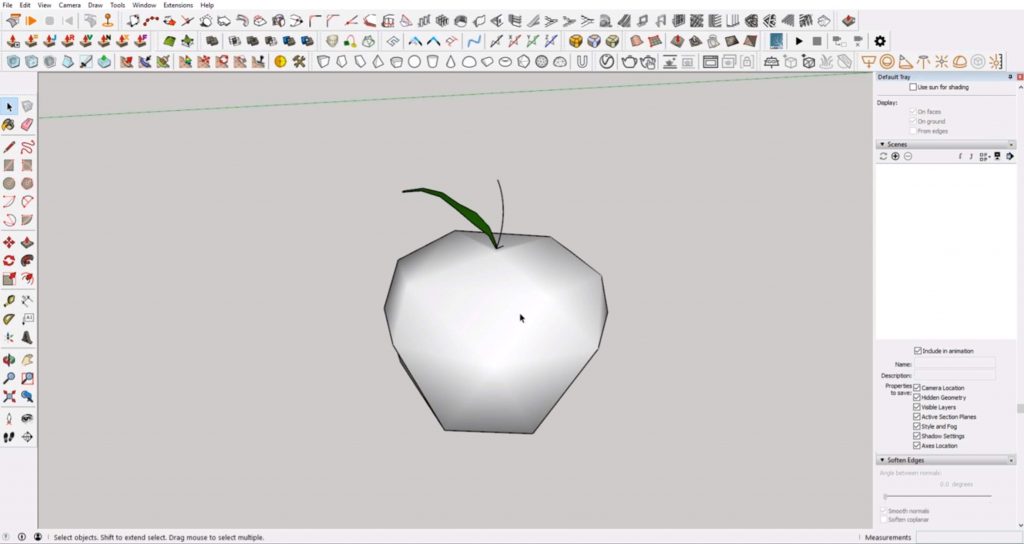
Soften Edges. Converting an object to low poly can be really useful if you are creating any low poly art in Sketchup. If you go to “view” and turn off “hidden geometry,” you can see that the object is still smooth around the edges.
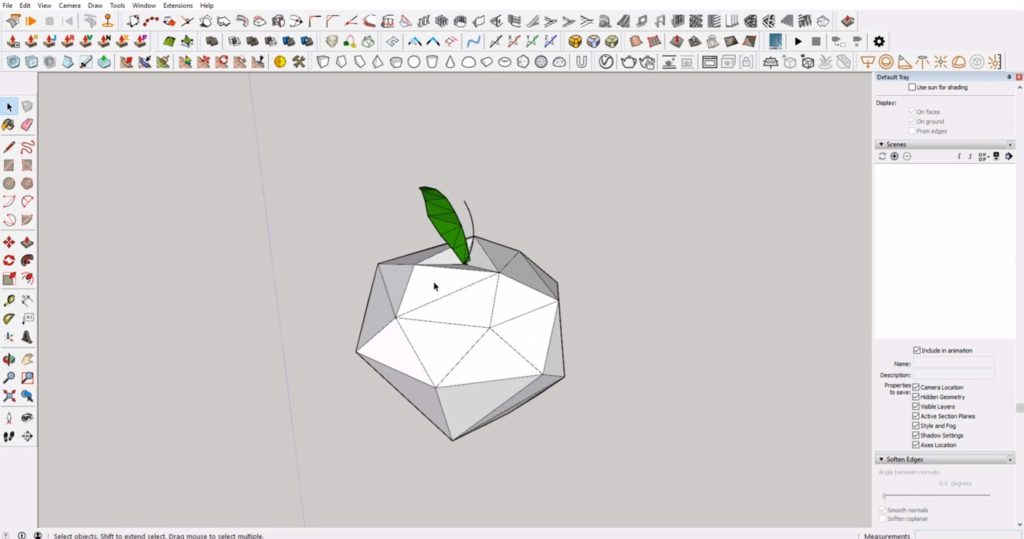
If you want to keep the hard edges, just right-click on the object and select “soften/smooth edges.” This will open a tab in the default tray called “soften edges.” From here, you can use the “angle between normals” slider to adjust the hardness of the edges. Experiment with the angle until you get the look you are going for. We adjusted the angle until all of the faces were triangulated.
We hope this article was helpful for converting your high poly objects to low poly in Sketchup! If you liked this tutorial, click here to see the rest of our Sketchup tutorials! You can find something for every skill level. If you’re looking for more useful plugins like Artisan, be sure to check out this article. What plugins do you use the most in Sketchup? Let us know in the comments!
Happy Hacking!
No comments yet.