
How to Create Realistic Grass in Lumion 8.5

Need some tips on how to create realistic grass in Lumion? We’ll show you all the tricks to getting an effective result in this article. Lumion is a great tool for creating fast realistic renderings and scenes. There are plenty of options you can customize and it may get a little overwhelming! We’re going to show you two simple methods for adding grass to your Lumion renderings. Let’s get started!
Method 1: Paint Realistic Grass in Lumion
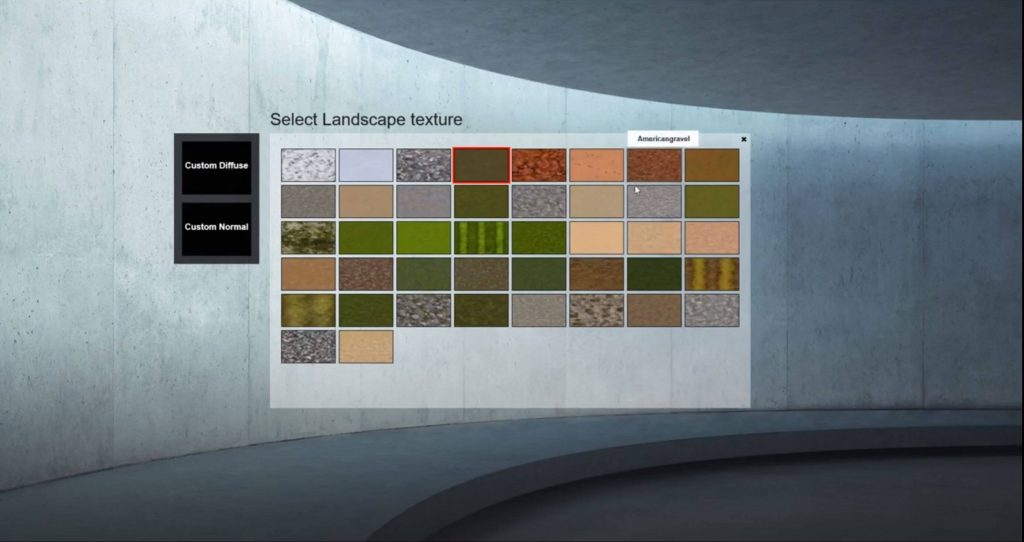
Landscape > Paint > Edit Type. With Lumion open, select the default mountain scene. To add some terrain, click on the landscape tool and then select the paint button. The first swatch should have a grass symbol on it. Select “edit type” and choose a texture to add to your rendering.
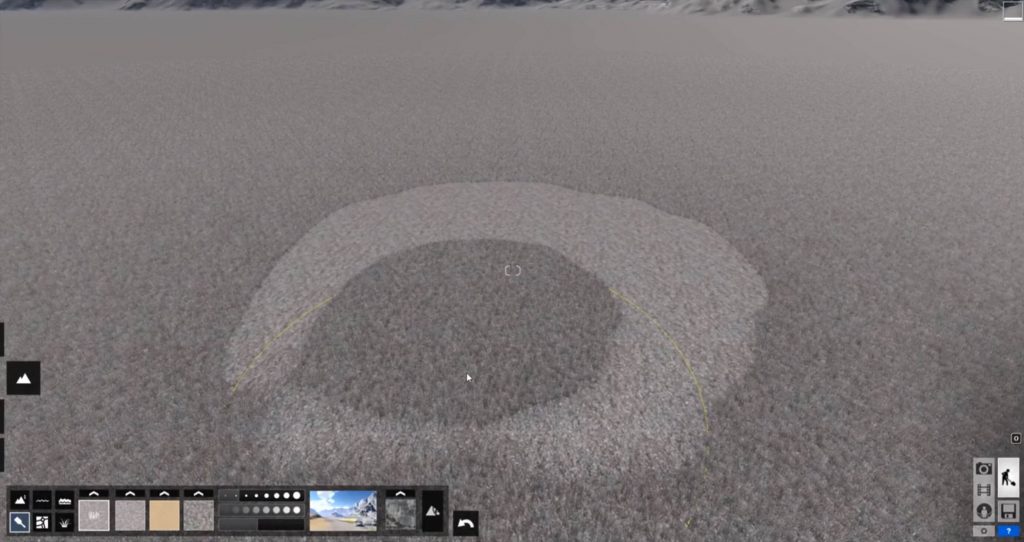
Paint. If you want to add it to a specific area in your rendering, select the paint tool and then click on the grass swatch. Click and drag your mouse to paint the texture onto your landscape.
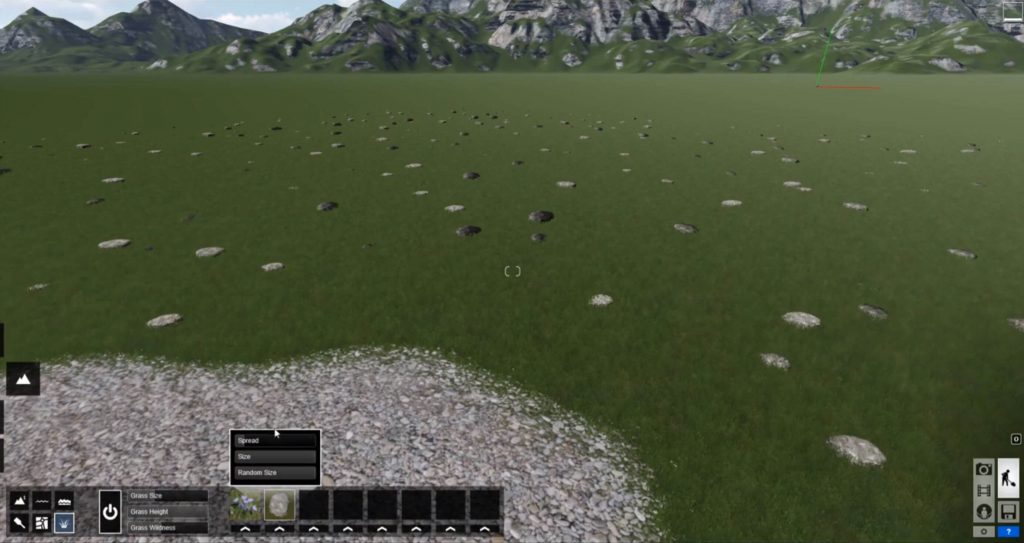
Customize Grass. Click on the “grass” button. From here, you can use the sliders to customize the size. Basically, the higher the slider is the larger the scale will be. You can also customize the height of the grass using the “height” slider. To create the look of realistic grass in Lumion you’ll want to set the “wildness” slider so that it varies in height but you don’t see the underlying texture. If you want to turn the grass off altogether you can click on the “power” icon.
Edit Type. You can also use the “edit type” buttons to add other objects such as rocks, weeds, and flowers that will be placed throughout the grass. You can use the sliders to change the spread and size of each item. We usually maximize the “random size” to make it appear more natural.
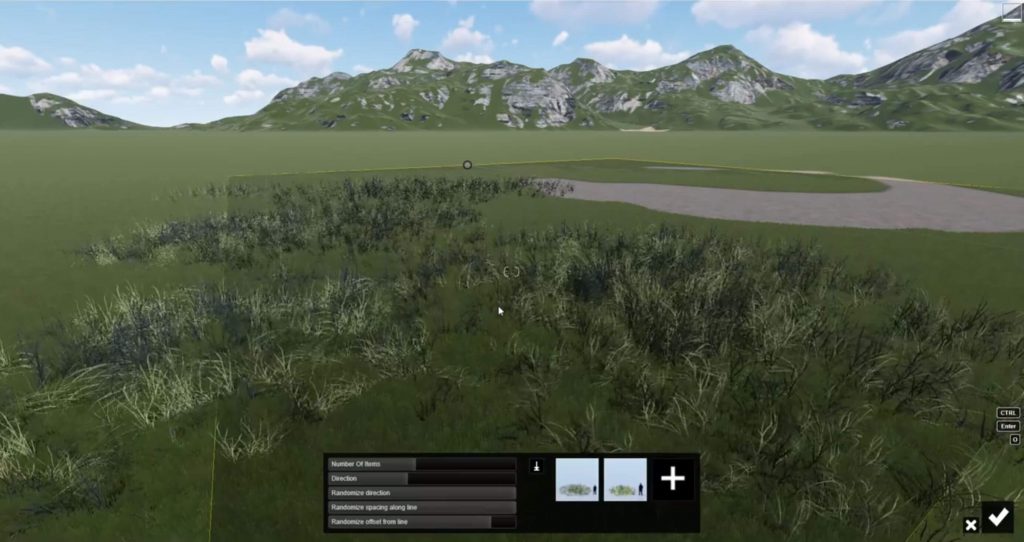
Method 2: Place Object
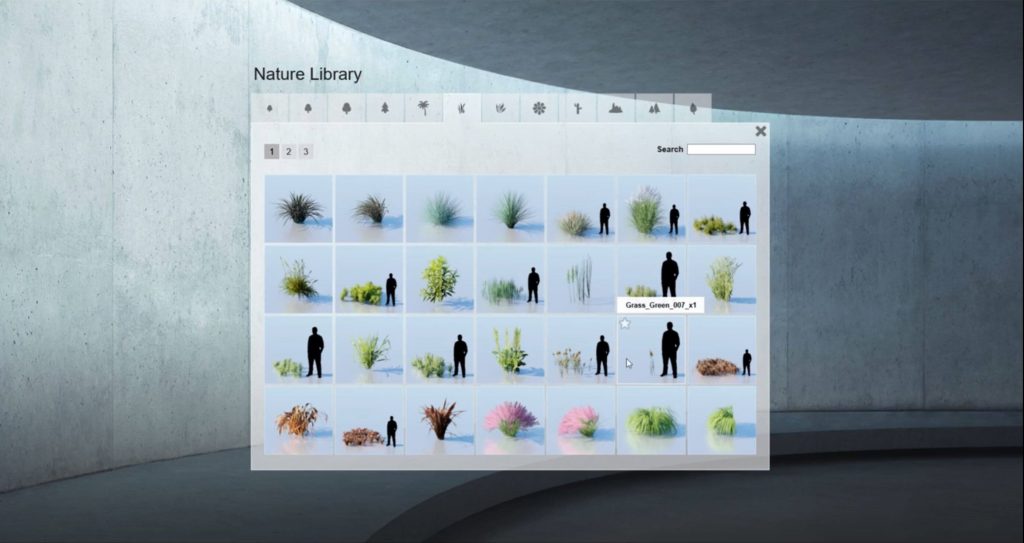
Objects > Nature. Click on the “objects” tool on the left and then select “nature.” From the nature library, select the tab that says “grass.” This method is really useful if you’re looking for a specific type of grass. It is also useful for adding variation to your rendering or adding small patches of grass. You can even layer on different types to really add depth. But keep in mind this will also add to the processing time of your rendering!
Mass Placement. If you want the grass to cover a larger area, select the “mass placement” button. Select the area you want to cover. You can use the sliders to customize the direction and spacing.
No matter which method you use, there are plenty of ways to create realistic grass in Lumion. Painting the texture is great for covering a large area, but if you are doing a top-down view you can begin to see the tiling in the texture. Placing it as an object makes realistic top-down and close-up views. It adds a lot of depth, but it will take more processing speed.
We hope you experiment with each method and find what works best for you and your rendering style! What other Lumion tricks do you want to learn? Let us know in the comments! We would love to help out with another tutorial. Until then, be sure to check out the rest of our tutorials here.
Happy Hacking!
No comments yet.