How to Create a Beautiful Line Rendering with Sketchup and Vray

In this article, we’re going to be tackling how to create a line rendering from Sketchup and Vray. Taivan7doloo asks:
“How do I do a line showing render? I’ve been trying out Sketchup for a few months now and people have been doing some renders that have only black lines on white background. Can you guys please help me?”
We’ve imported a model from the 3D Warehouse to show you what steps you need to take. There are two major steps to approach this question. First, we’re going to show you what you’ll need to do in Sketchup.
Create a Line Rendering with Sketchup
Window > Default Tray > Show Tray. Open the default tray by navigating to “window” > “default tray” and select “show tray.” You also want to make sure “styles” are checked.
Edit Style. Go to the “edit” tab of the “styles” dropdown in the default tray. Select the “faces” thumbnail so you can edit the model faces. Then, under the “style” section, select “display shaded using all same.”
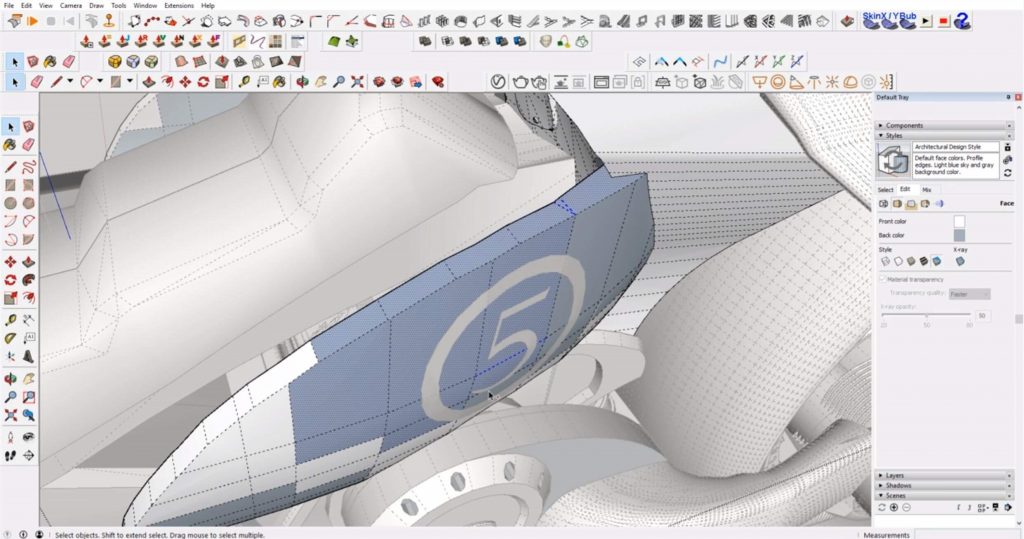
You may notice that some of the faces appear white and some of them appear gray. This is because Sketchup recognizes both the front and backside of faces. To get a consistent look, you’ll want to make sure all the faces are oriented the same way.
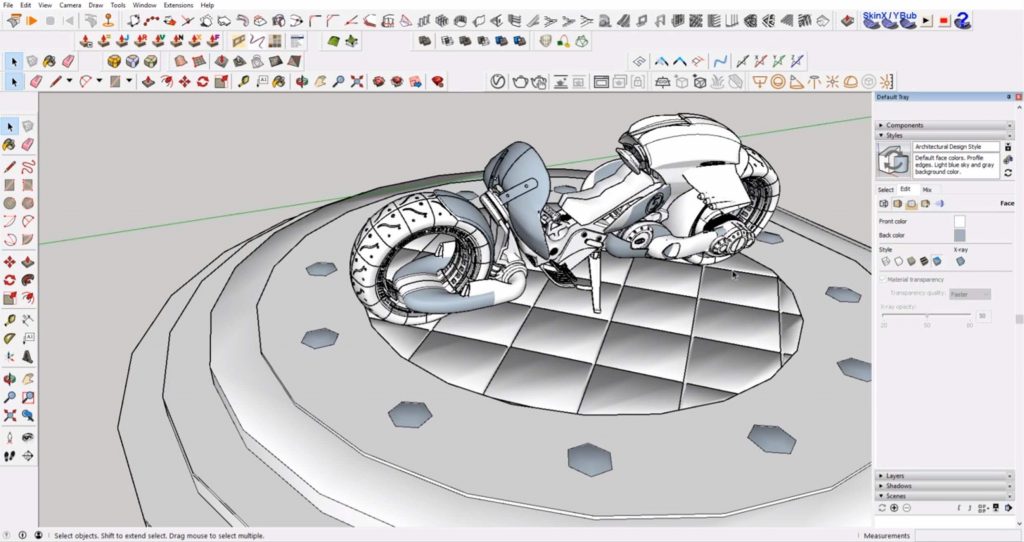
To fix this, double click into the model and then right-click on the incorrect faces. Select “reverse faces.” In some areas, you may have to manually select each face and reverse them individually.
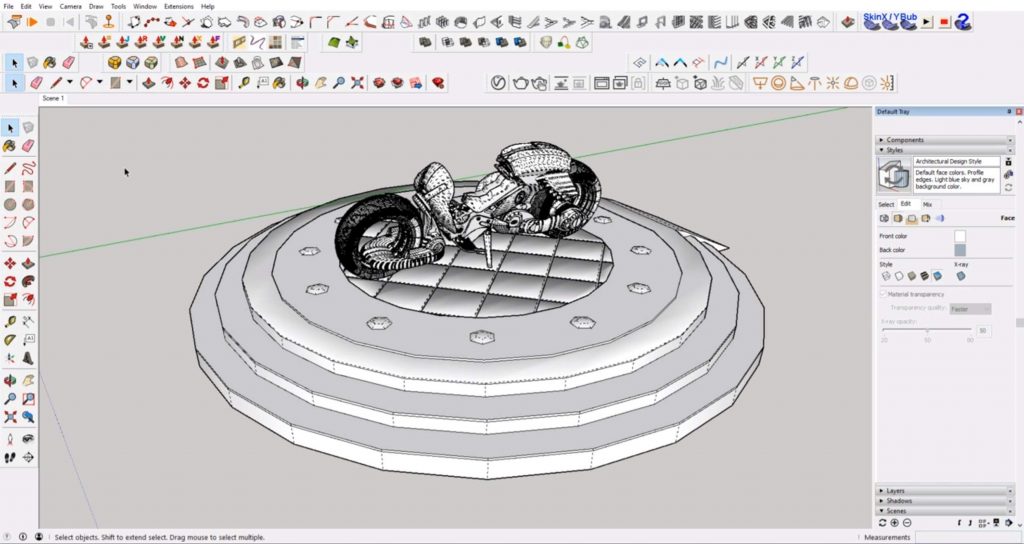
Select Camera View. Once you have all of the faces correct, you’ll want to save a new scene. Hit the “+” button at the bottom of the default tray. There will now be a tab at the top left of your screen that says “scene 1.” Don’t forget to save your model!
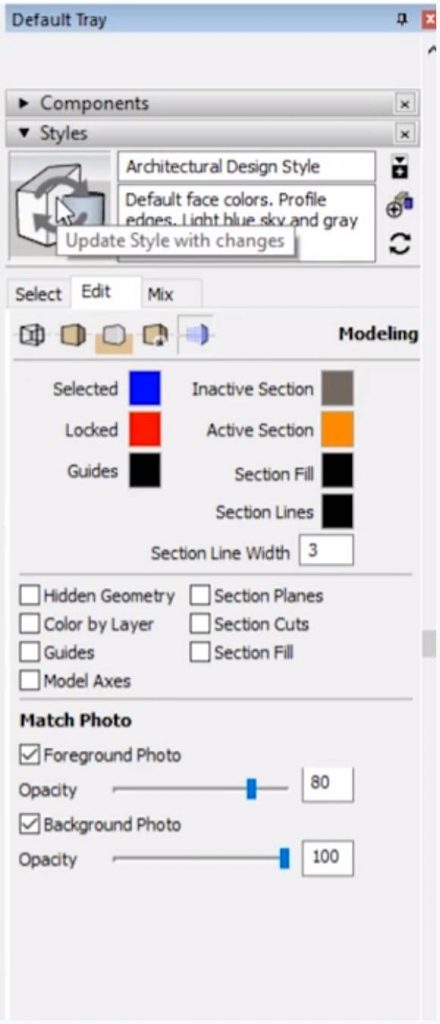
Styles > Model Settings. Go back to the “styles” tab of the default tray to edit the line rendering settings. Under the “edit” section, select “modeling settings.” Uncheck “hidden geometry,” “model axes,” “section cuts,” “section fills,” and “guides.”
Update Style. Click on the thumbnail image directly underneath the “styles” tab to update the style.
Edge. Click on the “edge” thumbnail under the “style” tab. From here you can decide what settings you want to include. “Edges” are essentially the outline of your model. “Back edges” include a ghosted image of the back side of your model. “Profiles” thicken the lines. For now, we just selected “edges” and “profiles.”
File > Export > 2D Graphic. Once you have all of the settings selected, you can export your file. Go to “file” > “export” and select “2D Graphic.” Type in the name of your file and click “export.”
Create a Line Rendering with Vray
If you want to take your file to the next level, you can use Vray (or really any other rendering software) and Photoshop to overlay the linework on top of a rendering. Click on the “render interactive” button in Sketchup to open Vray.
Settings > Material Override. To get rid of the default materials, go to “settings” and click on “material override.” Click the slider so that “material override” is turned on and re-render the image.
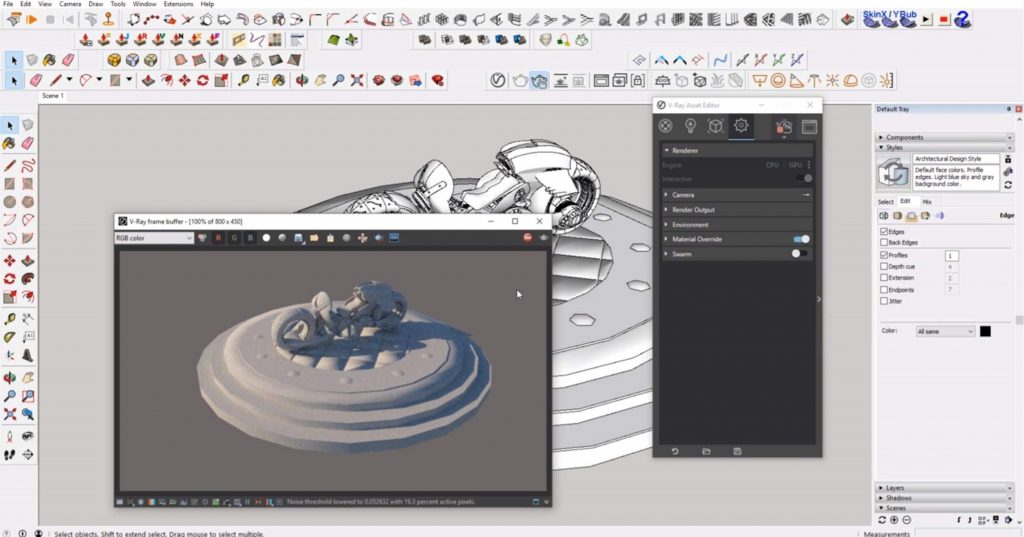
Open in Photoshop. Click on the thumbnail image that reads “copy current channel to clipboard.” Open Photoshop and then open your PNG file.
Create New File. Create a new file in Photoshop and paste your Vray image (that was copied to your clipboard) into the file.
Copy. Hit “ctrl” + “A” to copy all of your line drawing. Then go to the Vray rendering and hit “ctrl” + “V” to paste.
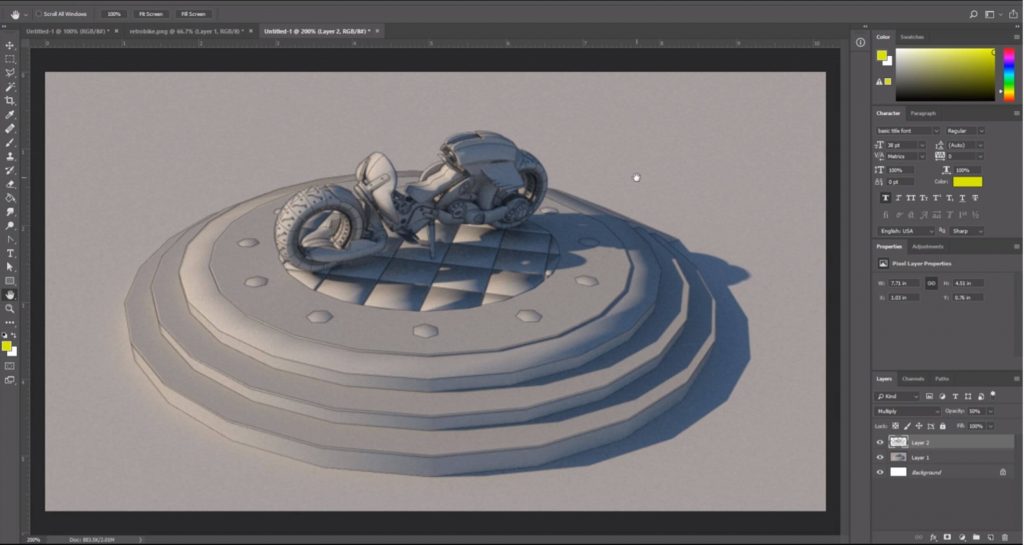
Multiply. Change the blending option of the line drawing layer to “multiply.” This will get rid of the white and allow the black lines to sit on top of the render.
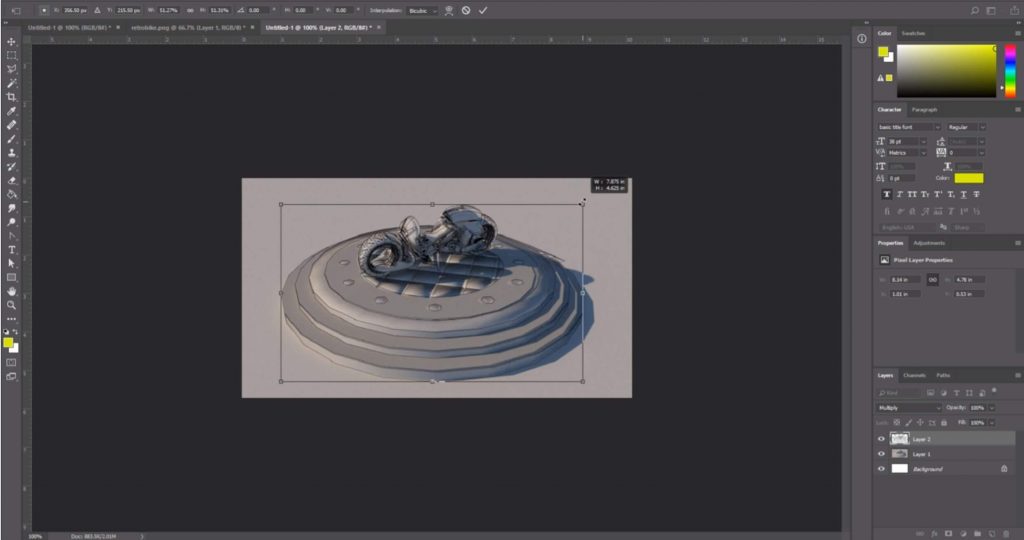
Transform. Hit “ctrl” + “T” to transform the layer and align it with the rendering. If you want, you can play around the with opacities of your two layers to get the look you’re after.
If you found this article helpful, be sure to check out the rest of our tutorials! What other types of renderings do you make with Sketchup and Vray? Let us know in the comments!
Happy Hacking!

No comments yet.