
How to Make Stairs in Sketchup (without plugins)
")
Making stairs in Sketchup can be a bit tricky, especially if the design is more complex. In this tutorial, we’ll show you how to model a staircase. Don’t have a plugin? Don’t worry about it! We’ll show you how to make a staircase without using any Sketchup plugins. Before you get started, you want to make sure you know the floor-to-floor height.
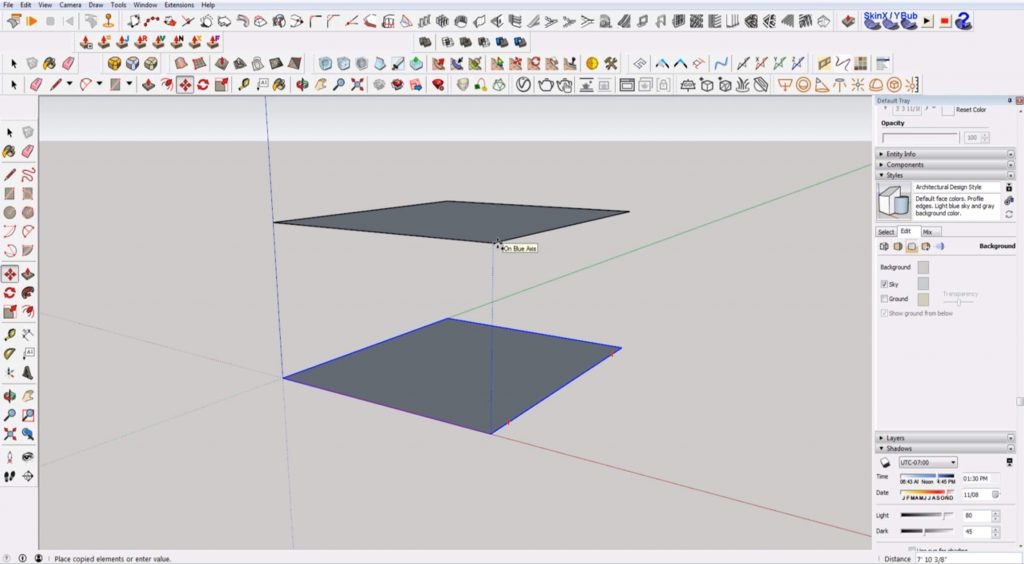
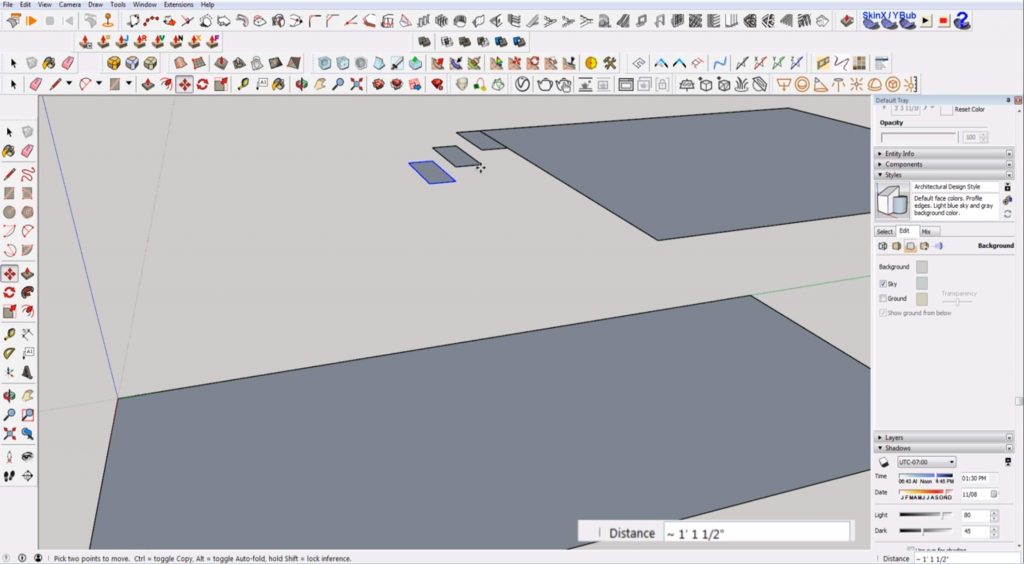
Model Floor-to-Floor
Draw Rectangle. Use the rectangle tool to draw a plane for the ground.
Make Group. Right-click and select “make group.”
Copy. Copy the rectangle and move it up on the blue axis. Type the amount of the floor-to-floor height and hit “enter.” Move the top rectangle so that it is offset from the bottom rectangle to create space for the stairs to connect.
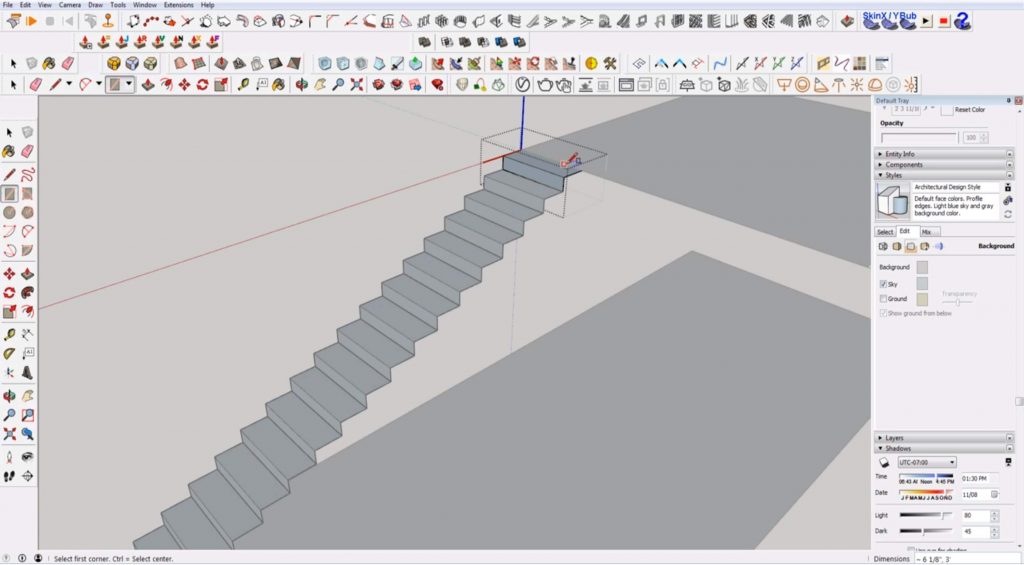
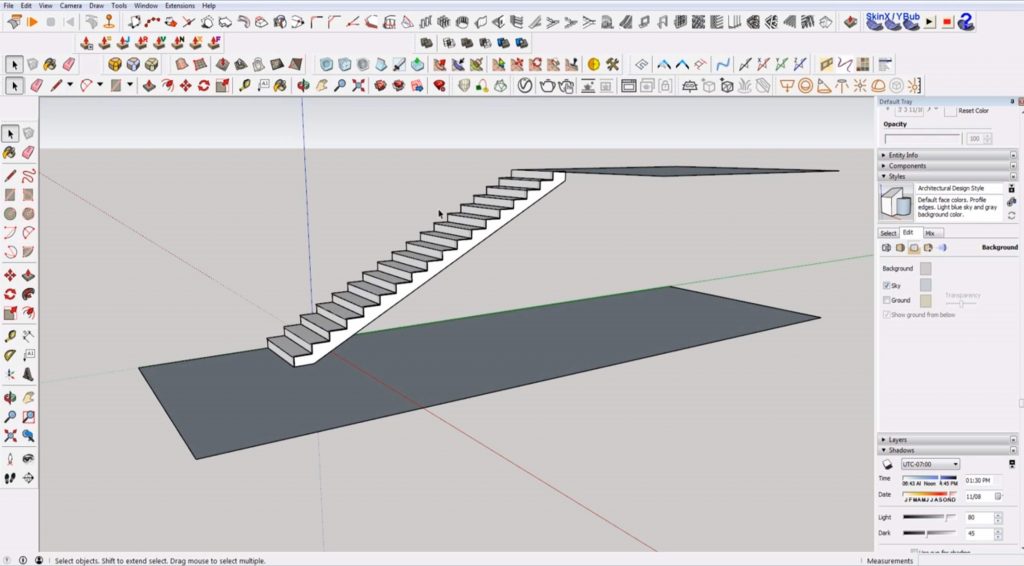
Model Stairs in Sketchup
If this is a real project, make sure to verify the tread and riser measurements with the building code that is applicable to your project.
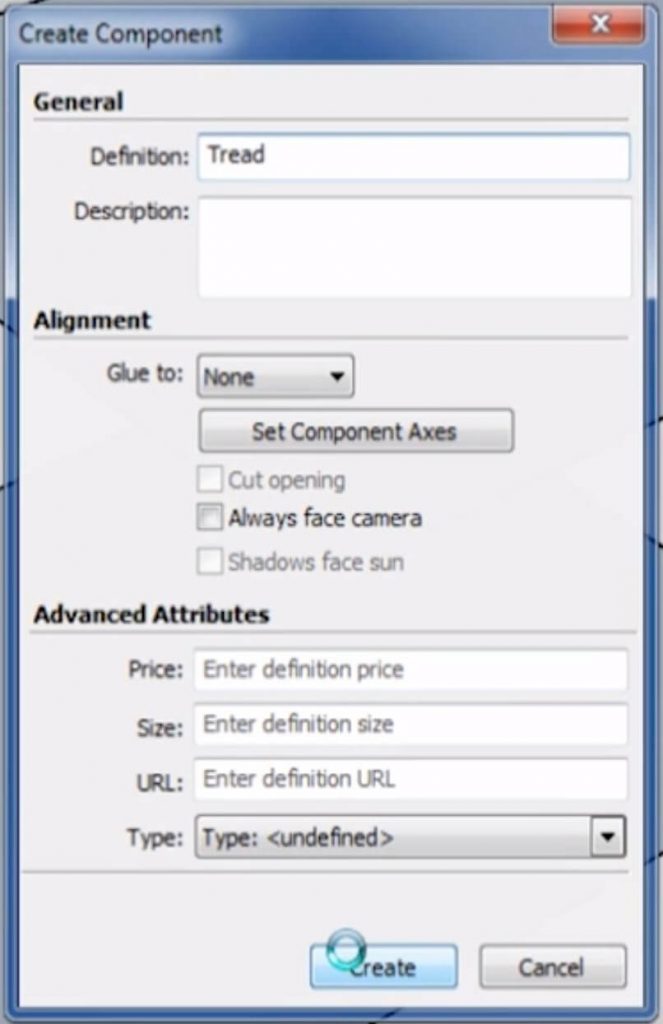
Draw Tread. Use the rectangle tool to draw a rectangle that is level with the top floor. Type “ 3’,1’ ” in the dimensions box and hit “enter.”
Make Component. Right-click on the tread and select “make component.” Type “tread” in the “definition” box and click “create.”
Determine Maximum Riser Height
Copy Tread. Select the tread and open the move command. Hit “ctrl” to make a copy. Drag the copied tread to the bottom floor. Type “/10” and hit “enter.” Depending on your floor-floor height, you may need more or less than 10 treads. I personally always have a measurement calculator at the ready so I can just punch this in ahead of time to see what I need.
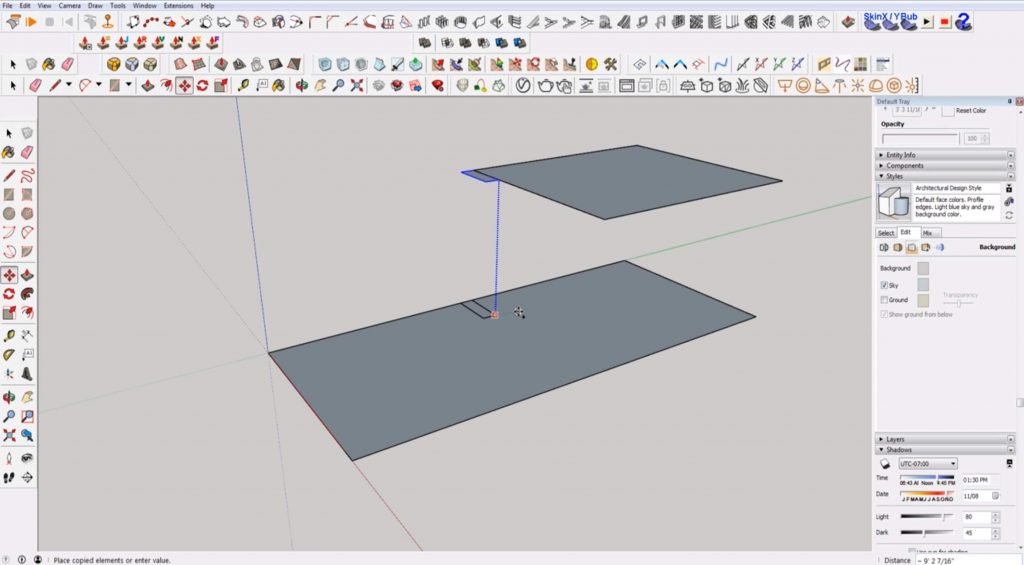
Measure. If you don’t have access to a measurement calculator you can always do this kind of by trial-and-error as well. Use the tape measure tool to measure the distance between the treads. If the distance is more than 7 inches, try dividing the tread instance by a higher number. Keep double-checking the measurements between the treads until you get a height between 6-7 inches. When you have the spacing figured out, you can delete all of the treads below the top two.
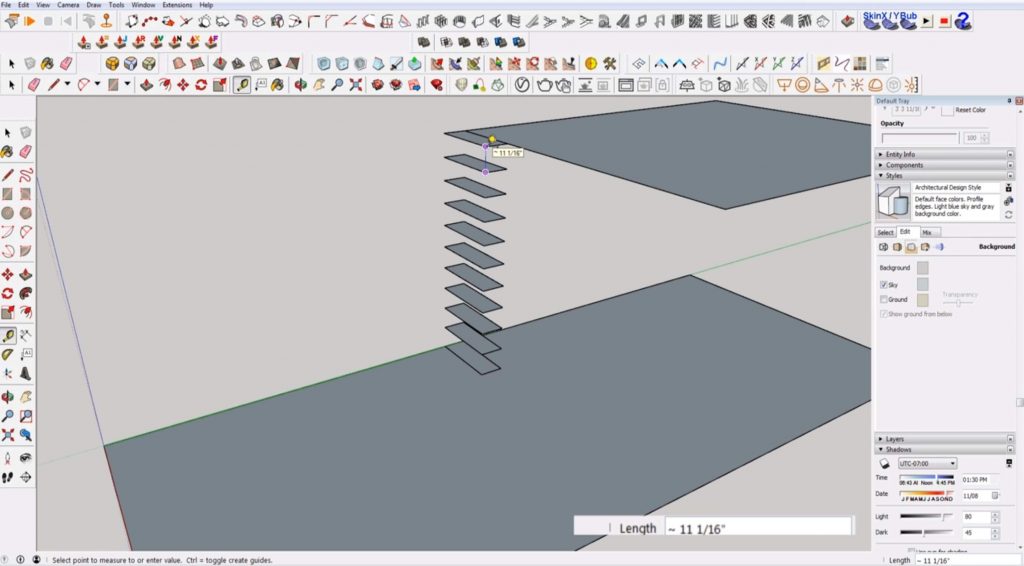
Copy Treads. Select the second tread. Move it so that the back edge aligns with the front edge of the tread above it. Select the second tread. Click on the back corner of the top tread as the first point. Copy and move the tread by clicking on the back corner of the second tread as the second point. Type one less than the number of treads you determined you needed and hit “enter.”
Add the Risers
Since you made the tread a component, you just have to draw the riser once and it will be applied to every tread.
Double click on the top tread. Draw a line connecting the top tread to the one below it on both sides.
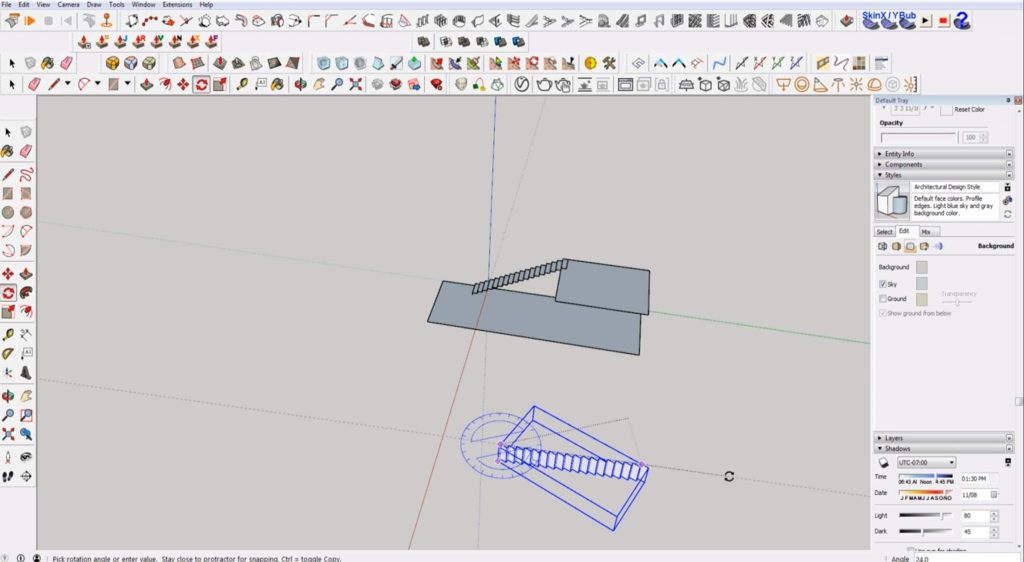
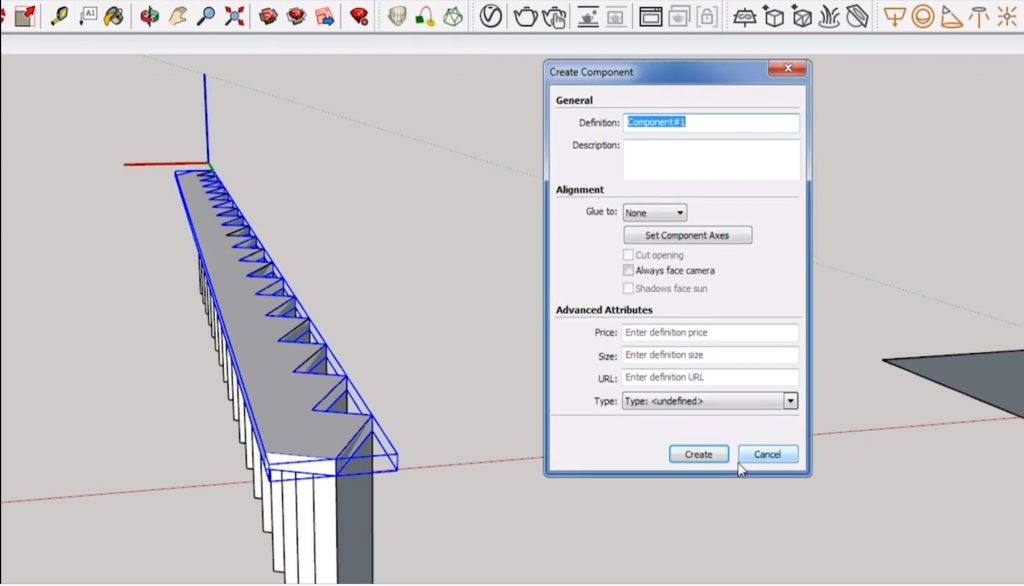
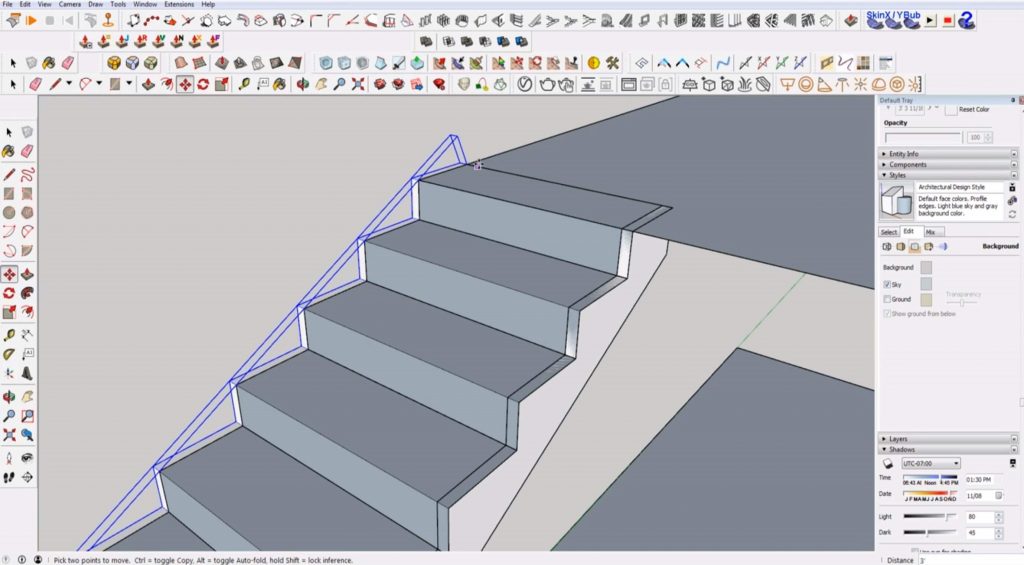
Make the Stringer
The final step to making stairs in Sketchup is to add the stringer.
Copy. Copy your staircase off to the side. Rotate the staircase so that it is on it side.
Rotate. Use the rotate tool to lock the staircase to the green axis.
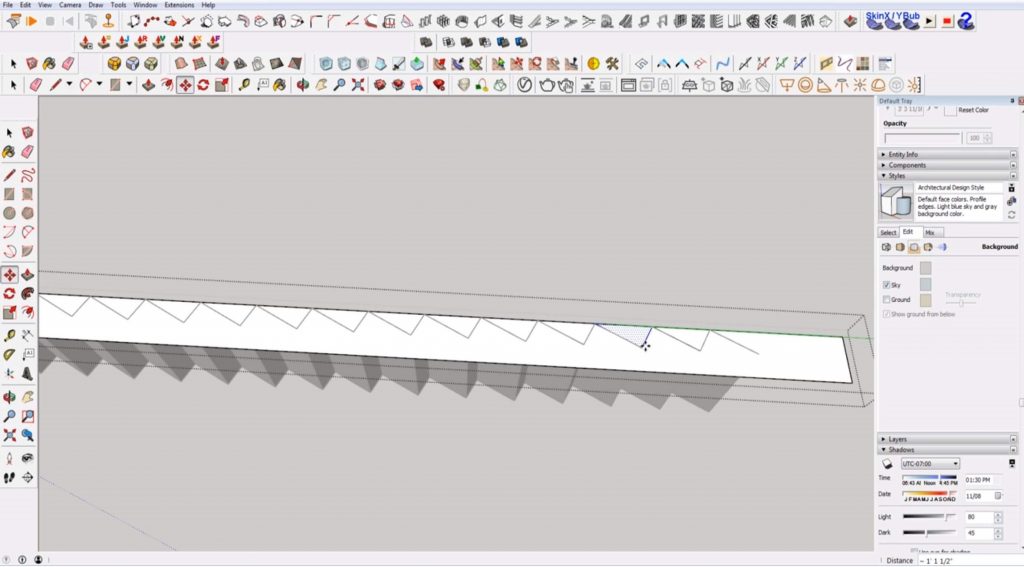
Draw Rectangle. Use the rectangle tool to draw a rectangle that is approximately 11.25 inches by 3 feet on the side of the stairs. Extend the top and bottom edges of the rectangle so they extend past the risers.
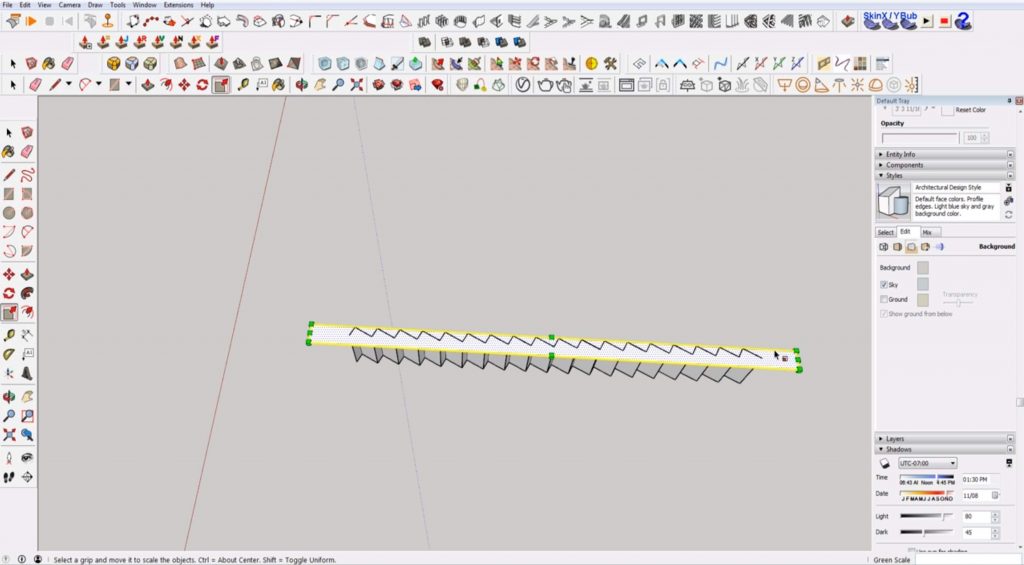
Make Group. Right-click on the rectangle and select “make group.”
Trace Shape. Double click into the group. Use the line tool to trace the triangular shape in between one of the treads. Copy and paste the shape to the space next to it. Multiply the shape by typing “ *20 ” and hit “enter.” (this may be more than you need but you can just delete the extra or type * and a number less than 20 to reduce the number of copies.)
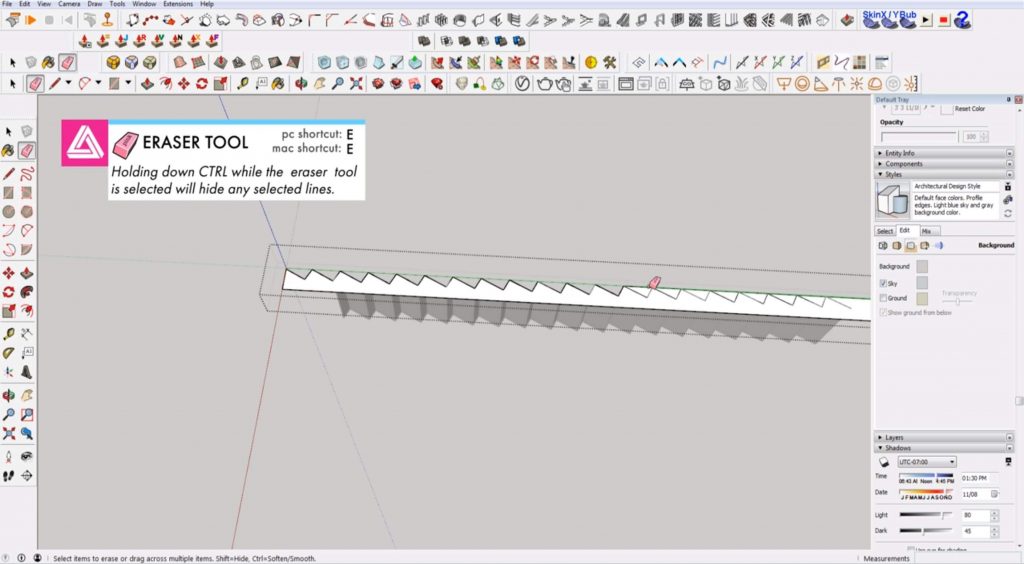
Erase. Hit “E” to open the eraser tool and delete all of the triangle shapes between the treads and risers.
Draw a line over the top riser. Draw another line that extends perpendicularly to the riser. Delete any of the excess rectangles that extend past the top riser.
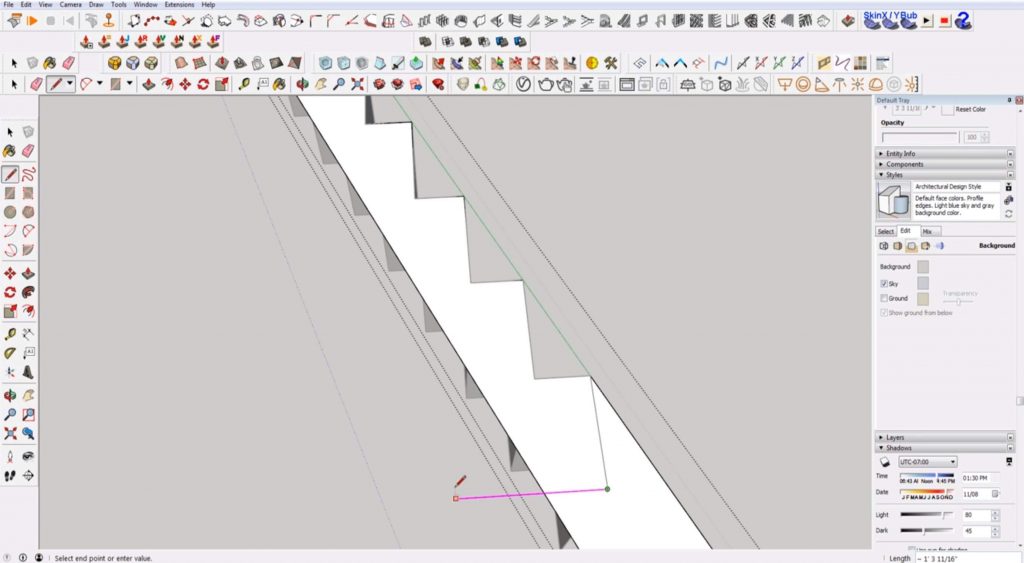
For the bottom riser, draw a line that extends from the front edge of the riser to the back of the stringer. Delete any of the excess that extends beyond the bottom riser.
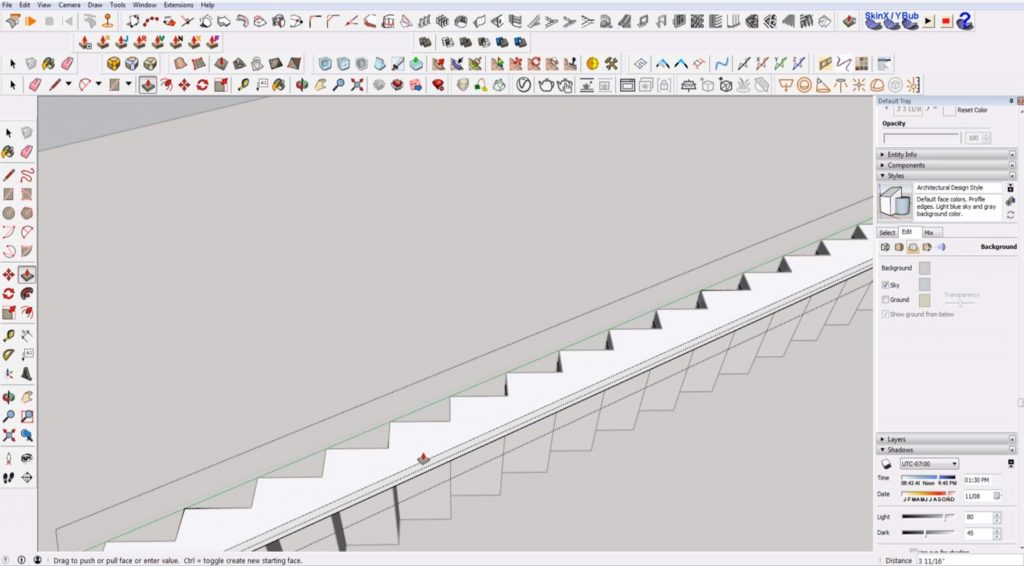
Extrude. Double-click into the stringer group. Use the “push/pull” tool to extrude the shape up 1.5 inches.
Make Component. Once your stringer is finished, right-click and select “make component.” Name the component “stringer.”
Move. Move the stringer and align it with the back edge of the top tread of your original staircase.
Rotate. Hit “Q” to open the rotate tool. Rotate the top edge so it aligns with the top tread on the green axis. Select the two points on the top face of the stringer and align it with the top face of the treads.

Copy. Copy the stringer over to the other side of the staircase.
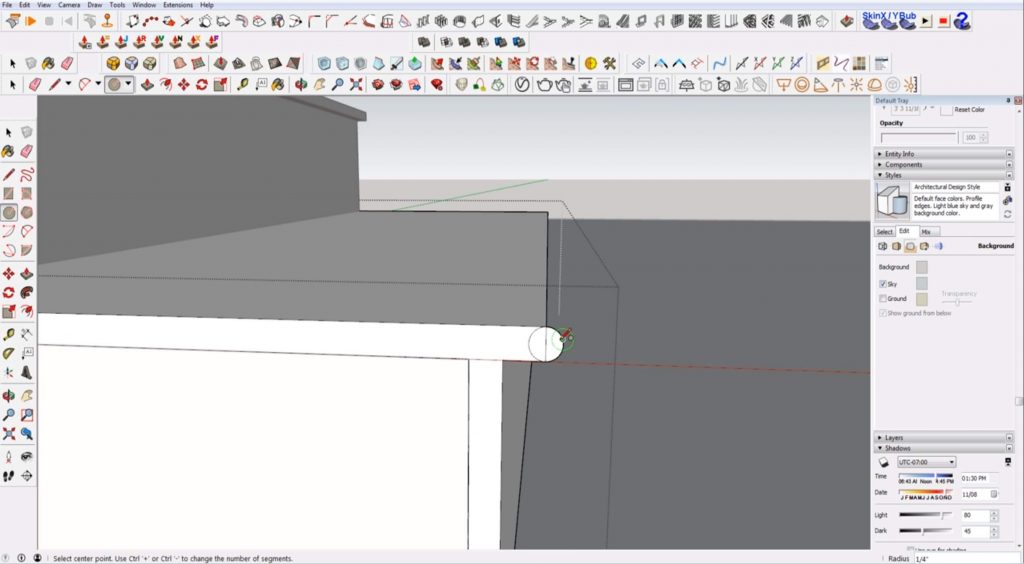
Finishing Touches
If you want, you can go into the stair component and add some details.
Extrude. Use the “push/pull” tool to extrude the treads and risers out .5 inches.
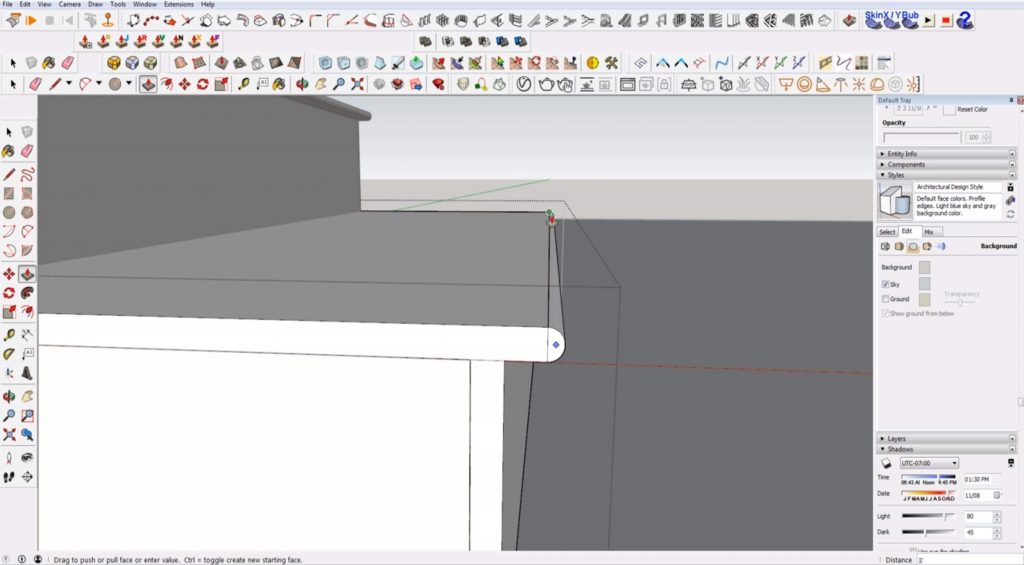
Add Nosing. Extrude the tread beyond the riser by an inch or so. Draw a circle (or any nosing shape) on the edge of the tread for the nosing. Erase any intersecting lines. Delete the half of the circle that intersects with the tread.
Use the “push/pull” tool to extend the semicircle to the opposite edge of the tread. Hit “E” to open the eraser tool. Hold “ctrl” while you select the top line on the tread to hide it.
Delete Top Piece. Right-click on the top tread. Select “make unique.” Double-click into the component and delete the top tread.
There are plenty of other details you can add like railings, banisters, and landings, but this gives all of the basics you need to model stairs in Sketchup! If you liked this article, check out our tutorials page to see more tips! What other details do you want to learn to model in Sketchup? Let us know in the comments, we would love to help out!
Happy Hacking!
No comments yet.