
How to Make an Architectural 2D Elevation in Sketchup

Sketchup is a great program for creating 3D models, site plans, and floor plans. This tutorial explains how to take a floor plan and turn it into a 3D model. However, in this article, we’re going to go over how to make a 2D elevation in Sketchup using a 3D model.
Settings
Camera > Parallel Projection. To change the view from a perspective to a 2D view, go to “camera” and select “parallel projection” from the dropdown menu.
Camera > Standard Views > Front. Then, to get a front view, navigate to “camera” > “standard views” and select “front.” You may have to choose “back,” “left,” or “right” depending on what view you want to use.
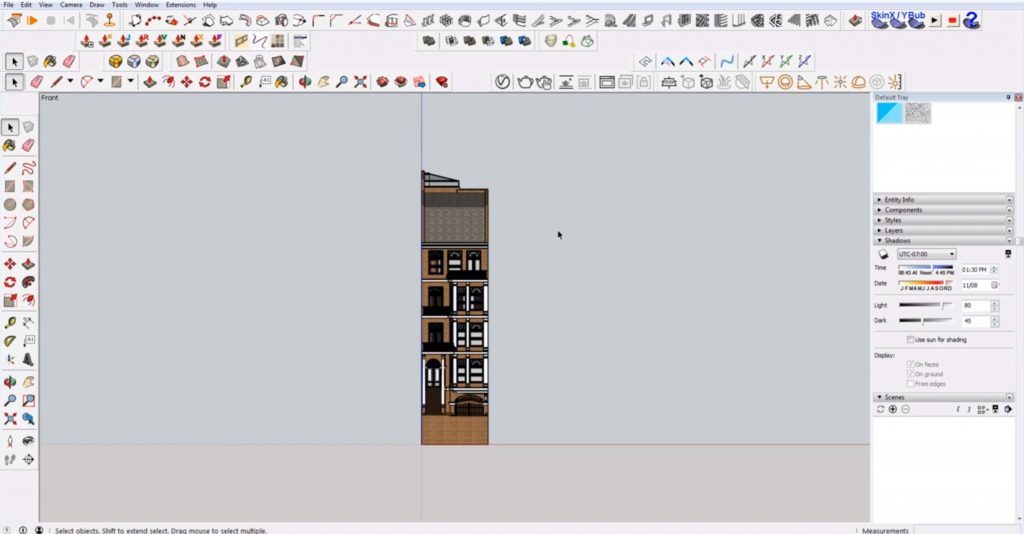
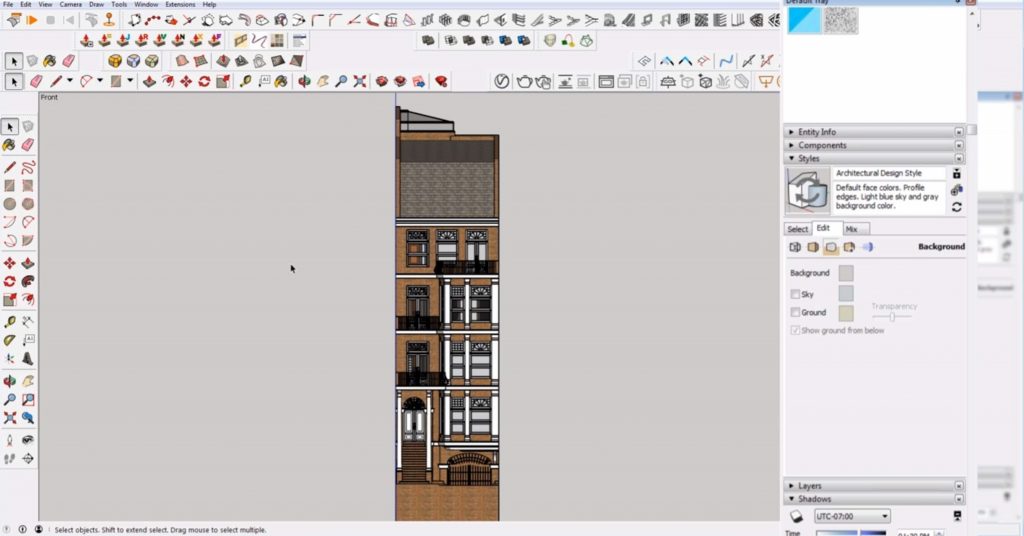
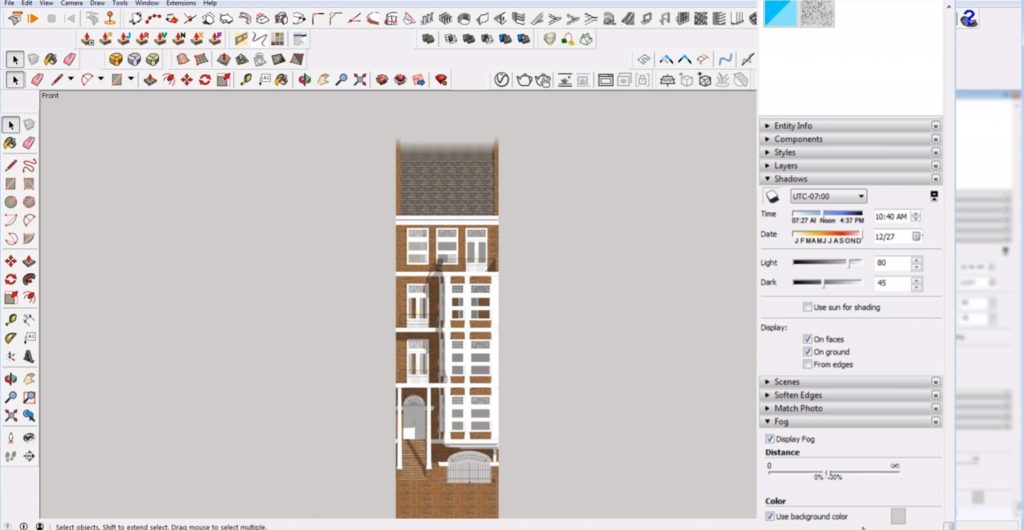
Default Tray > Styles > Edit. Go to the “styles” tab in the “default tray” and then select the “edit” tab. Uncheck the “sky” and “ground” boxes so you can export the final file as a PNG.
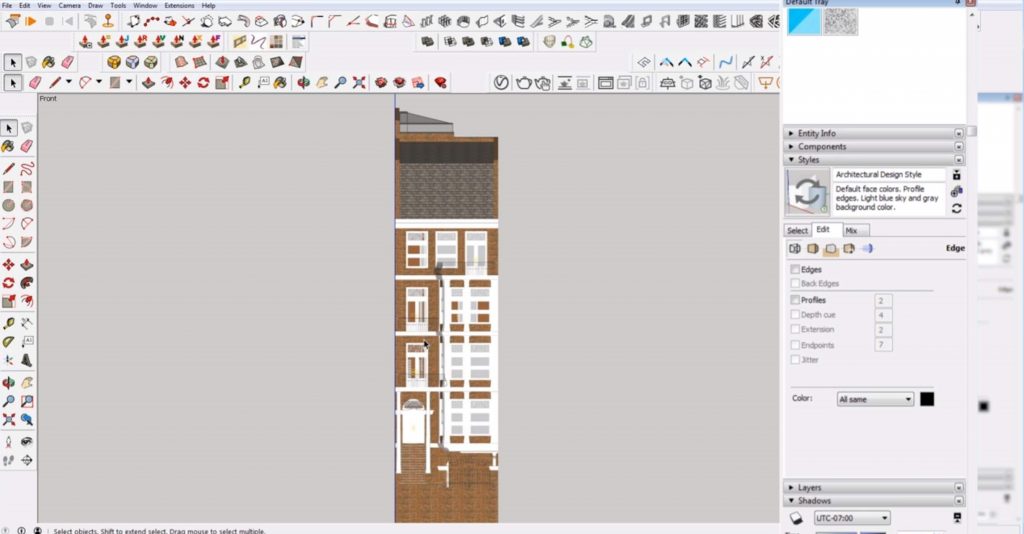
Edge Settings. While you are in the “edit” tab, select the “edge” settings from the thumbnail images. Uncheck “edges” and “profiles.” This view is good to use when adding shadows because the shadows define the shapes rather than the lines.
Face Settings. Next to the “edge” settings, you can select “face” settings. Here, you can change the style of the faces. We selected shading with textures.
Modeling Settings. The final thumbnail is for the “modeling” settings. Uncheck “model axes.”
When you finish editing the settings, click on the image under the “styles” tab to update the style with changes.
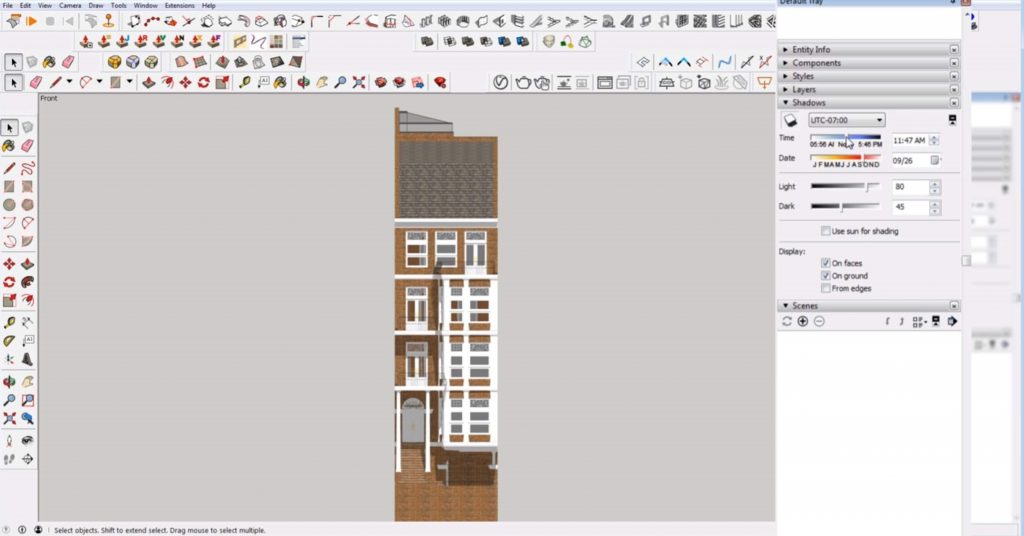
Shadows. Under the “shadows” tab of the “default tray” there is a small icon that you can select to turn the shadows in your view on or off. You can also change the time of year to get a different effect with your shadows. If you want more dramatic shadows, use the “date” slider to select a winter month. If you want shorter, less dramatic shadows, select a summer month instead. You can also use the “time” slider to adjust the time of day. Play around with each setting until you get the look you want.
View > Fog. If you want to edit the view depth of your 2D elevation in Sketchup, go to “view” and select “fog.”
Window > Default Tray > Fog. You can also go to the “fog” tab in the “default tray” by selecting “window” > “default tray” > “fog.” Here, you can select and deselect the “fog” setting or use the slider to edit where the fog starts and ends. The leftmost slider changes where the fog starts, and the rightmost slider changes how far back it goes.
Export a 2D Elevation in Sketchup
Add Scene. To save your view, go to the “scenes” tab in the “default tray” and click on the plus button. You can enter a name for your scene in the “name” box. If you change your view to a “left” elevation for example, you can simply click on the plus button again to save the view as a new scene. If you make any changes to your model in a scene, simply right-click on the image in the “scenes” tab and select “update scene.” Check which elements you want to update and then hit “update.”

Window > Model Info. When you have more than one scene you can toggle between them, but the animation between each scene may cause Sketchup to lag. If you want to disable this feature go to “window” > “model info” and select the “animation” tab. Uncheck the box that says “enable scene transitions.”

File > Export > 2D Graphic. To export your final elevation, make sure you have the view selected from the “scenes” tab. Go to “file” > “export” and select “2D graphic.”
If you found this article on making a 2D elevation in Sketchup helpful, be sure to check out the rest of our tutorials! What other types of views do you need help creating in Sketchup? Let us know in the comments!
Happy Hacking!
No comments yet.