
How to Turn 2D Typography or a Survey to 3D Terrain in Sketchup

From survey to 3D, this tutorial will take you step by step to transform a 2D typography into a 3D terrain in Sketchup. There are quite few steps so let’s jump in!
Importing the Image
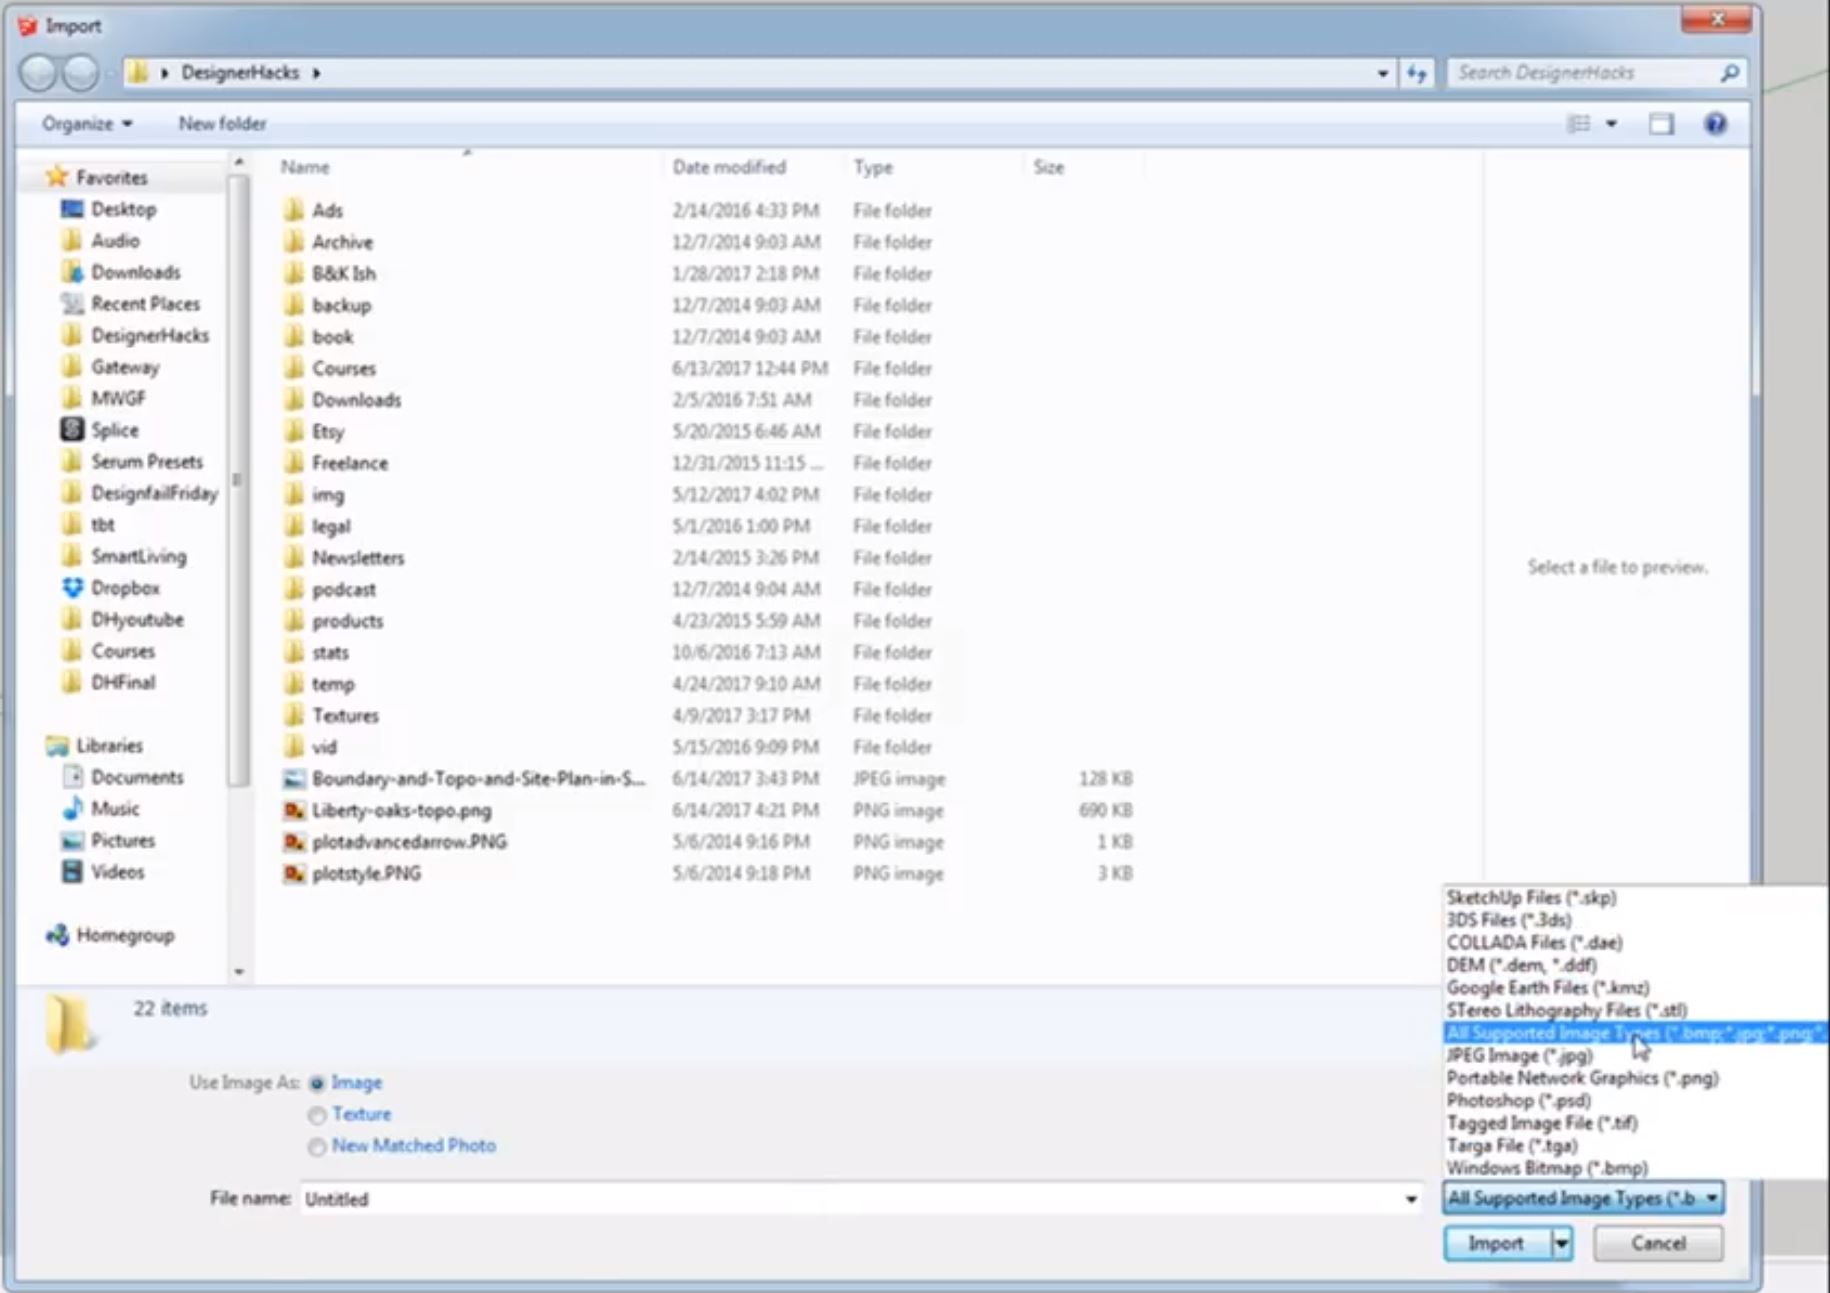
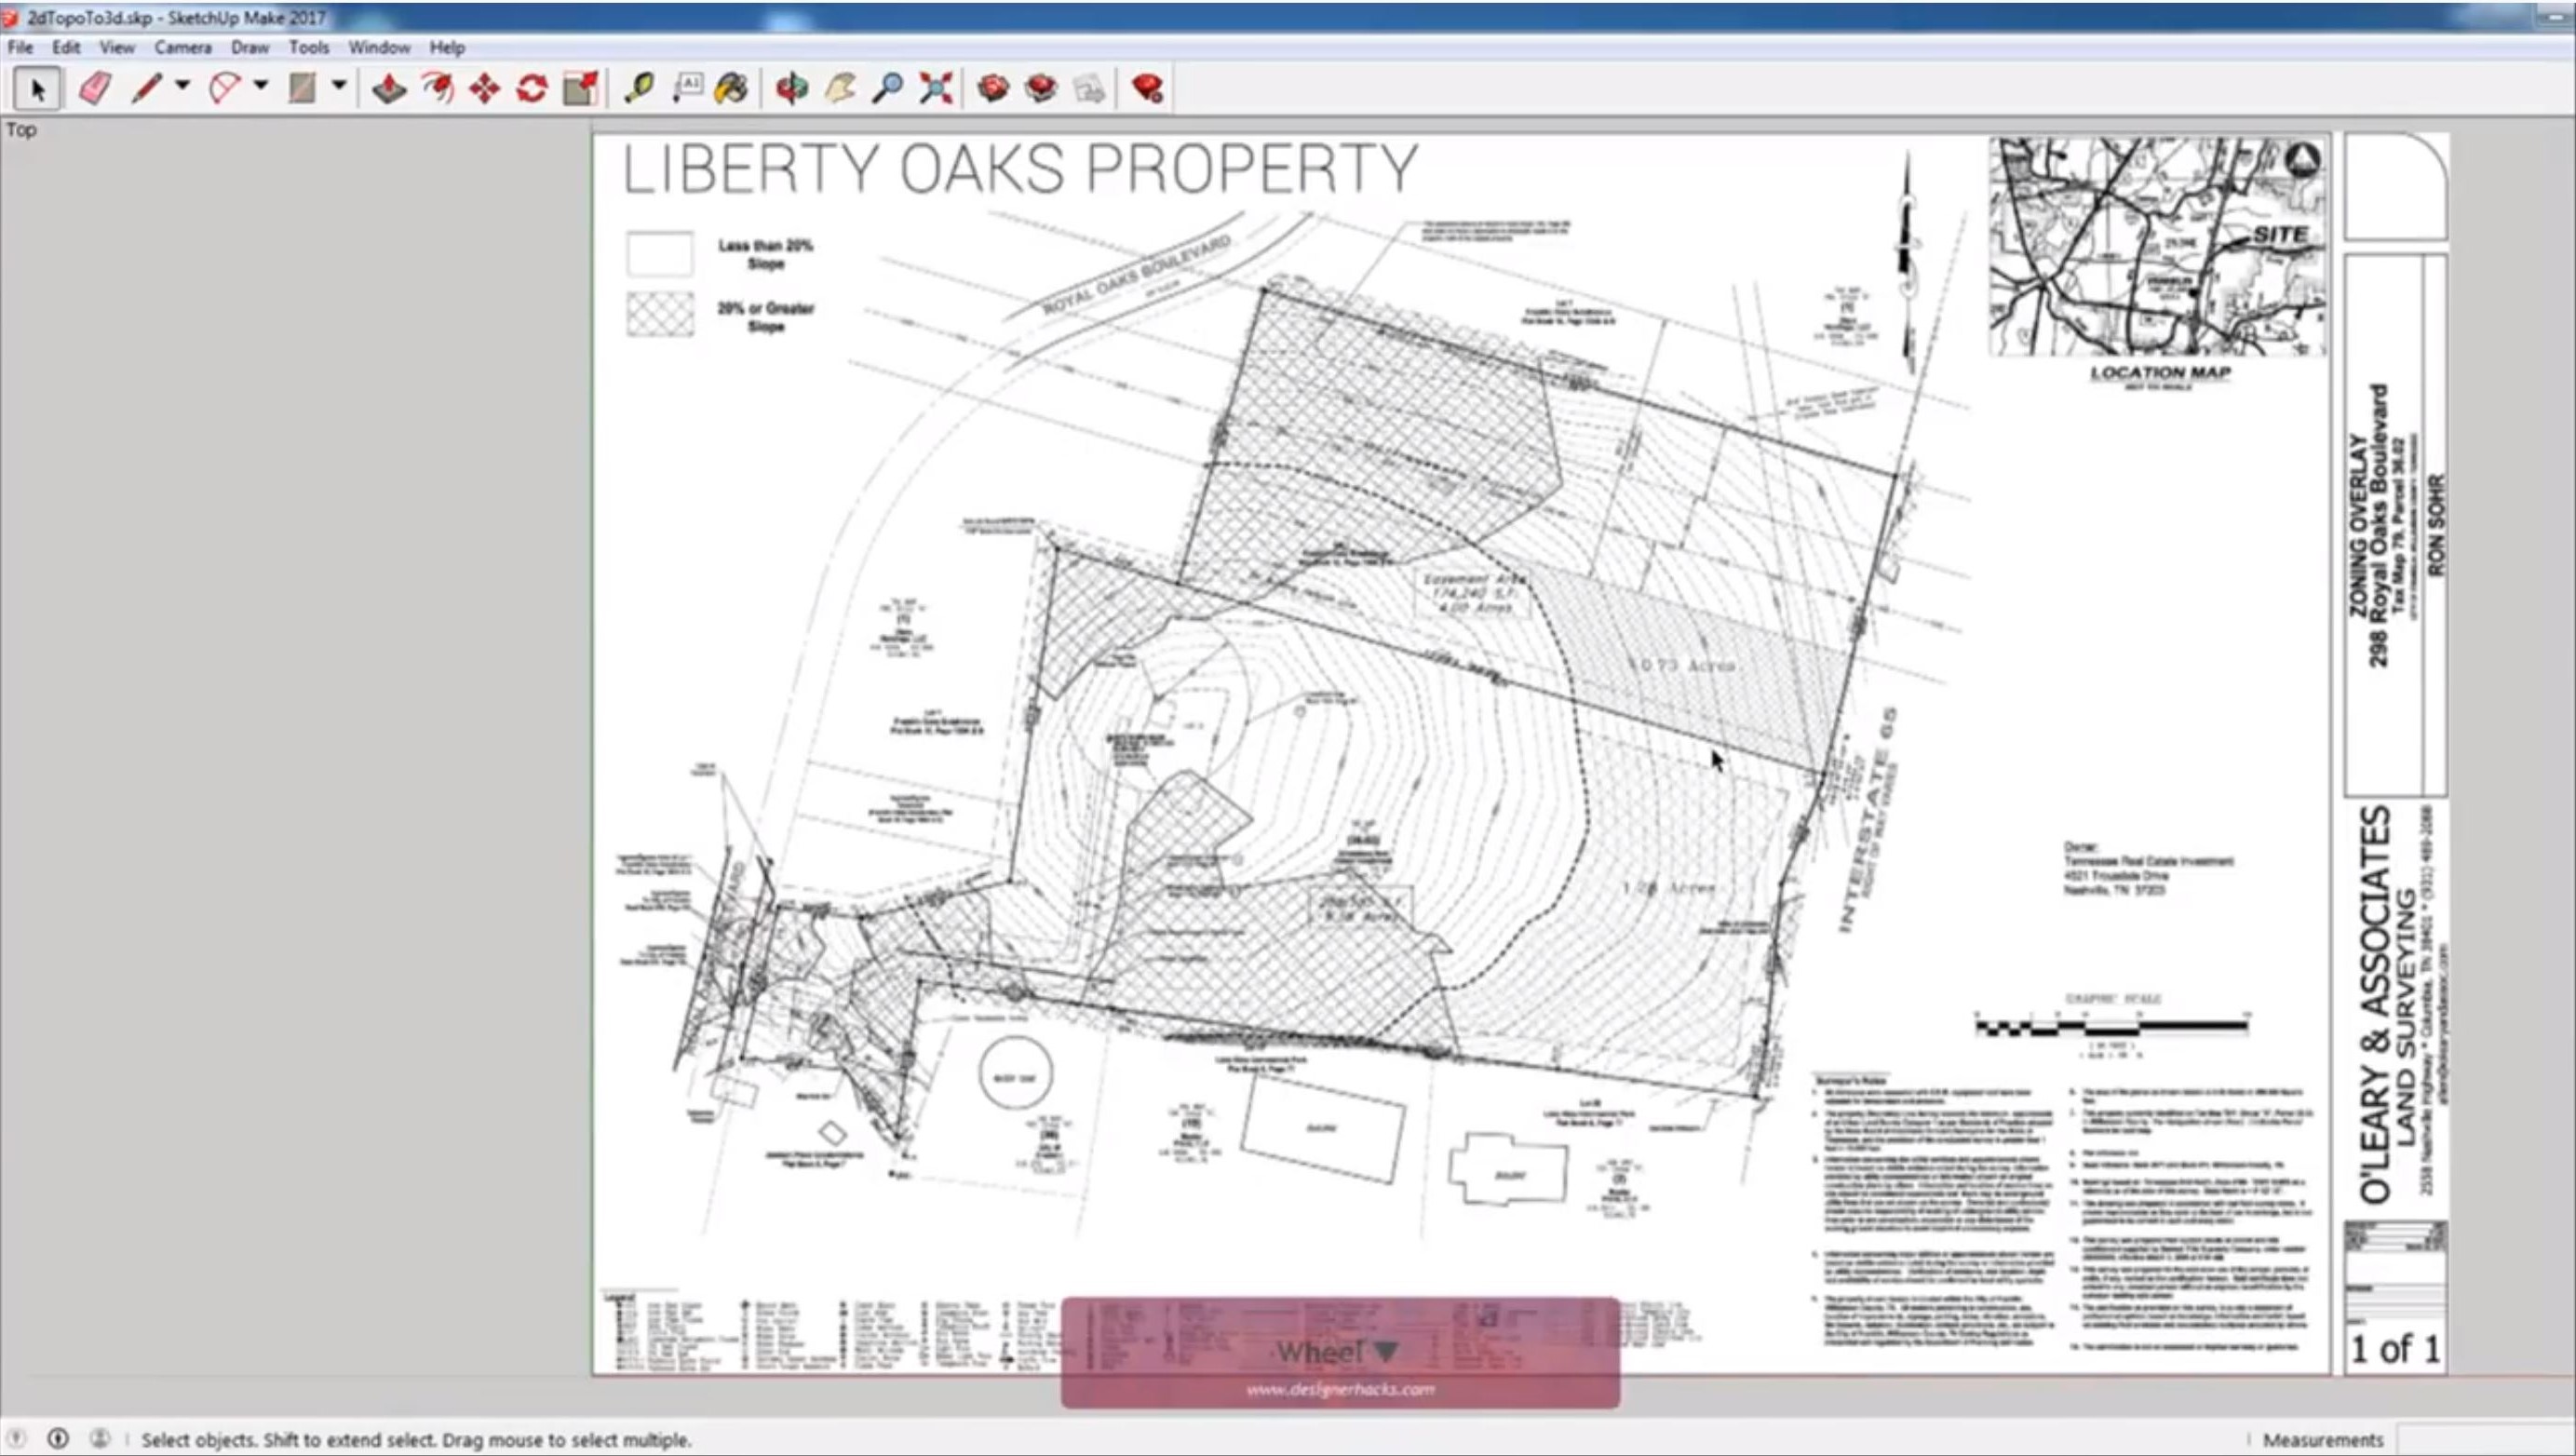
File > Import. The first step is to import the image that you want to convert from a 2D survey to 3D terrain. Select “import” from the file tab. In the lower right dropdown menu, make sure that “supported image type” is selected. Make sure the image you are using has a graphic scale so you can scale it properly in Sketchup. Select the image you wish to import and click “import.”
Scale Image. Click to place your image and roughly scale it to the correct size. To scale it accurately, select the tape measure tool and click from one end of the graphic scale to the other. Using the original image for reference, type in the total distance the graphic scale represents. In this case, 200 feet.
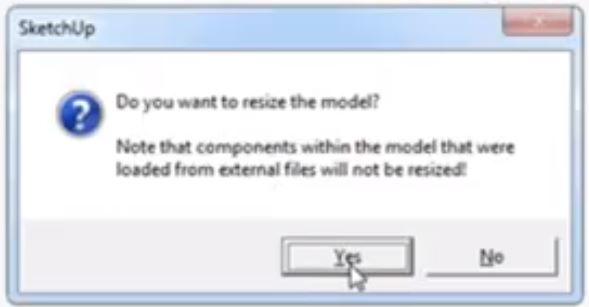
Resize Model. A message will appear asking if you want to resize the model. Select “yes.” Make sure you do this before you begin modeling anything.
Camera > Parallel Projection. Next, change the view from perspective by navigating to “camera” and selecting “parallel projection.” Then select “camera” > “standard view” > “top.” This will give you a flat view that will be easier to trace form.
Trace the Typographgy
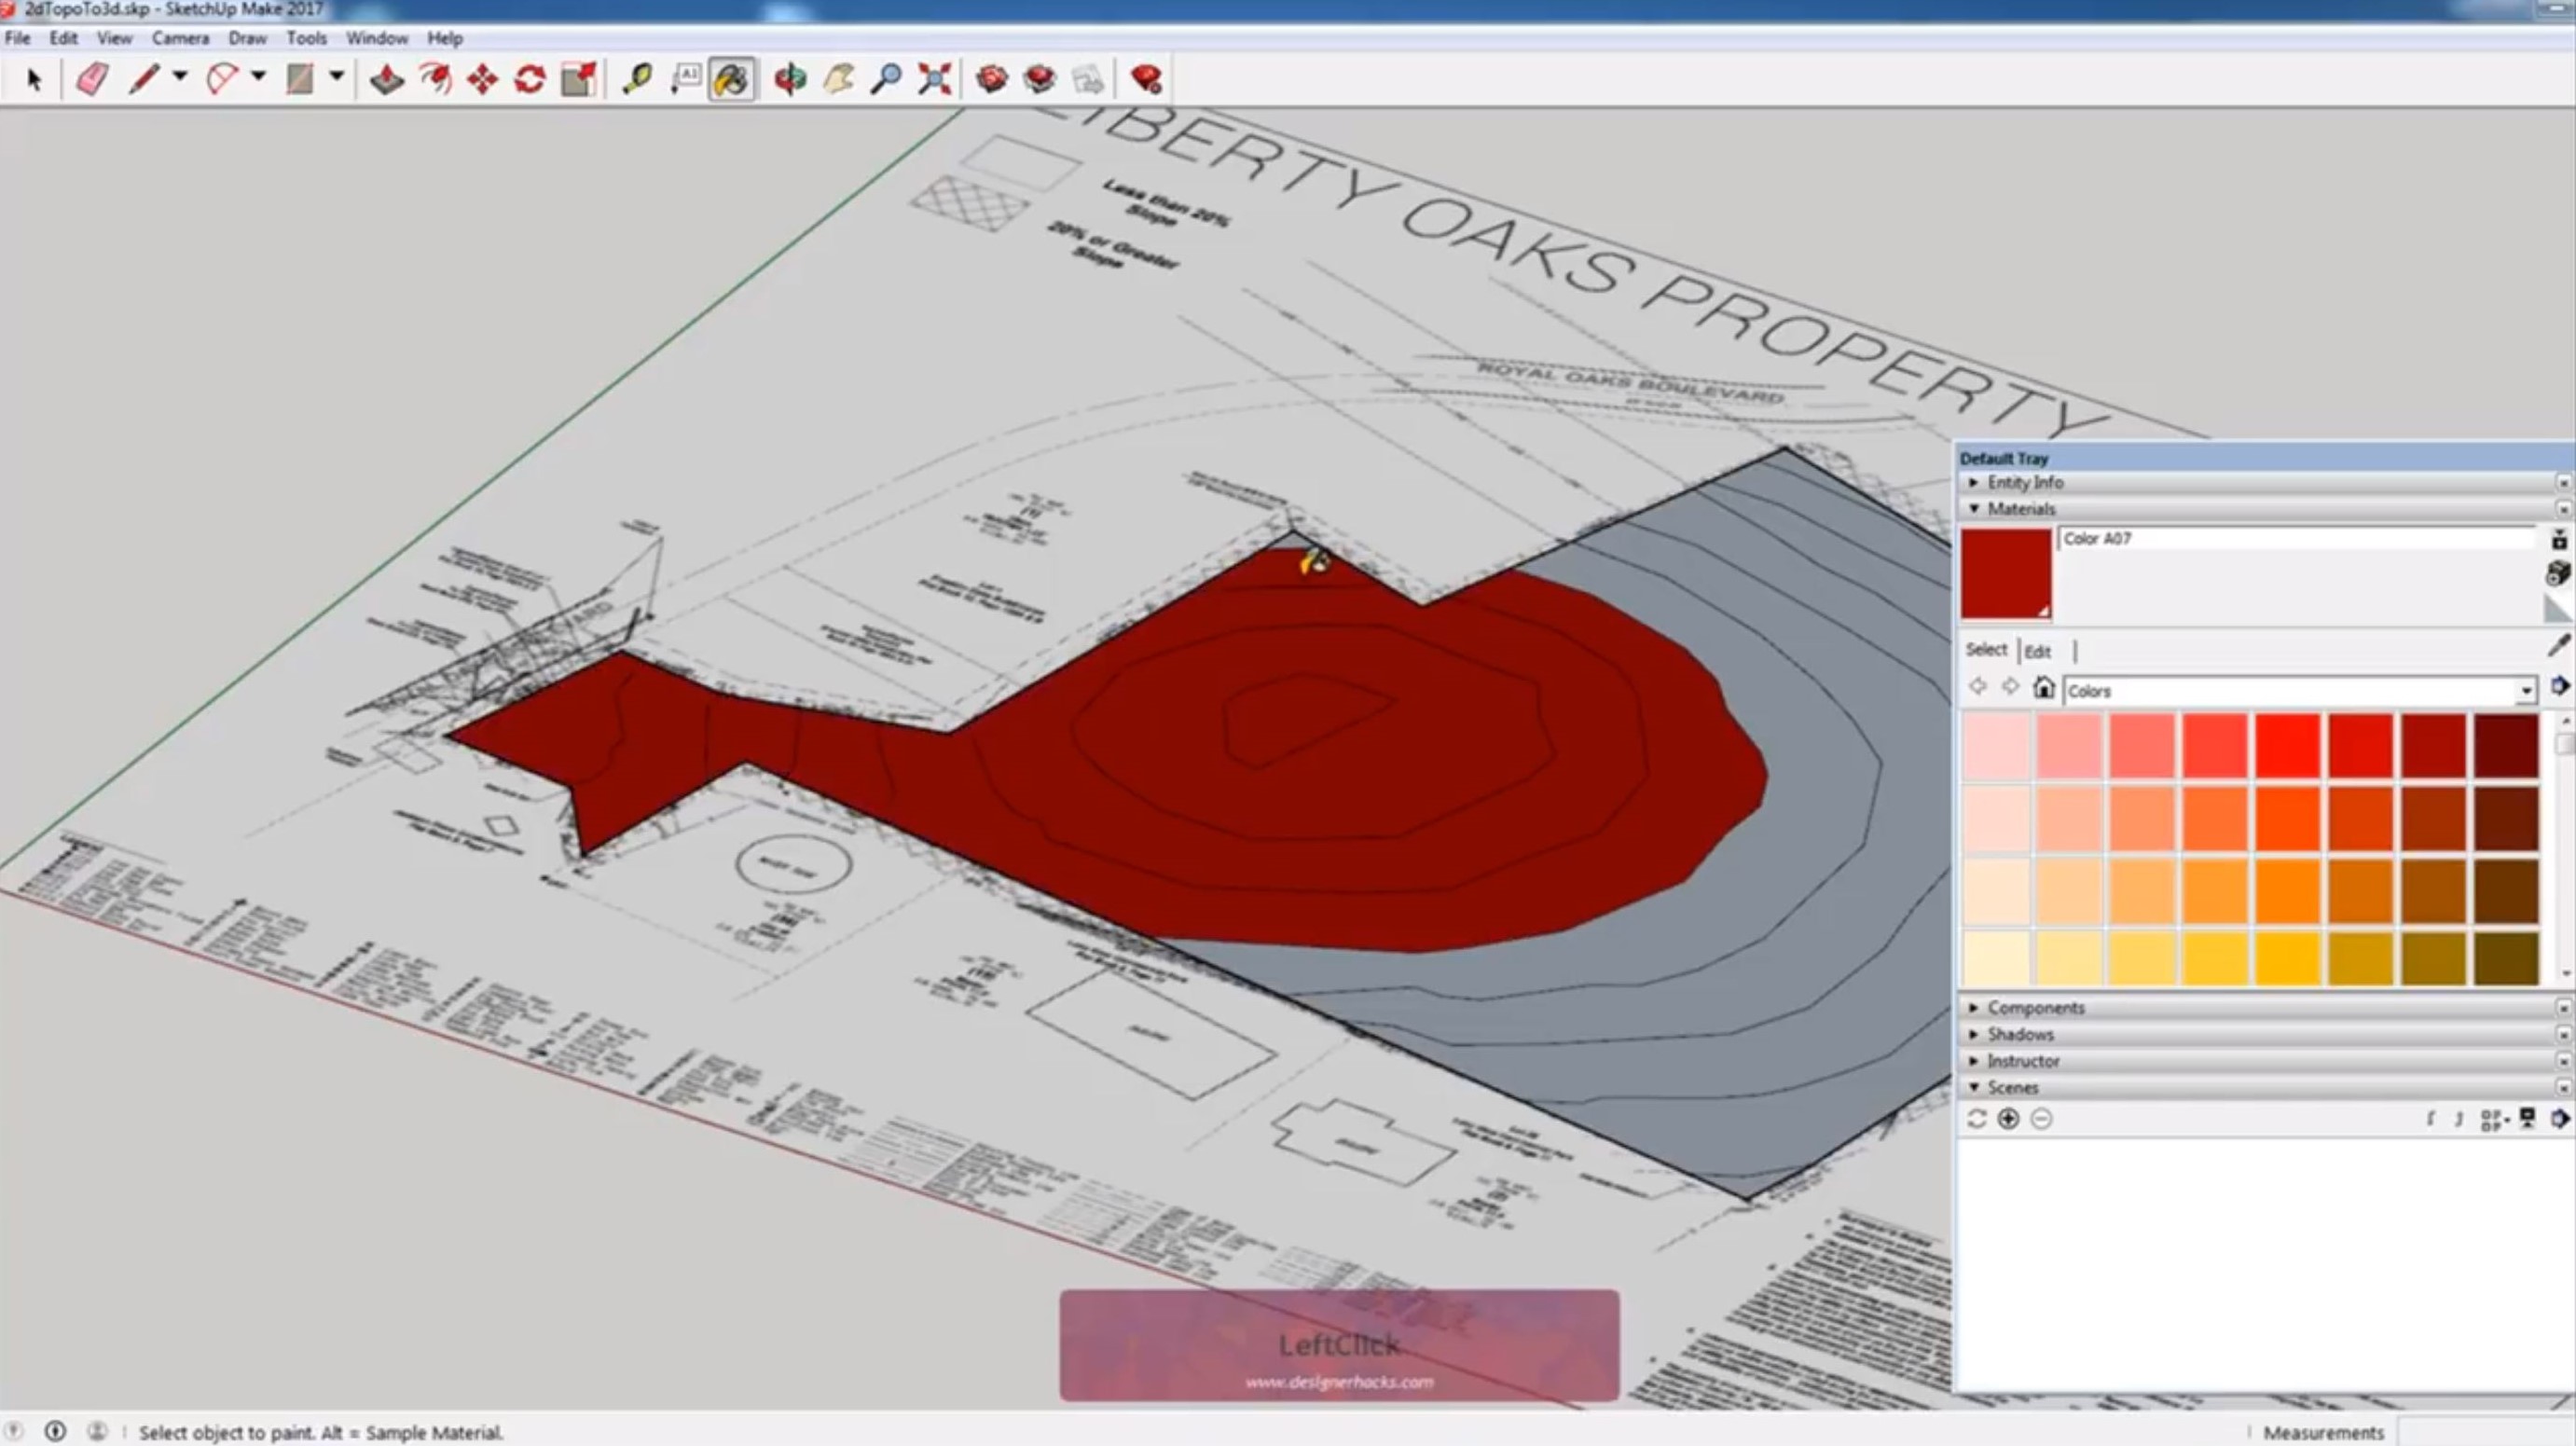
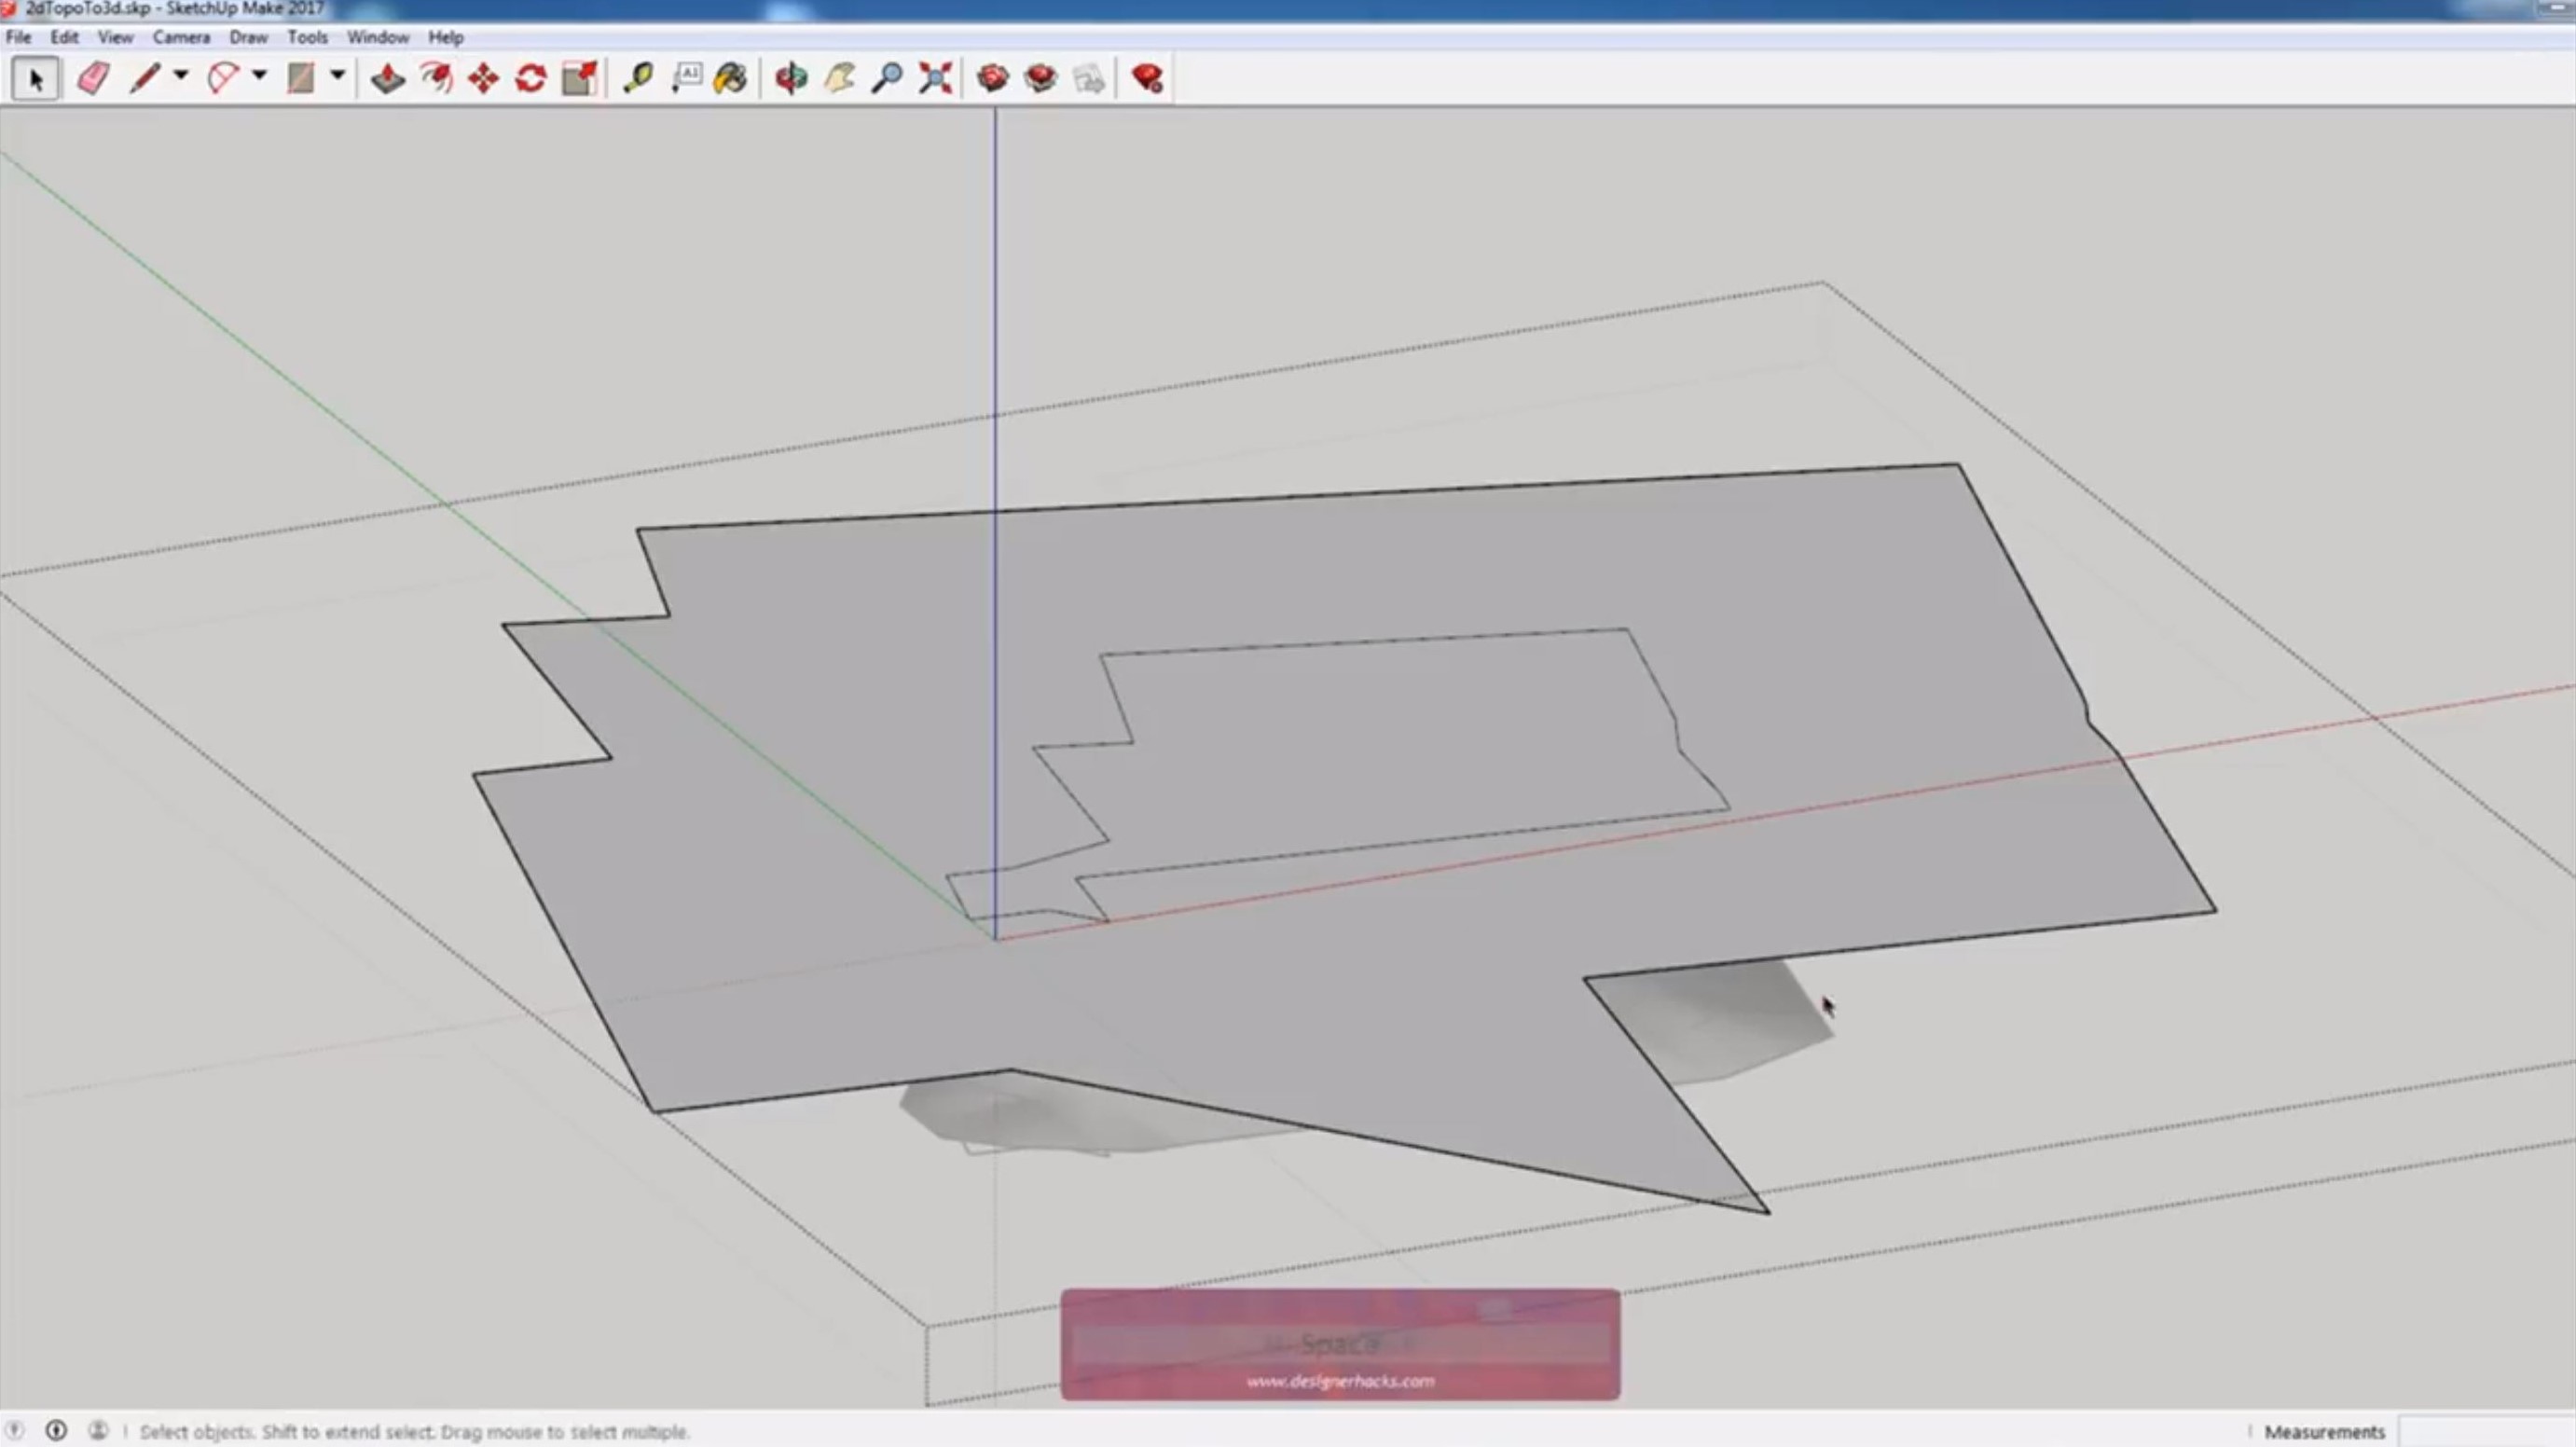
Trace. Begin by tracing the perimeter property line and then trace the topographic contour lines within the boundary. To do this, I recommend using the line tool.
Delete Faces. To quickly select all of the faces, press “b” on your keyboard. Select a color and triple click on the faces to select all of them. Use the bucket to paint them all the same material. Right click on one of the faces and click on “select” > “all with same material” and then hit “delete” on your keyboard. At this point, you can also delete the imported image if it is too pixelated to read accurate measurements from.
Convert Survey to 3D Model
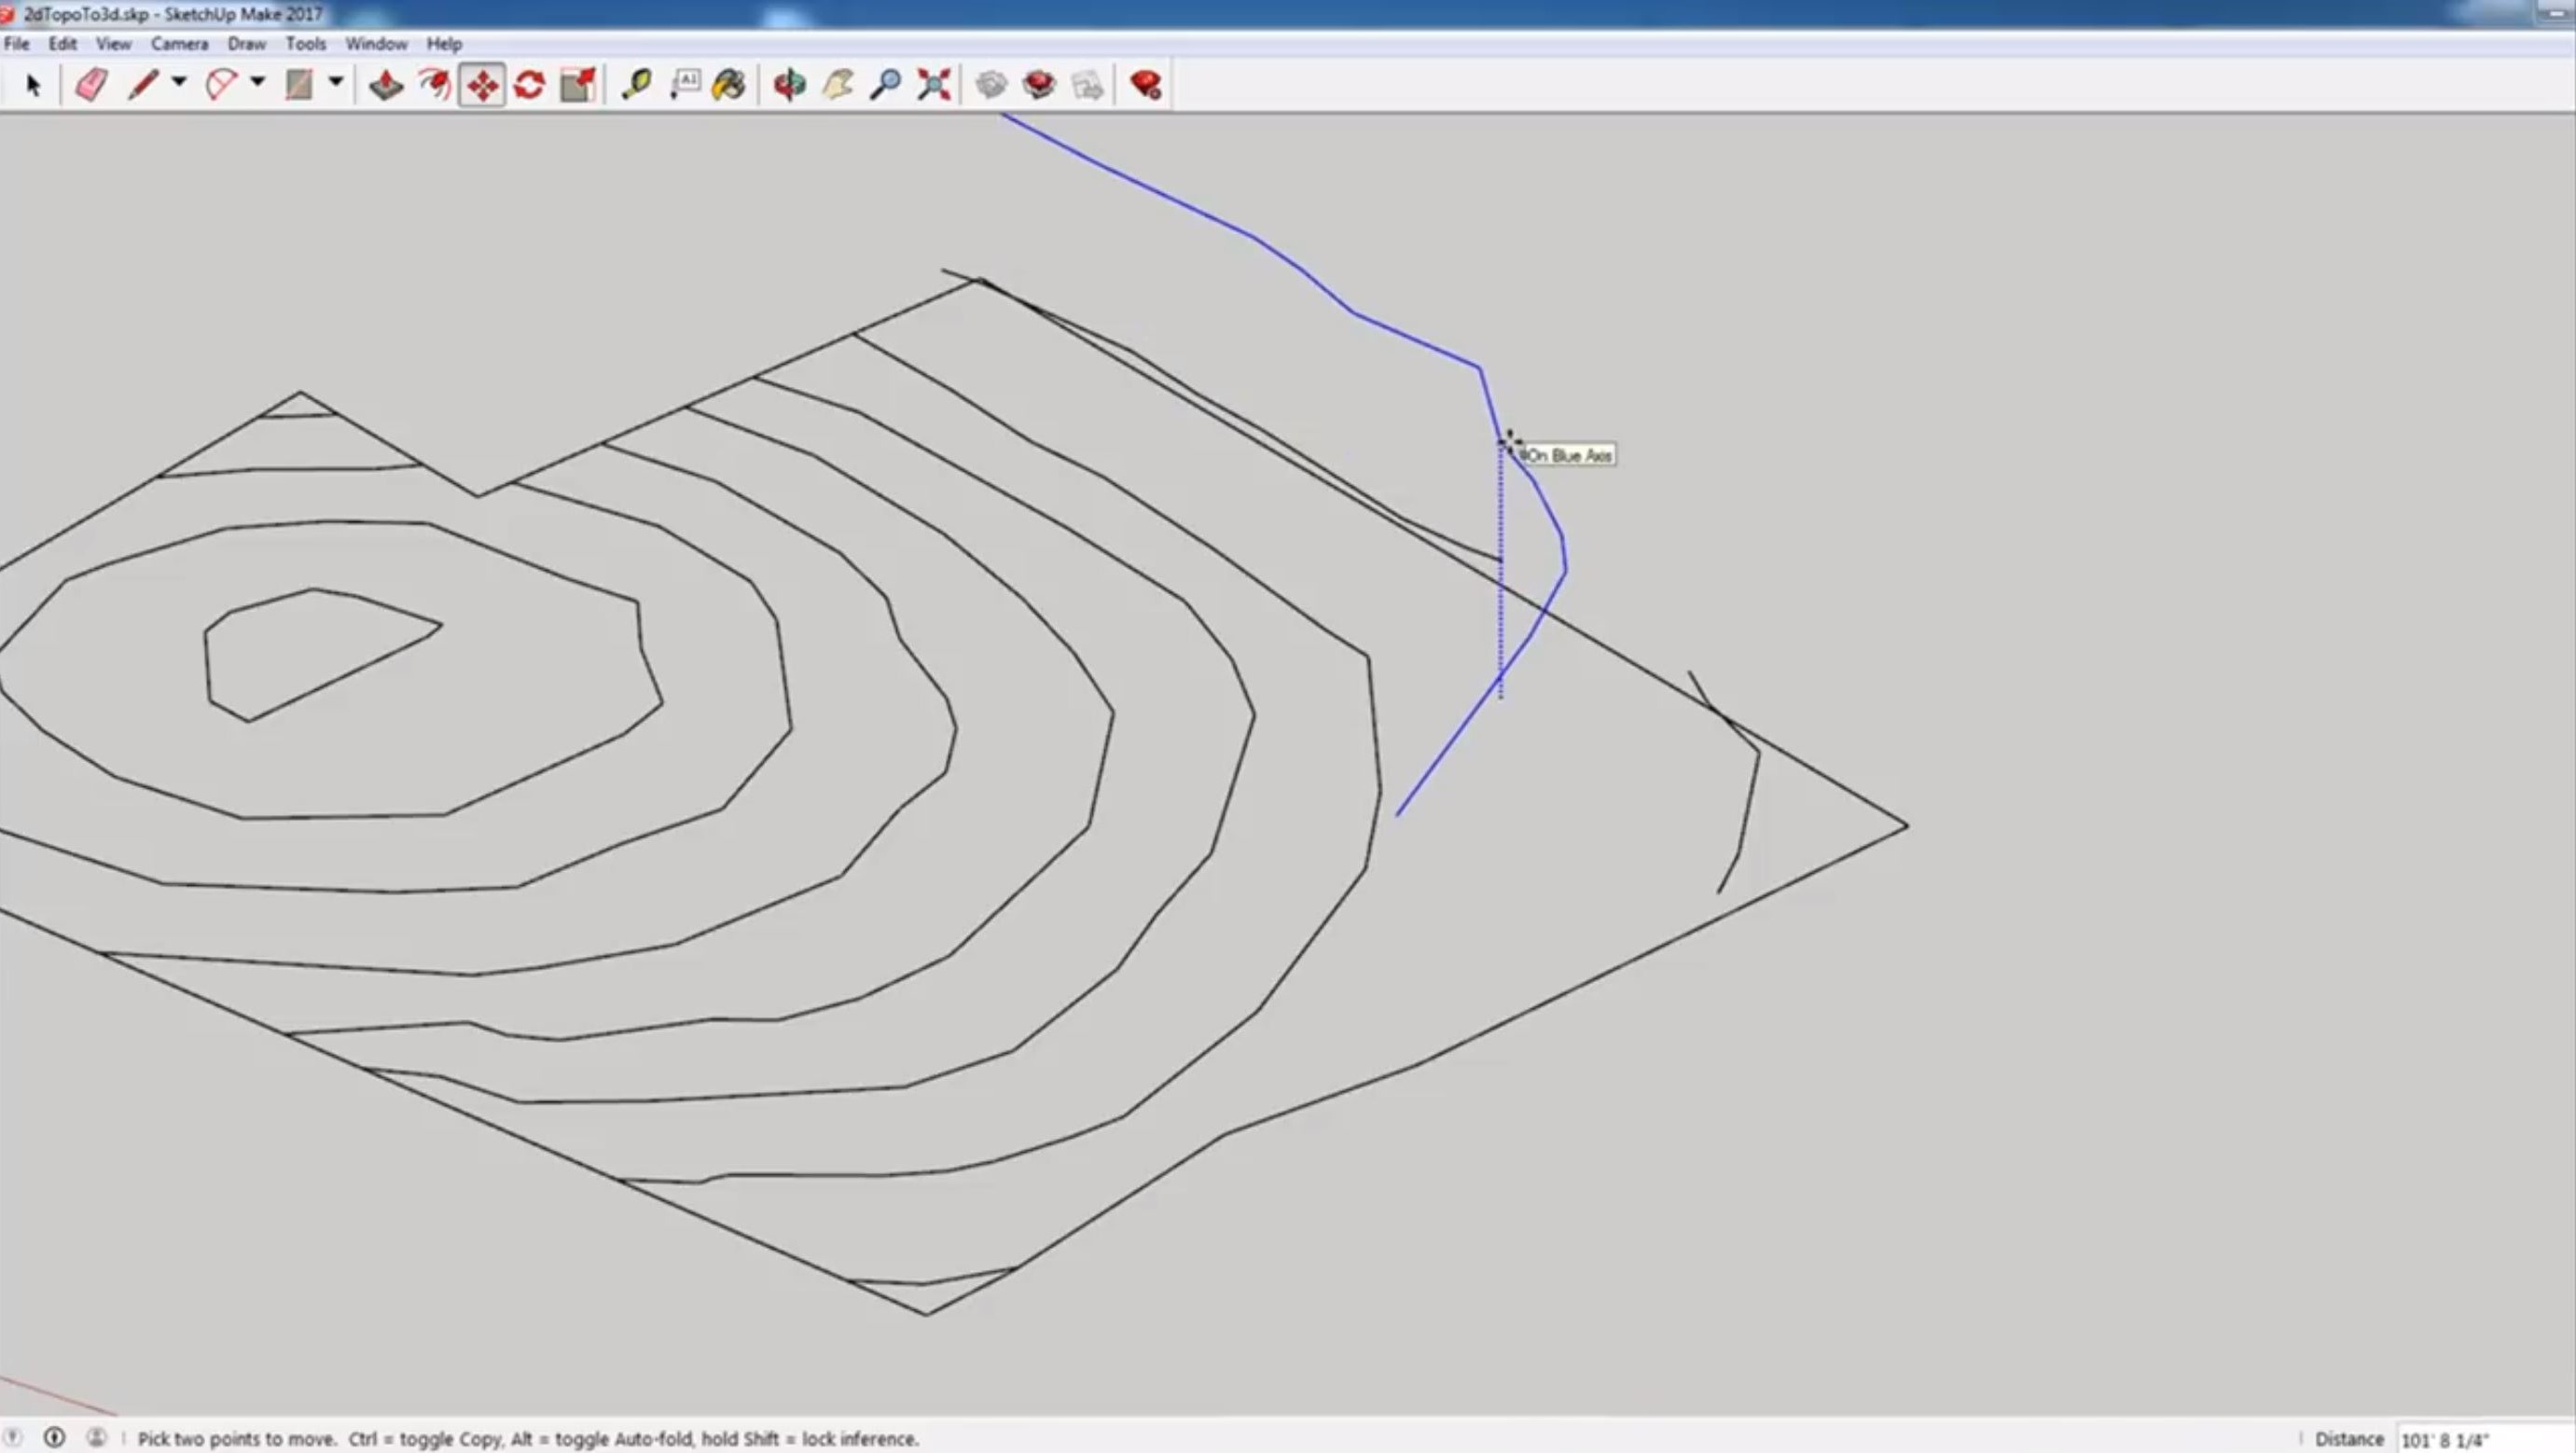
Edit > Make Group. While holding “ctrl” on your keyboard, click and drag your mouse to select the property boundary lines. Then click on “edit” > “make group.” Now that the property line is grouped, you can separately move each topographic line.
To move the 2D contour lines, select one and press the “up arrow” on your keyboard so that it is locked on the z-axis. Type in the appropriate height for each line. You may have to refer to your original typographic image to get the measurements.
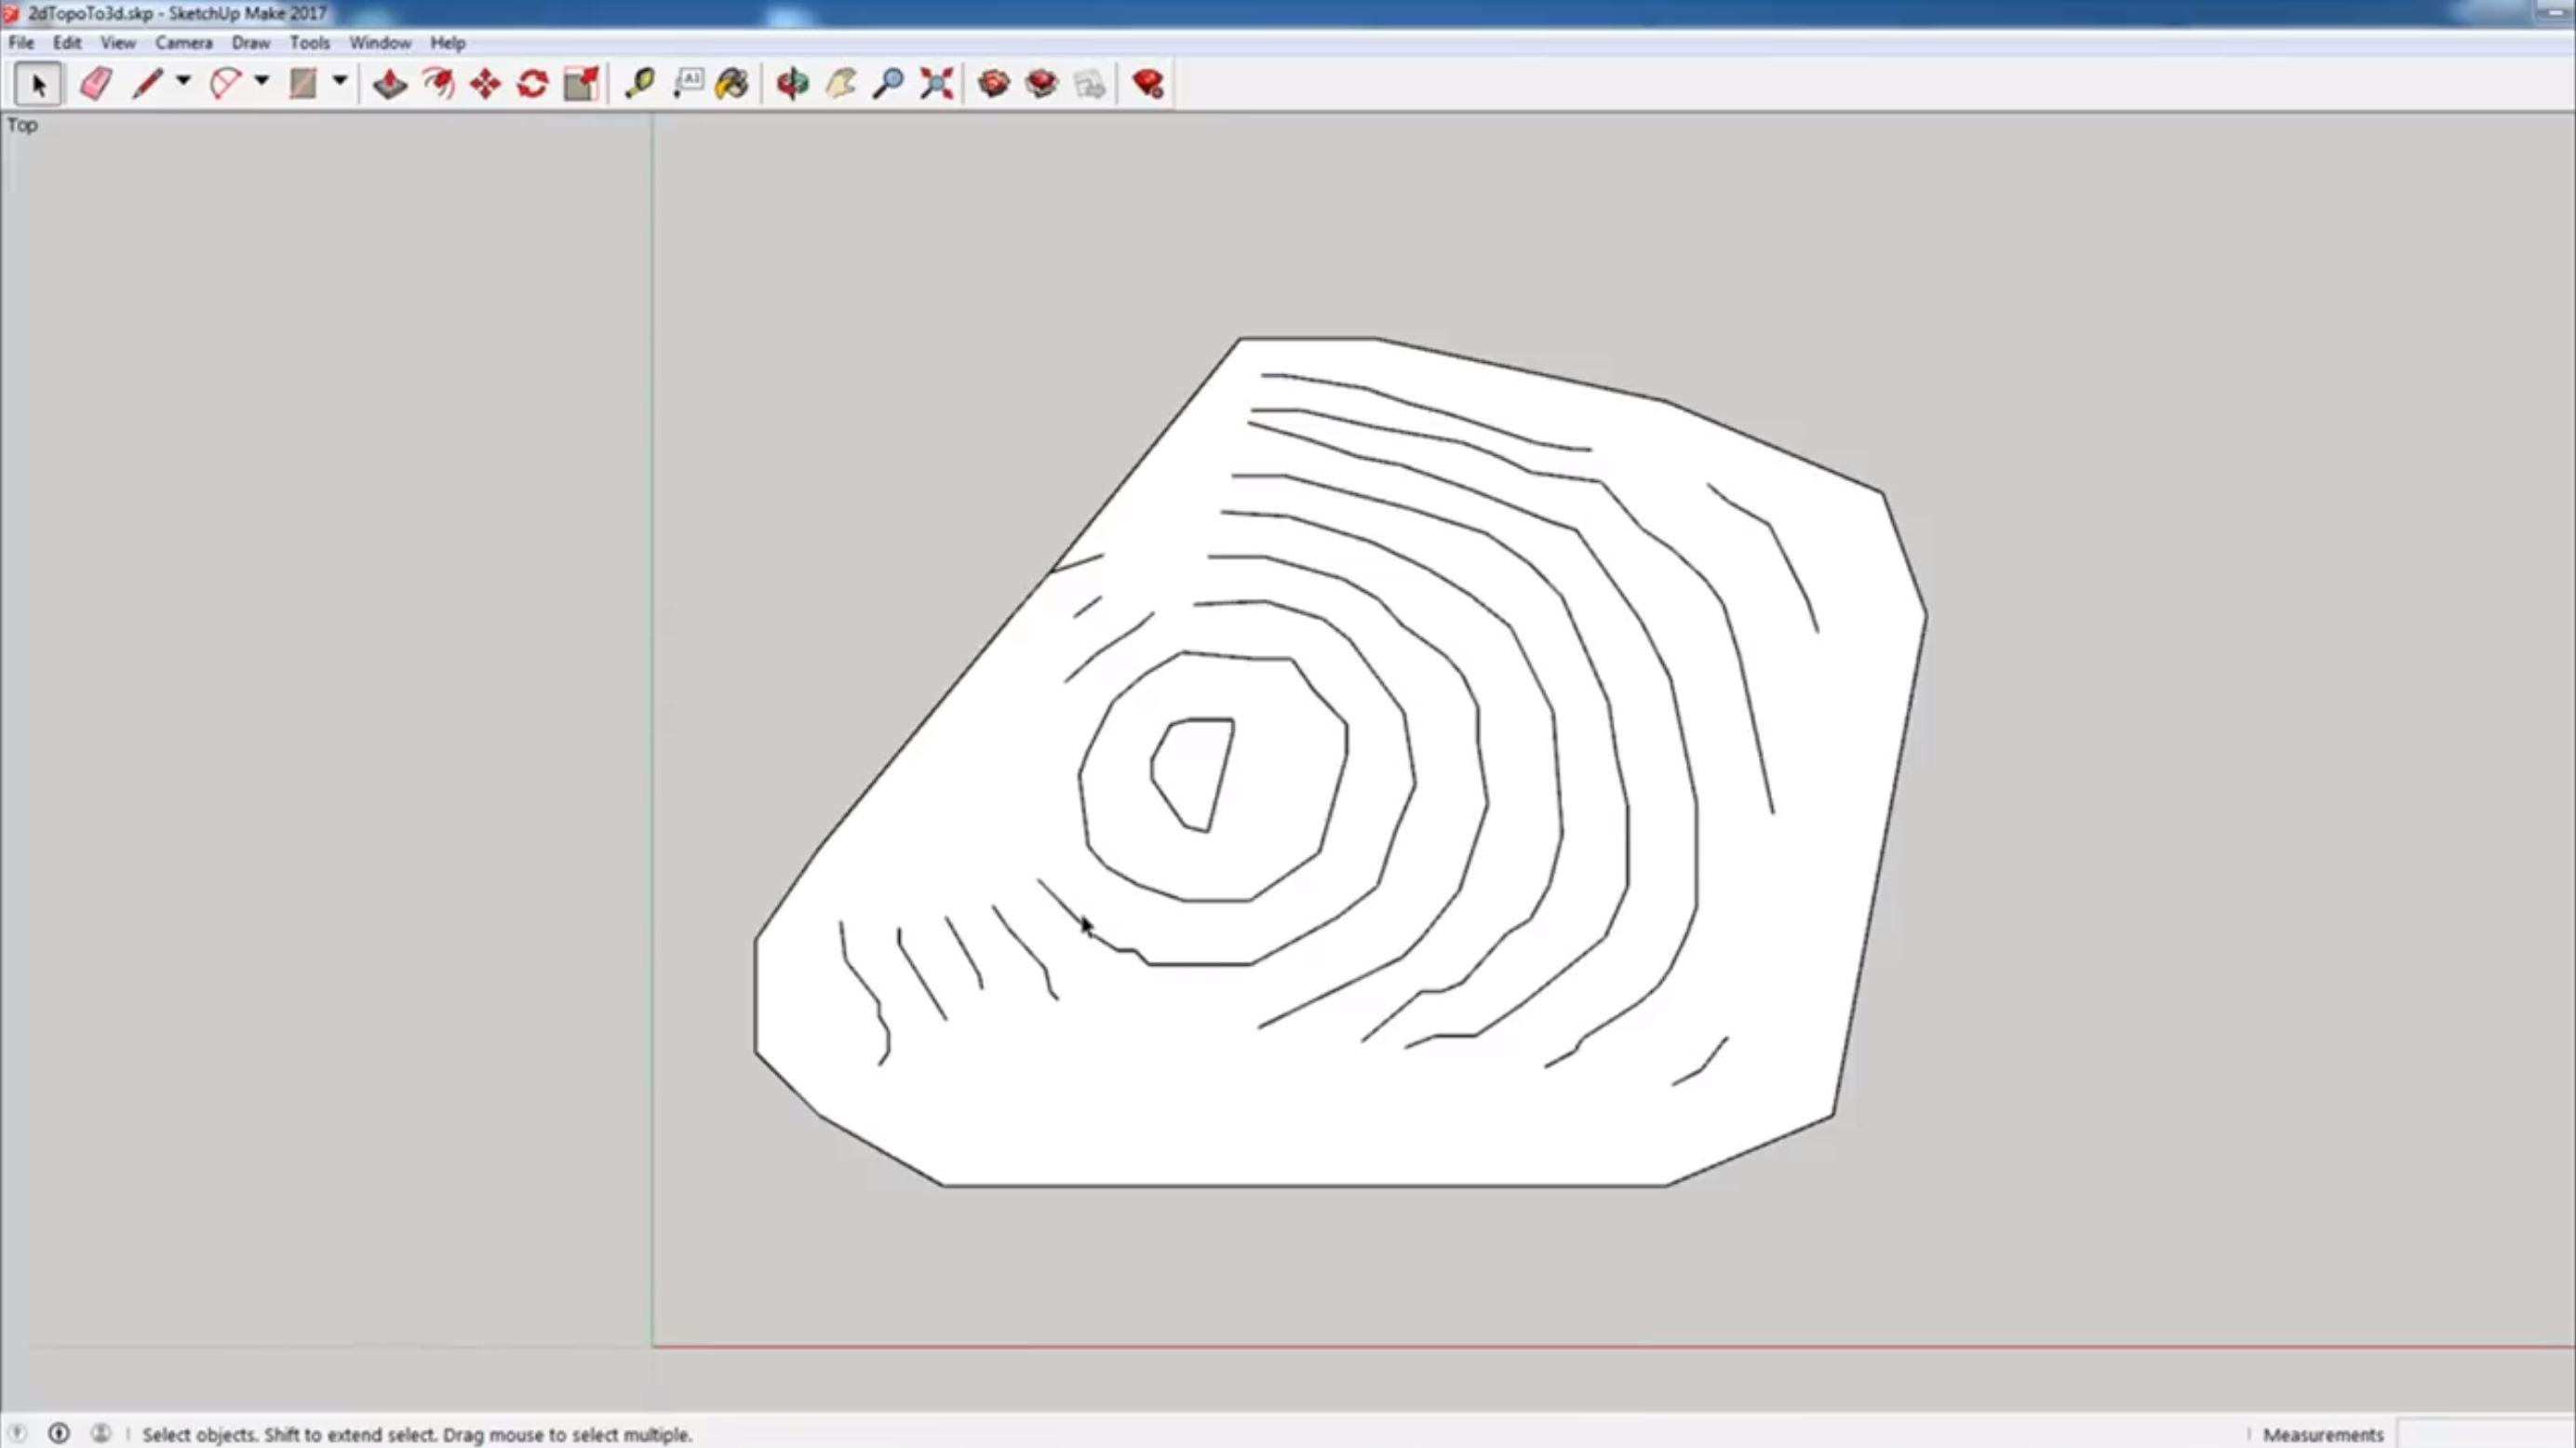
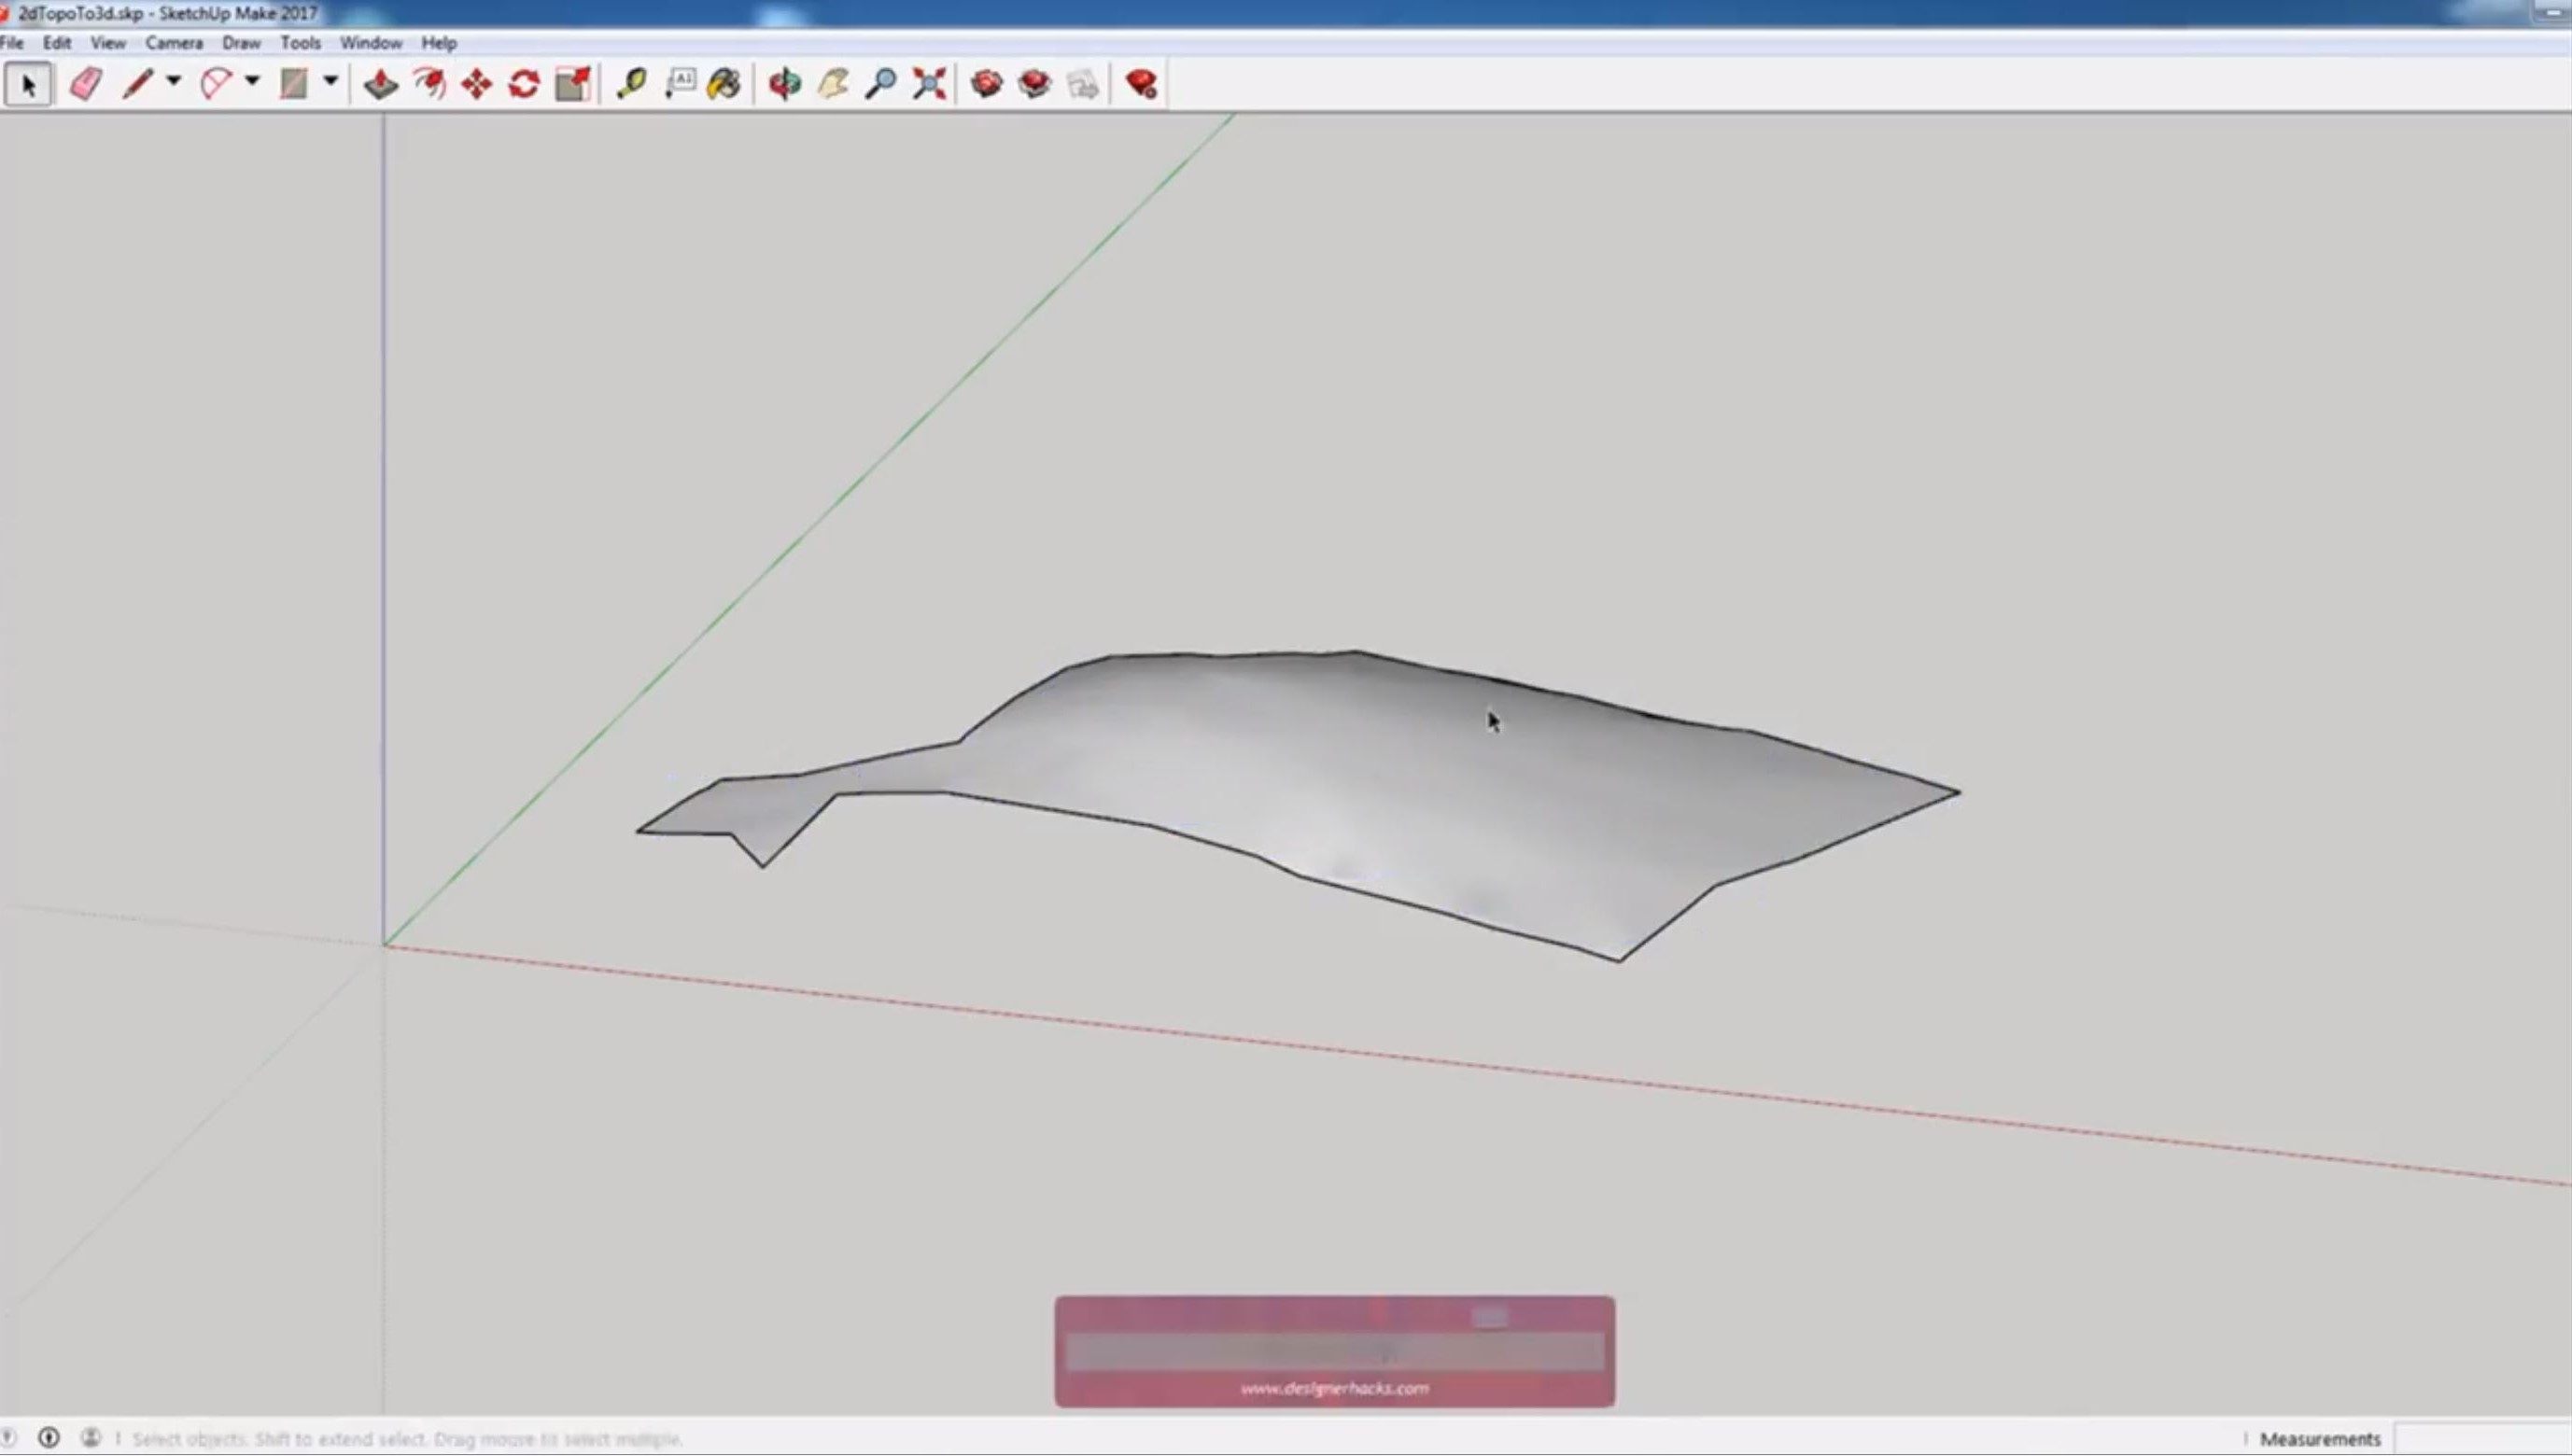
Draw > Sandbox > From Contours. Now is the time to transform the 2D survey into a 3D model. Highlight all of your lines and deselect the property line. Navigate to “draw” > “sandbox” and select “from contours.”
If you view the current terrain from the top, you will notice that the 3D model does not extend all the way to the edge of the property line. This is because we do not have information for the terrain beyond the property line. Unfortunately, we will just have to take a guess at how the terrain continues. A good way is to assume that the contours will continue in the same direction.
Roughly draw additional contour lines beyond the property line that replicate the other contours. Select each line and change the height to correspond with the decreasing increments of the original contour lines you drew.
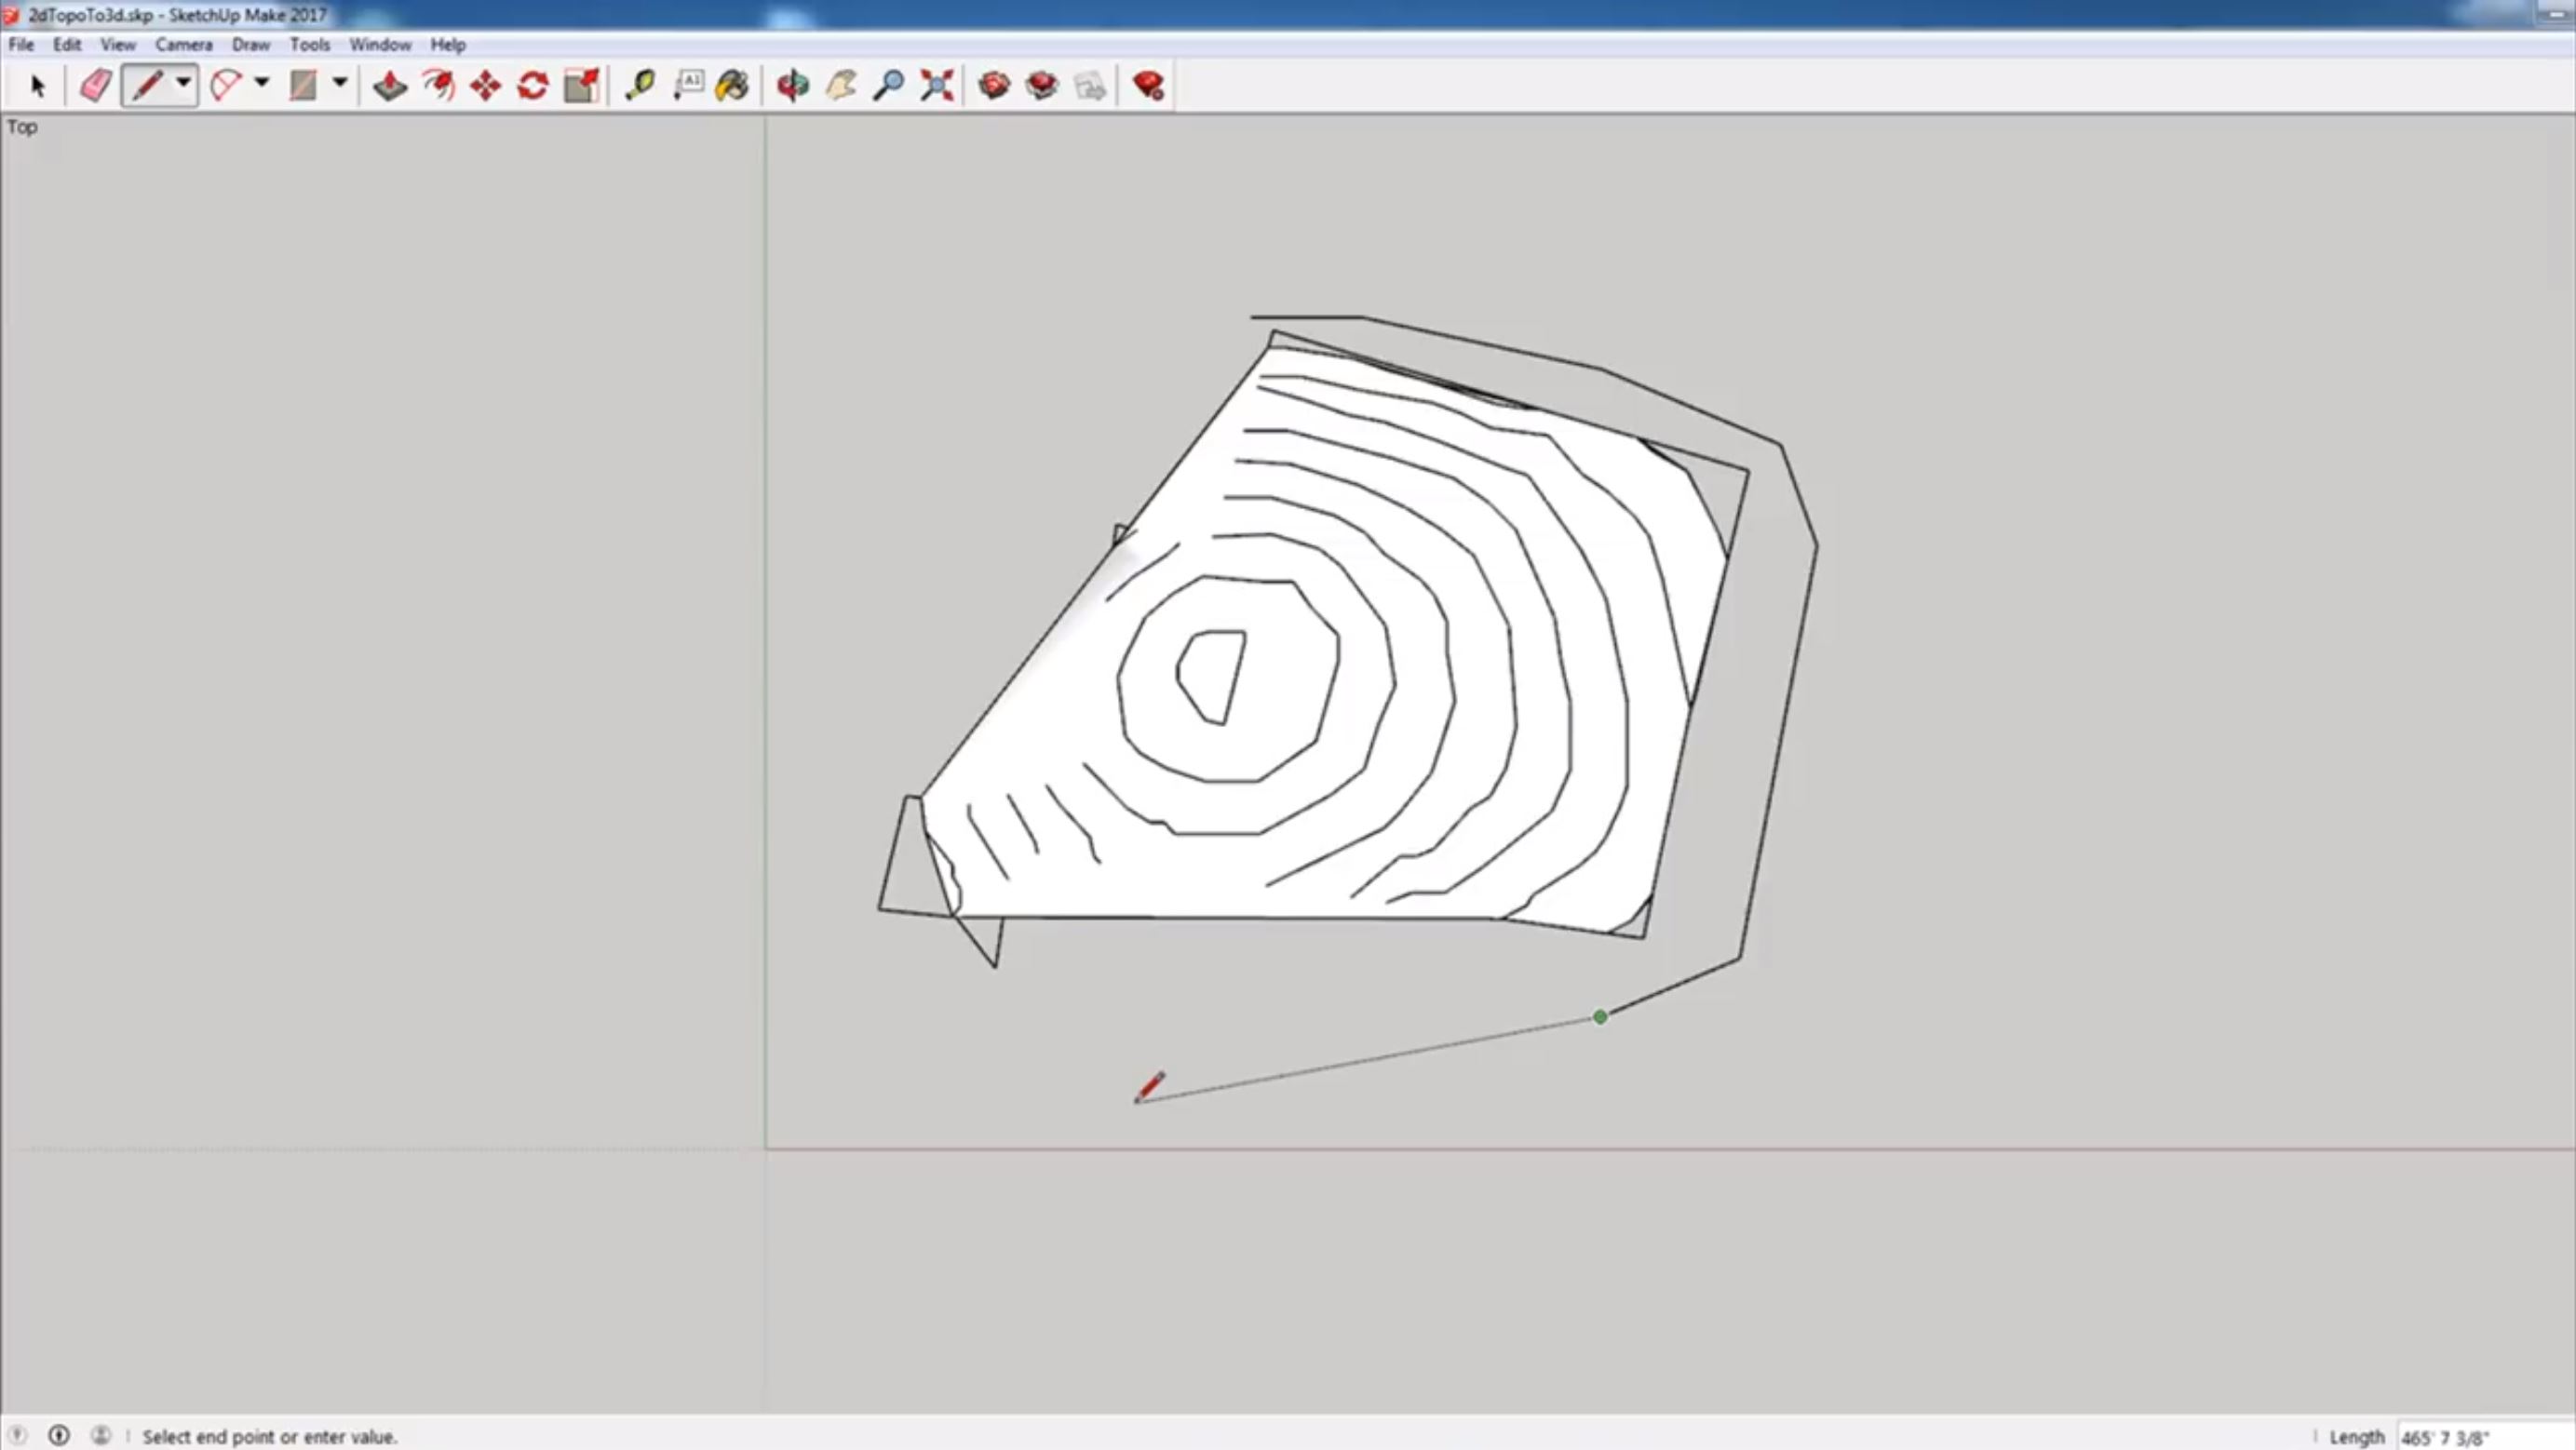
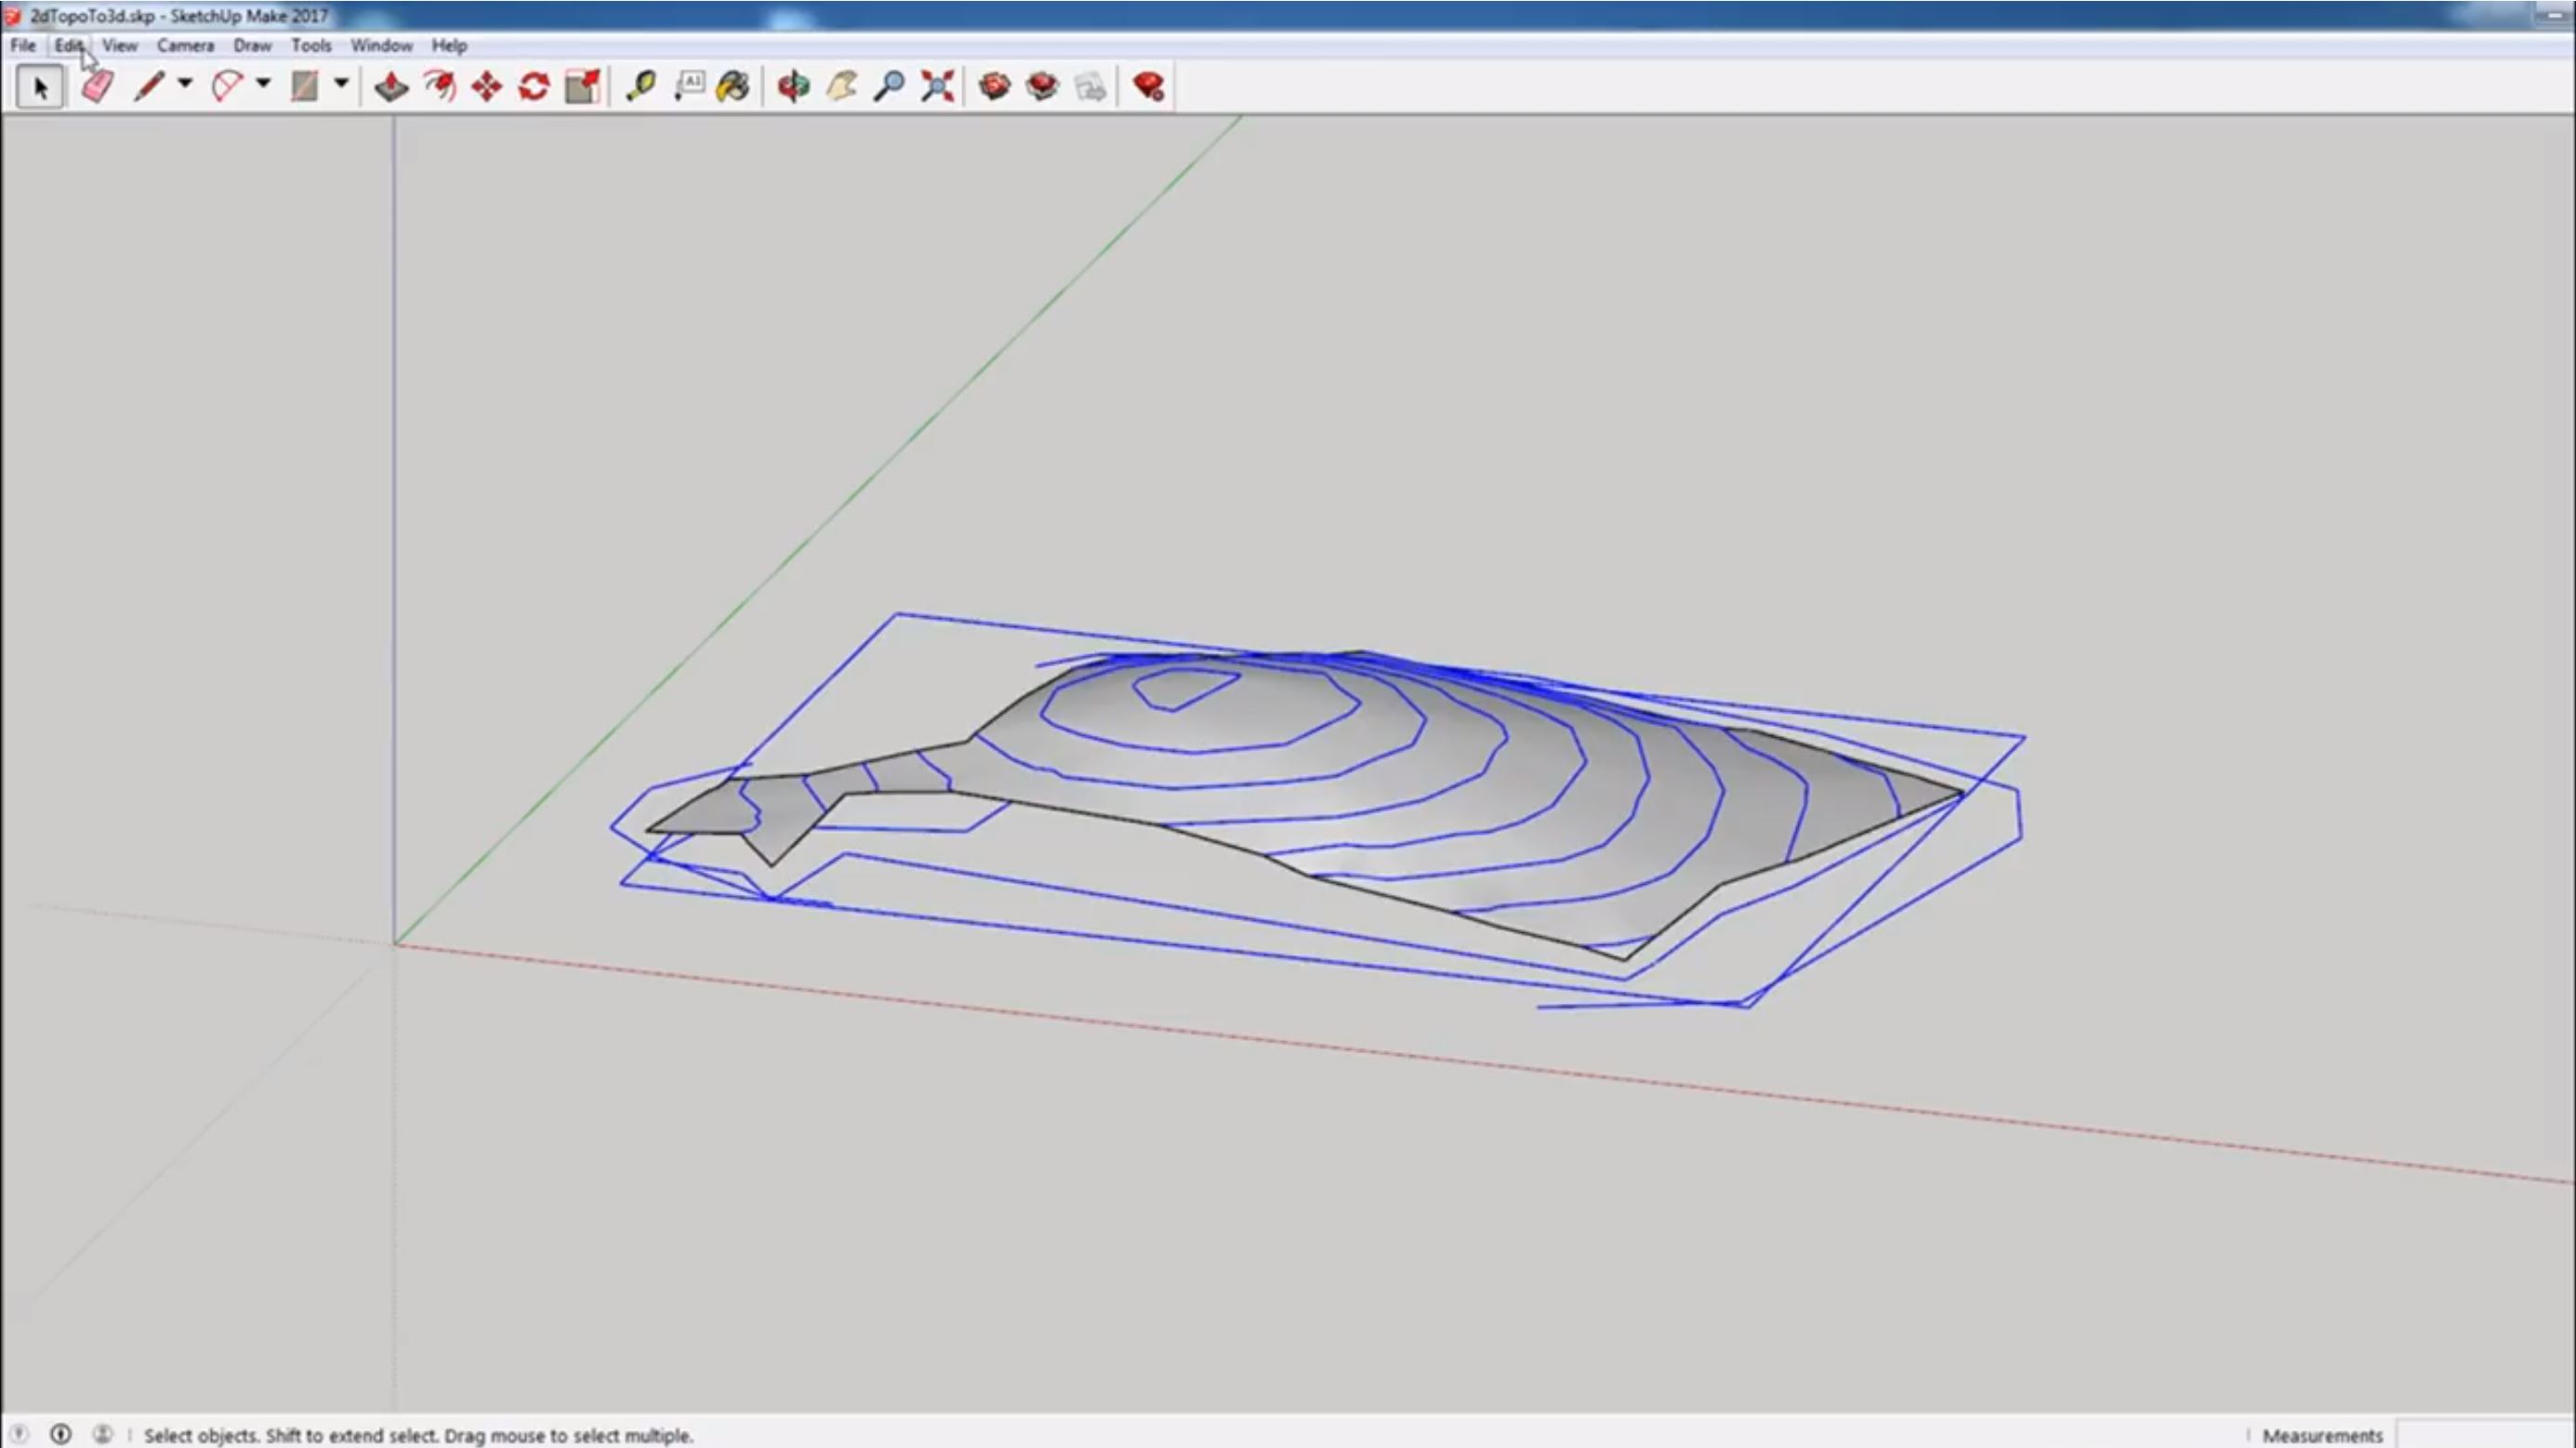
Select all of the contour lines again, be sure to deselect the property line, and navigate to “draw” > “sandbox” > “from contours.” If you go the top view, you will see that all of the contours now cover the entire site.
Trimming
Trim Contours. Now that all of the contour lines are drawn, you want to trim them so that they are in the shape of the actual site. Select the property line group and copy it above your contour lines. Make sure the group is completely closed off.
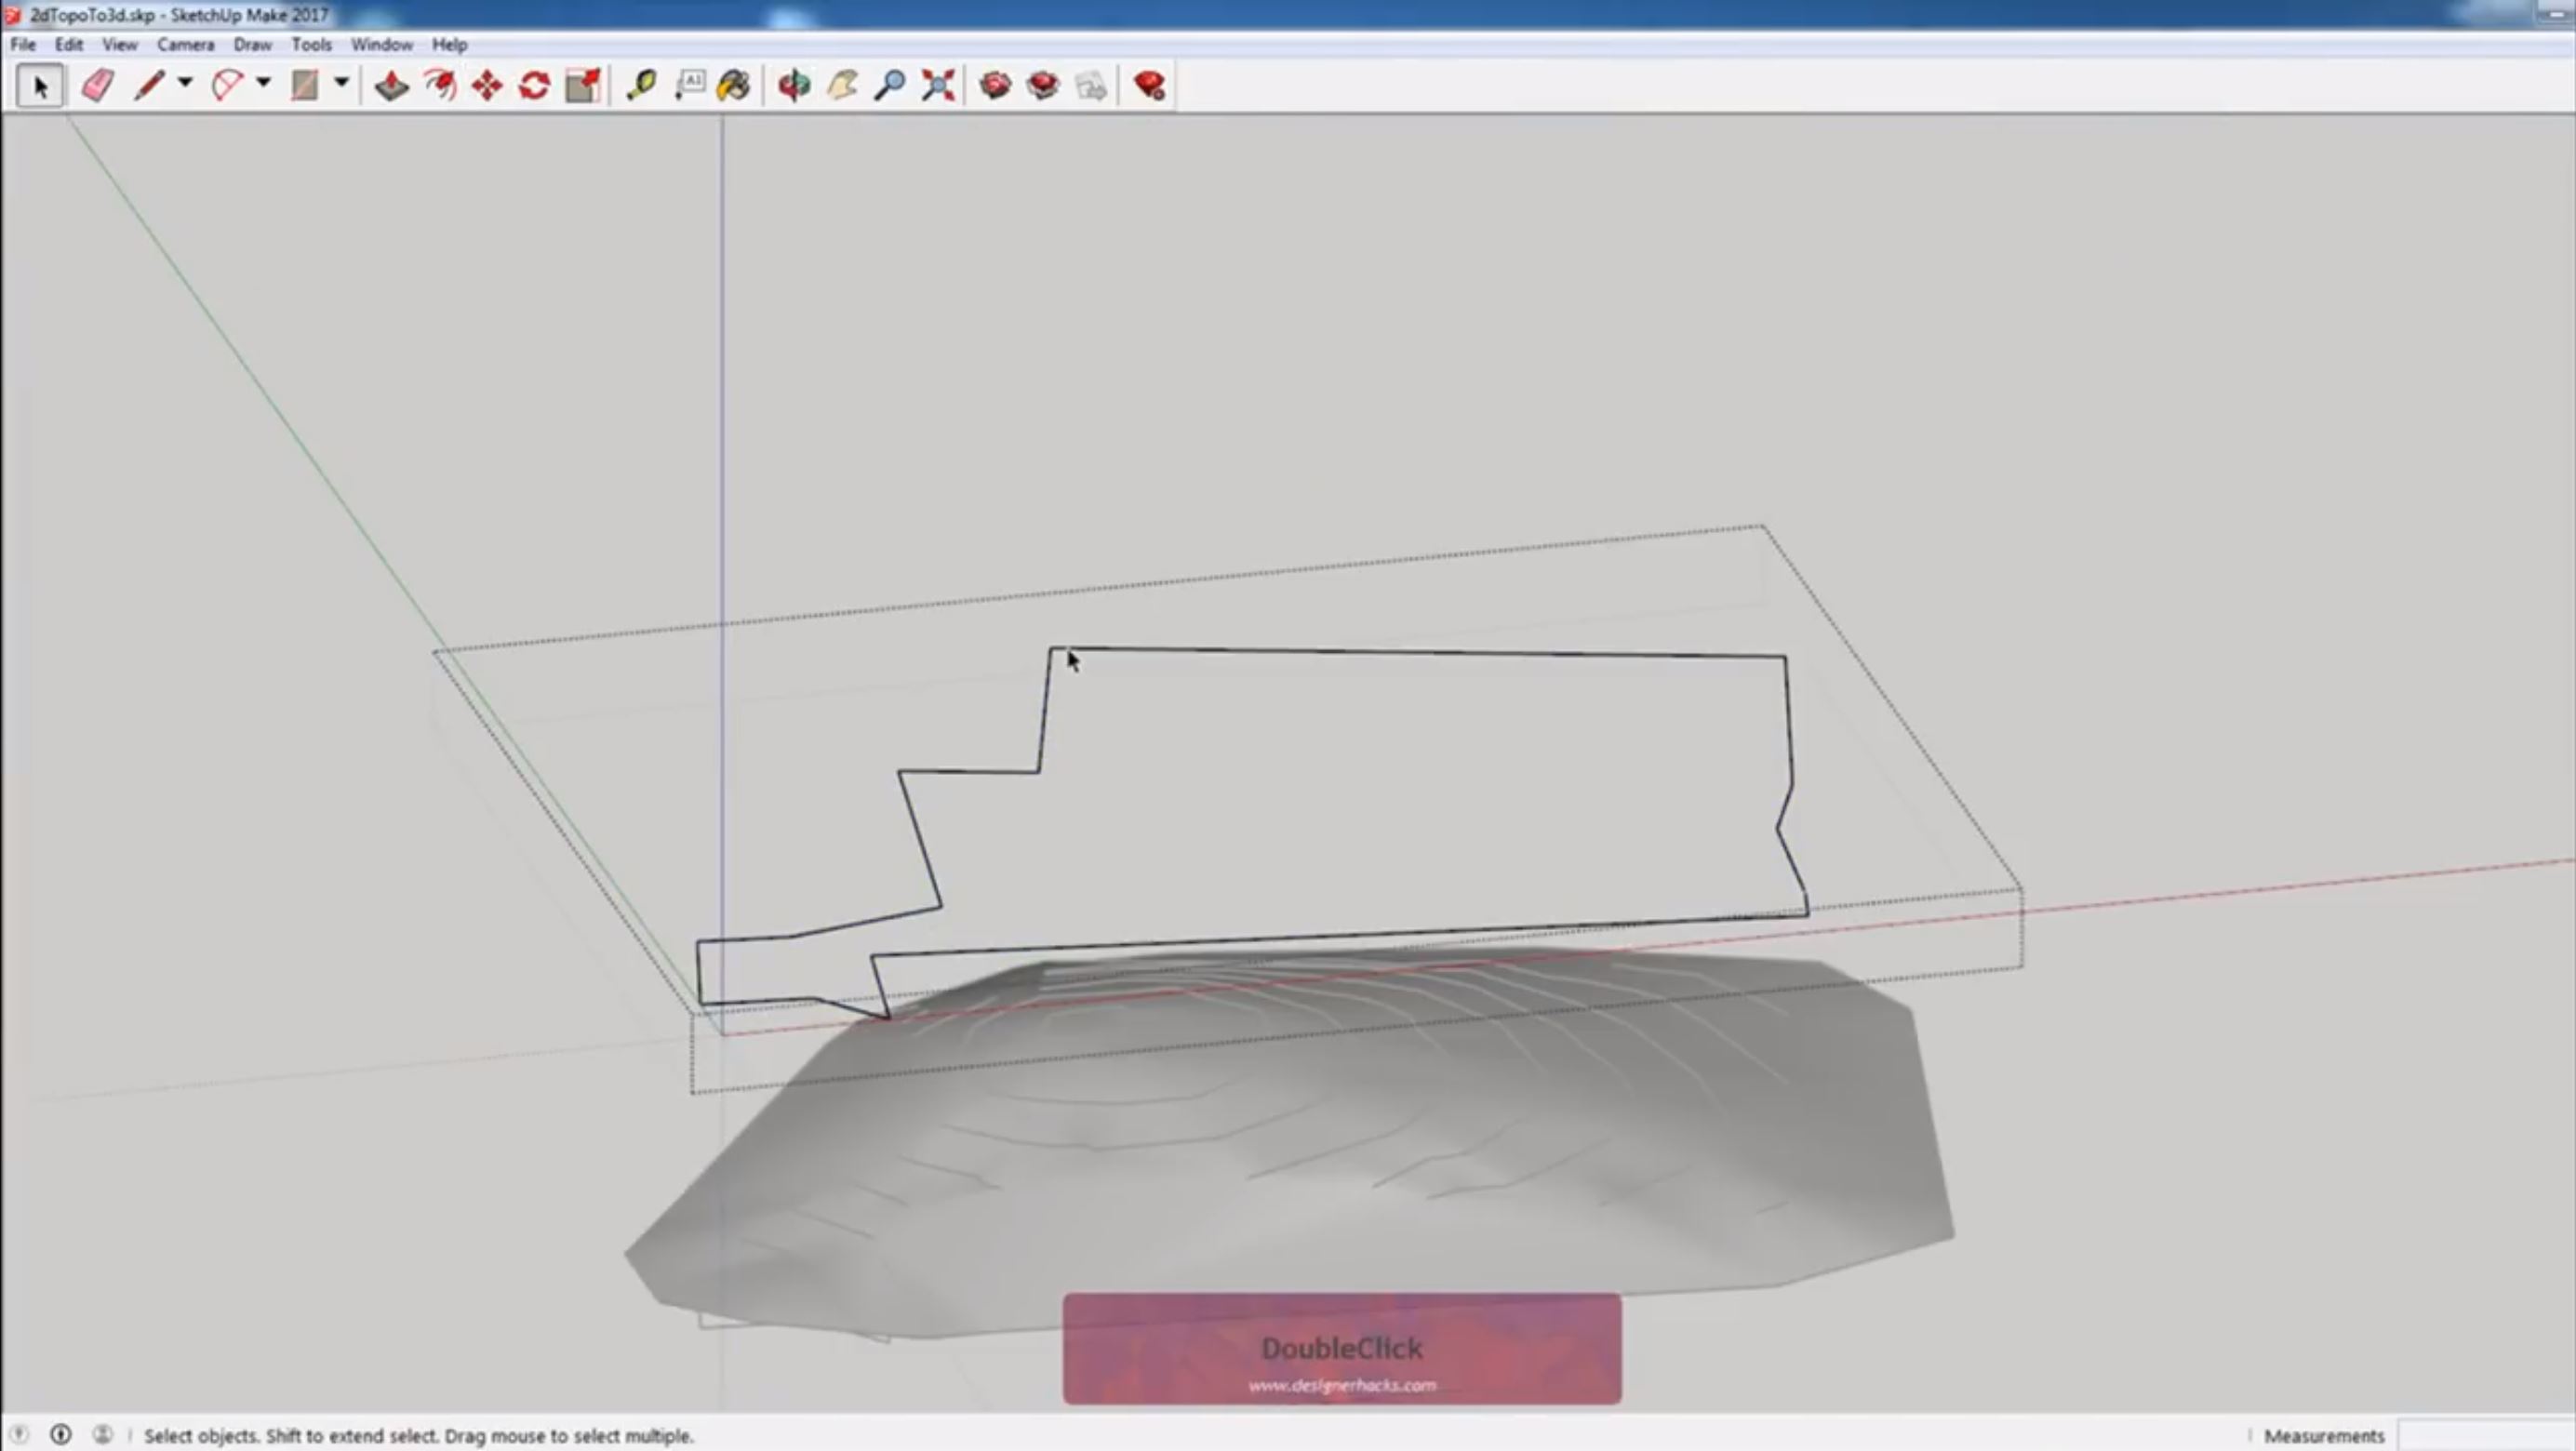
Use the offset tool to create an offset of the group that is large enough to cover all of the terrain. Select the inside face and hit “delete.” Press “p” to pull the group down to cover the terrain. Next, hit “ctrl” + “x” to cut the outlying box we just made. This will get rid of our geometry, but also save it to our clipboard.
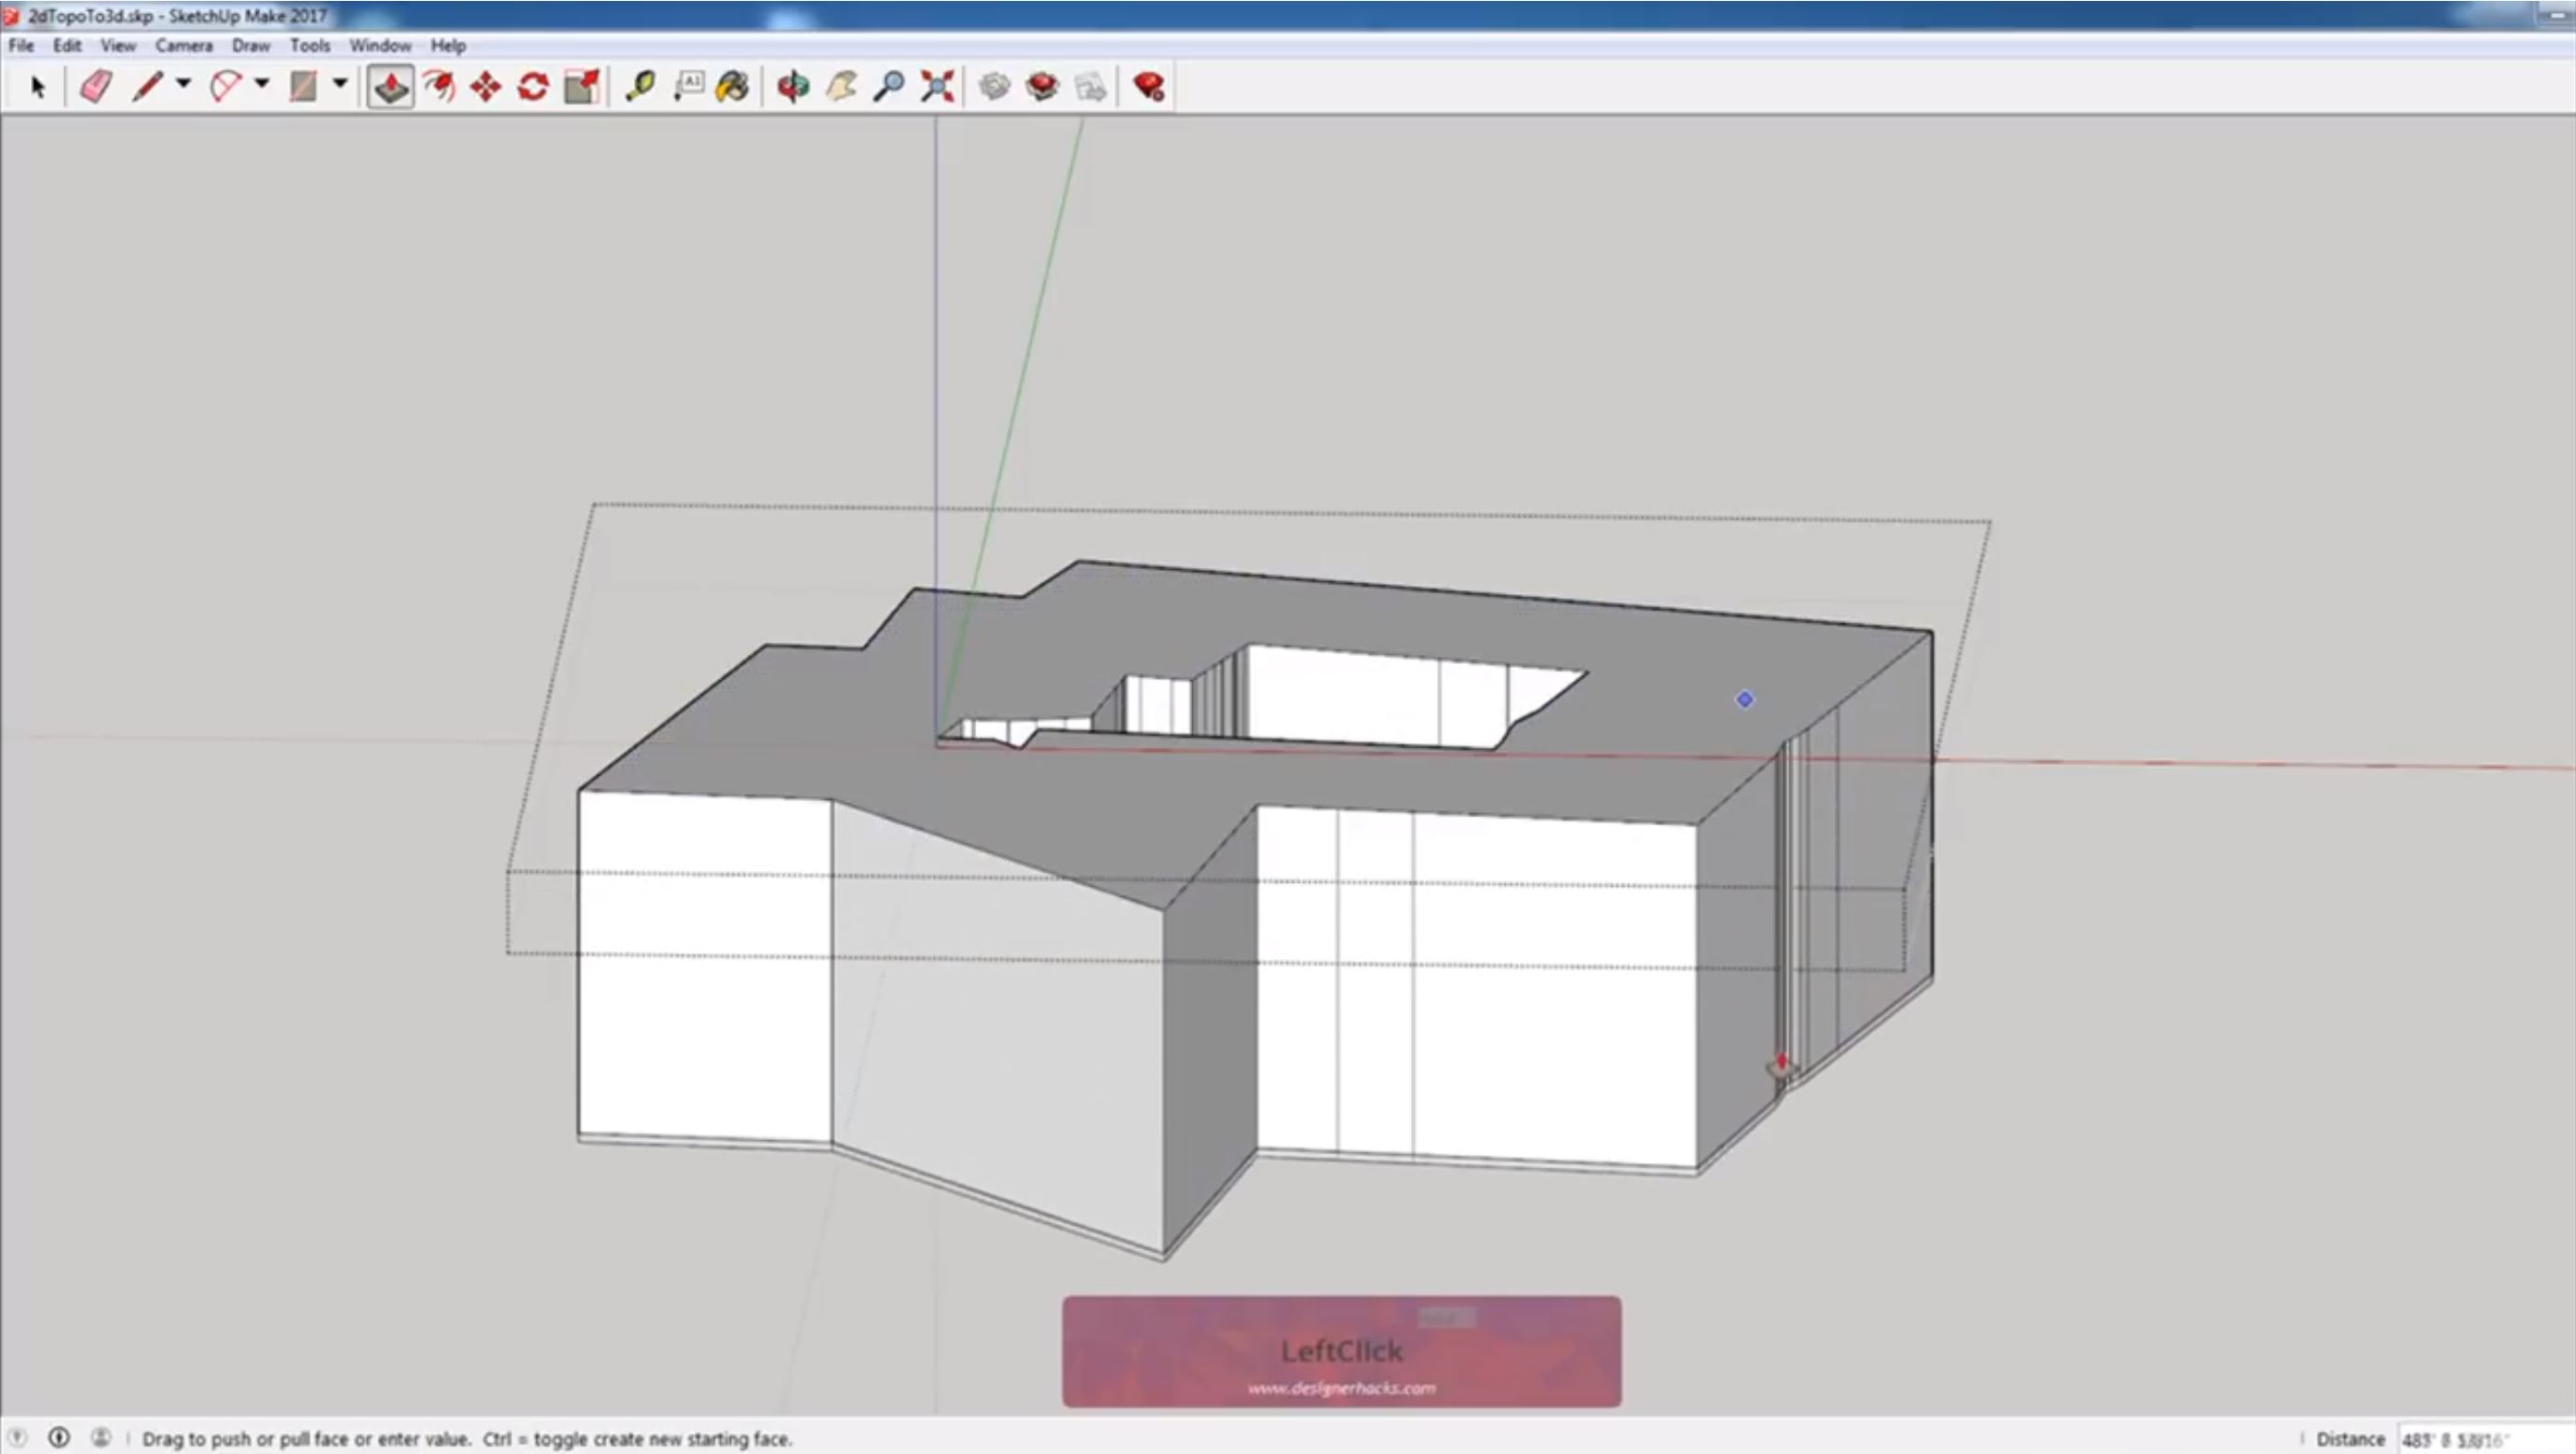
Edit > Paste in Place. Enter into your terrain group and select “paste in place” from the edit tab to bring the shape you just cut back into view within the terrain group.
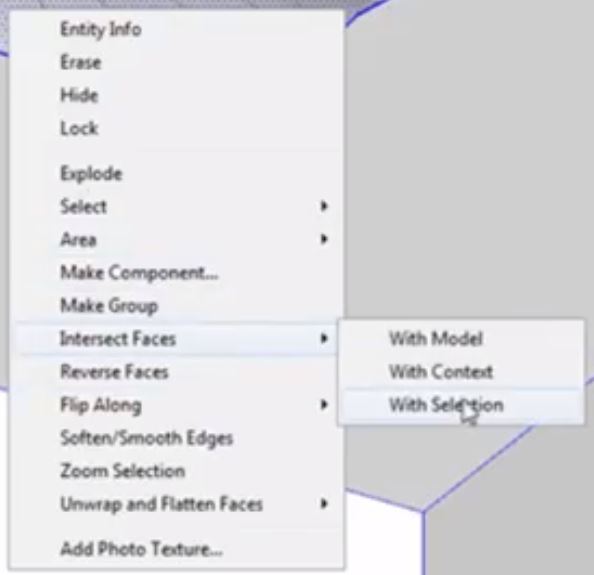
Intersect Faces > With Selection. Select both models and right click to select “intersect faces” > “with selection.” Make sure the box you are intersecting with your terrain is a group or things are going to get messy! After you cut the terrain, delete the group you used to cut with and the shape you created.
Hide Linework. Select all of the lines and use “ctrl” > “shift” to deselect the contours. Select “hide” from the edit tab. You can also delete them or put them on a separate layer.
Now you have an accurate terrain model that you transformed from survey to 3D. What kind of projects do you need to create 3D terrains for? Let us know in the comments!
Be sure to check out all of our Sketchup tutorials here. Happy Hacking!
No comments yet.