
How to Model IKEA Furniture in Sketchup

When working on a project in Sketchup you may use the 3D Warehouse or download files from the manufacturer to add into your model. Sometimes a product doesn’t always have a 3D model you can use and you have to make the model yourself. In this article, we’ll teach you how to model your own IKEA furniture in Sketchup!
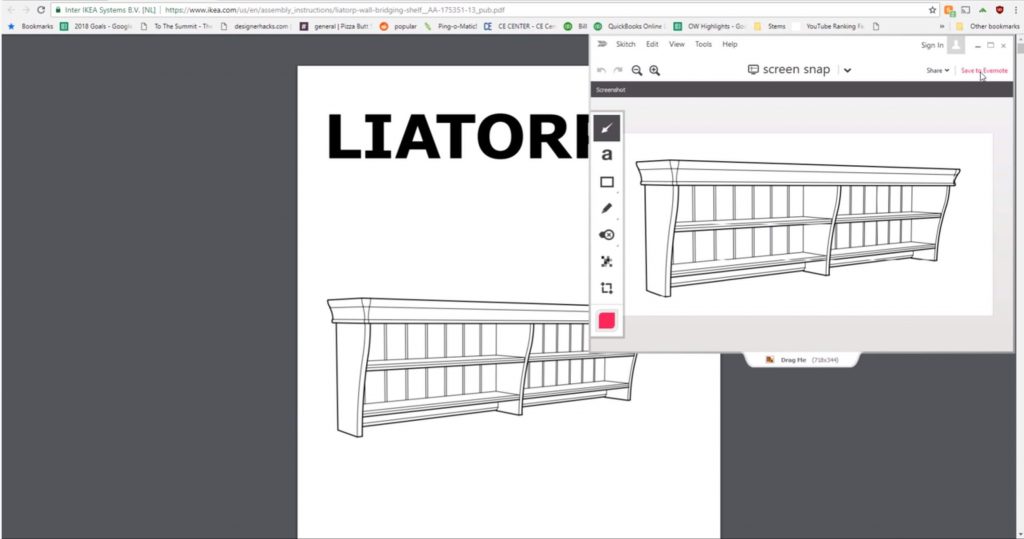
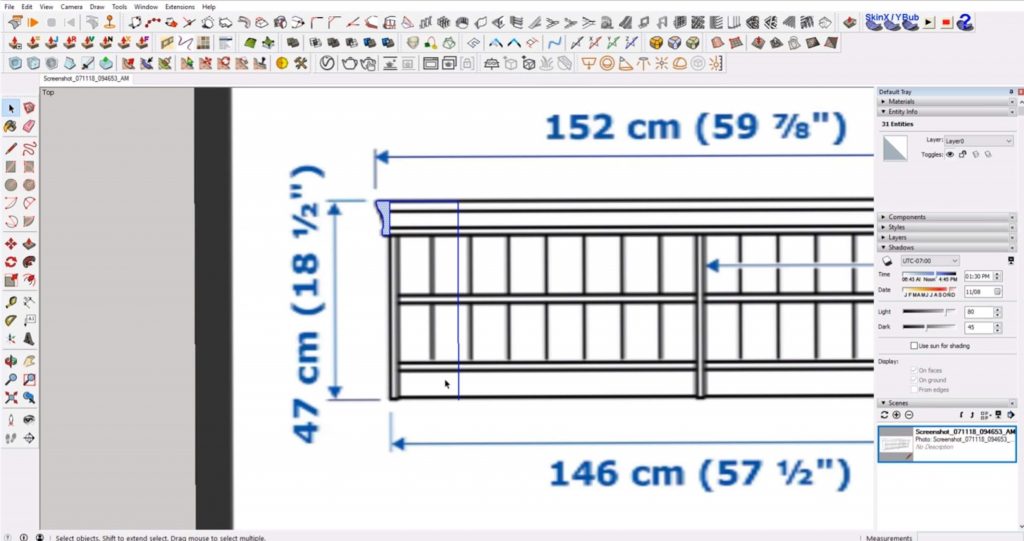
As an example, we are going to use a traditional looking shelf that we found on the Ikea website. Lucky for us, this product includes detail drawings with dimensions! In case yours doesn’t, we’ll show you how to use the product information to build your model too. Let’s get started!
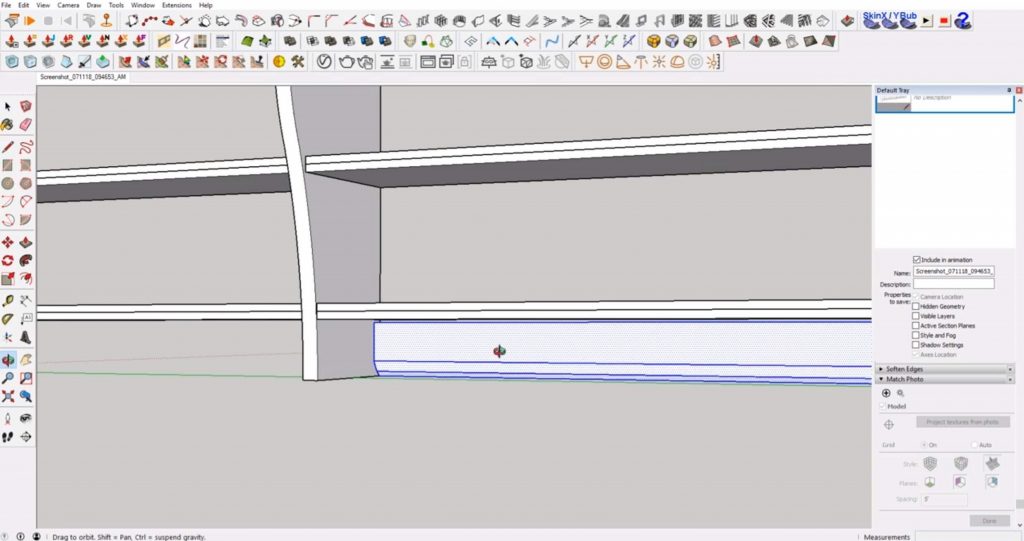
First, you’ll have to capture a portion of your screen. We use a program called Skitch, but you can also use the Snipping tool on windows, or press CMD+Shift+4 on mac to capture a window.
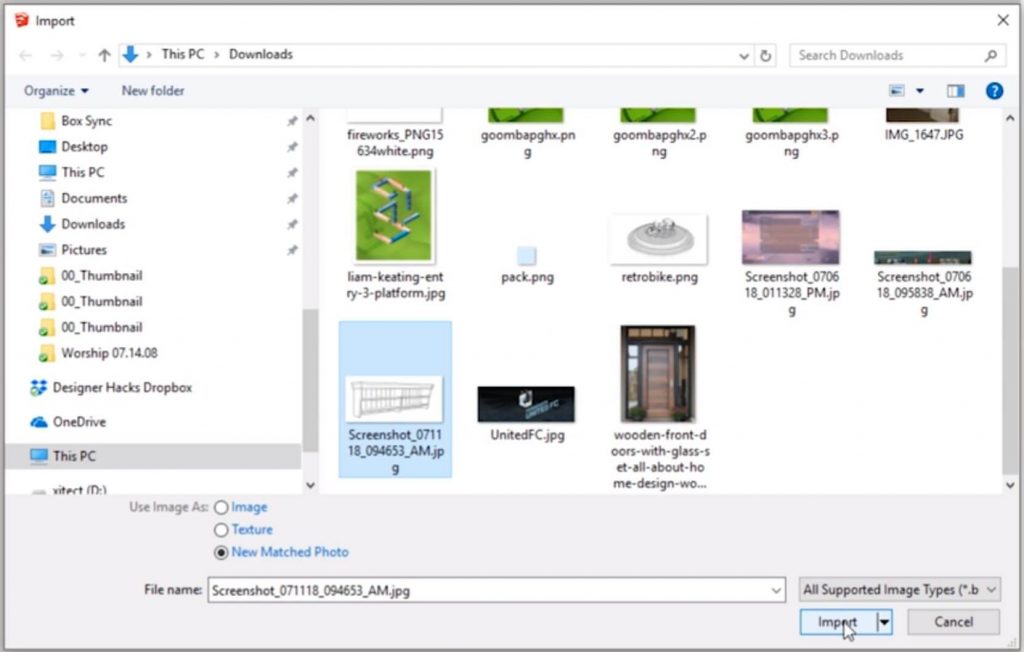
Skitch > Screen Snap. Open Skitch and click on “screen snap.” Click and drag your mouse over the area that you want to copy. You can use the “drag me” feature to drag your image into Sketchup to simply use as a reference, but for this example, we want to use photomatch. So we’ll need to save our photo to our computer somewhere and then import it into Sketchup.
File > Import. Open Sketchup and go to “file” > “import.” Select your image and make sure “new matched photo” is selected. Click “import.”
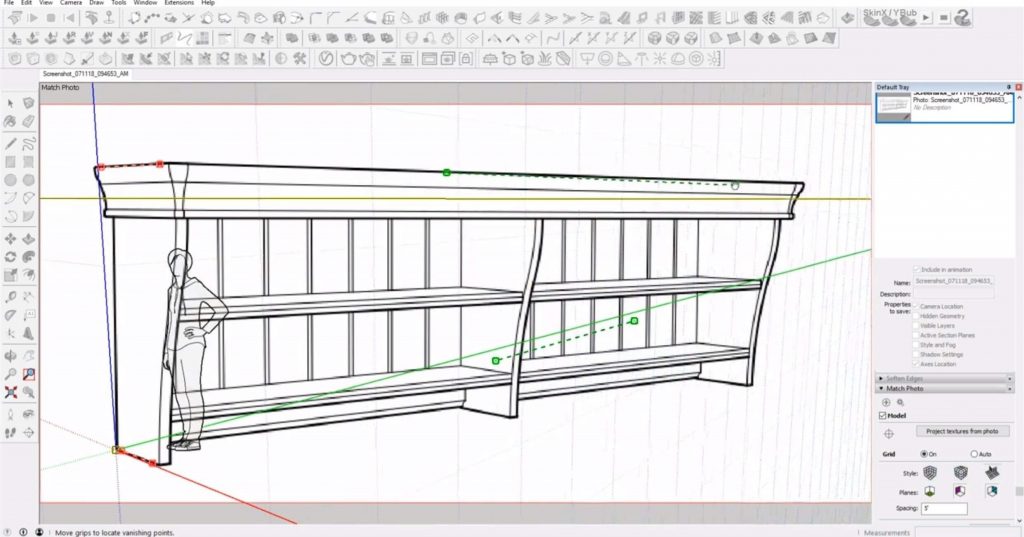
Drag the red and green perspective lines to align them with the lines in the photo.
If you need more help with this, feel free to check out our other tutorial specifically on photo match.
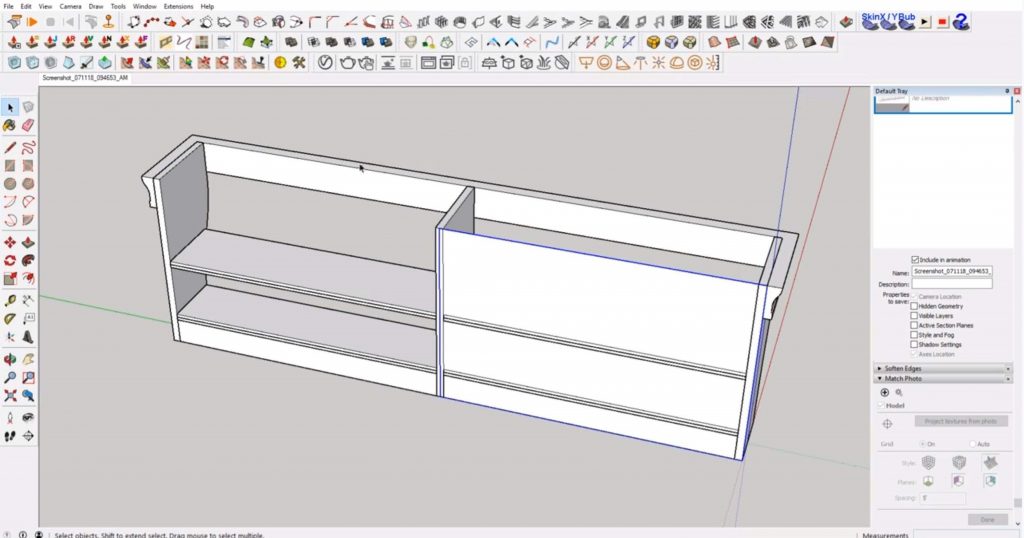
Trace IKEA Furniture in Sketchup
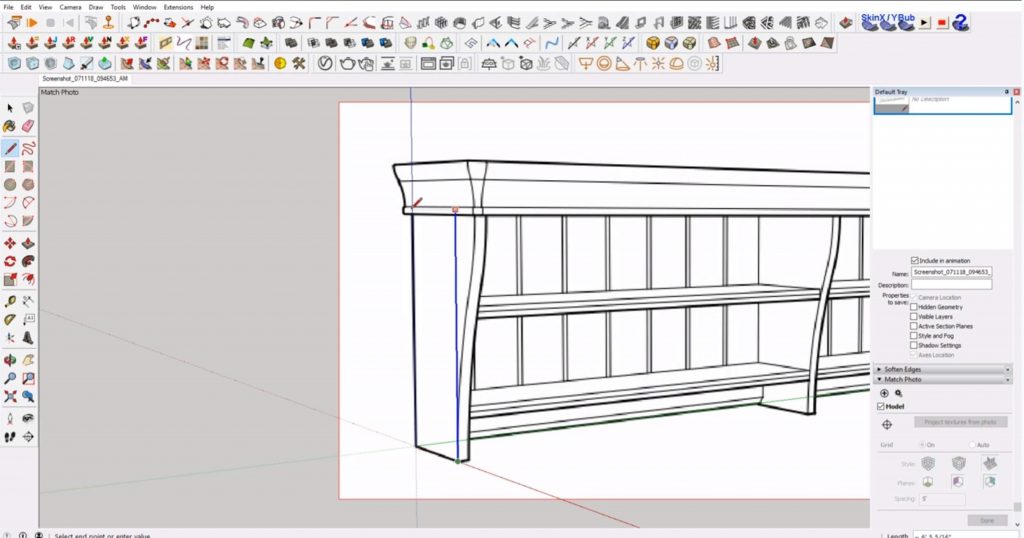
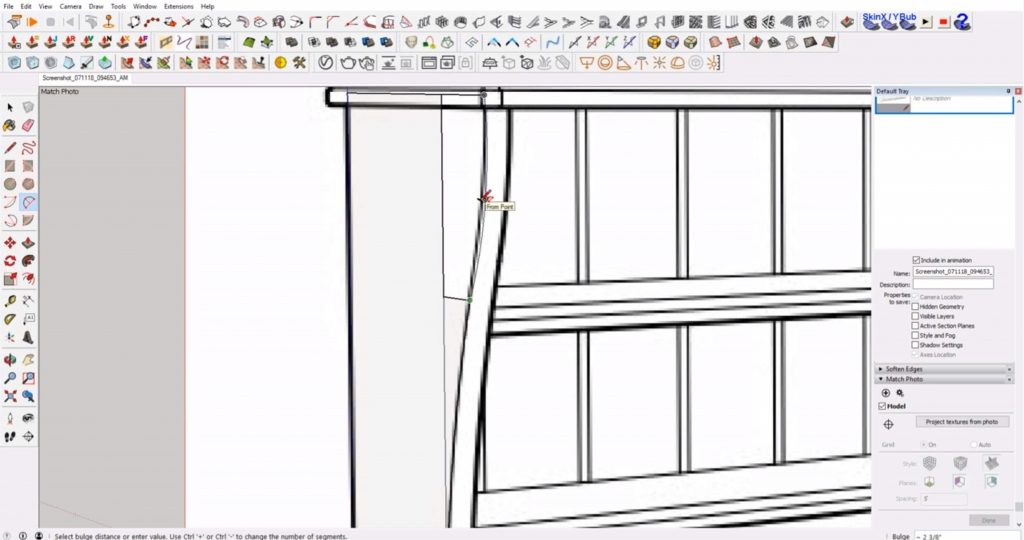
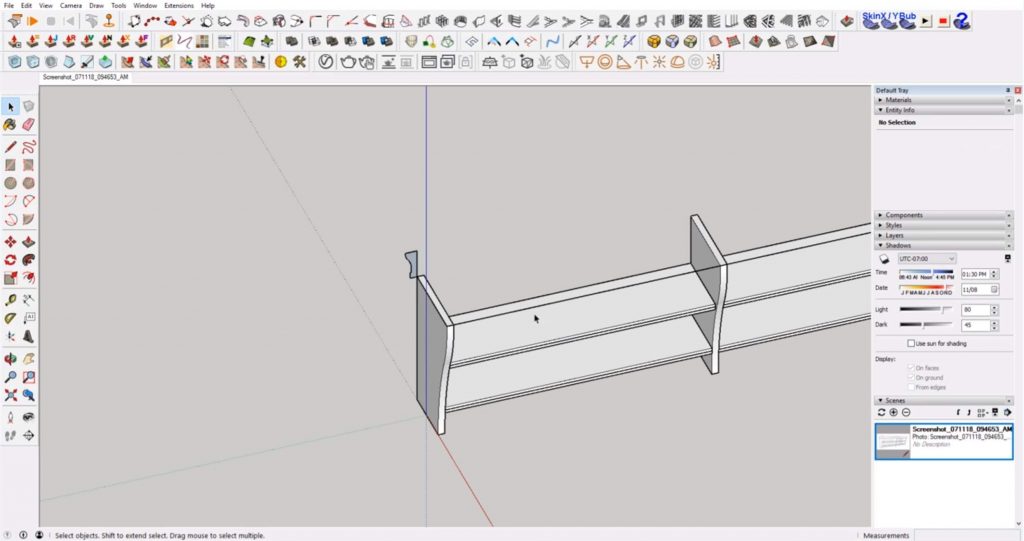
Begin making the model by tracing the end support. You may have to adjust the perspective lines by right-clicking and selecting “edit match photo.”
Trace Edge. Use the line tool to trace the bottom edge of the shape. Then draw a vertical line up that aligns with the back corner. Draw another vertical line down to the starting point to close off the rectangle.
Draw Curves. Draw a horizontal line at the tangent point of the curves. Click on the arc tool and select the bottom corner and the line at the tangent. Make sure you are in the correct plane and hold “shift” to lock to the plane. Align the arc with the curve of the drawing. Repeat for the top curve.
Erase. Hit “E” to open the eraser tool. Hold “ctrl” while using the mouse to hide the extra lines.
Extrude. Use the “push/pull” tool to extrude the shape back.
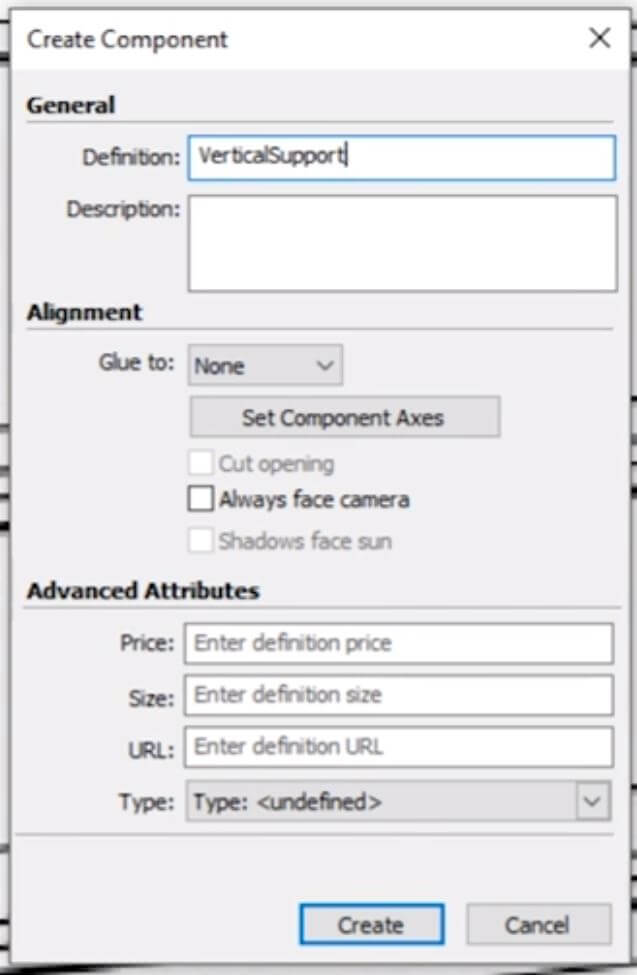
Make Group. Double click on the shape you just created. Right-click and select “make component.” Name the component and hit enter.
Copy Support. Copy the support to the other end of the shelf. Type “/2” and hit enter. This will ensure the center support is directly between each end piece.
Trace Shelf. Use the line tool to trace the face of the shelf that connects to the middle support. Extrude the rectangle so that it connects to the first side support. Copy and paste the shape directly below it.
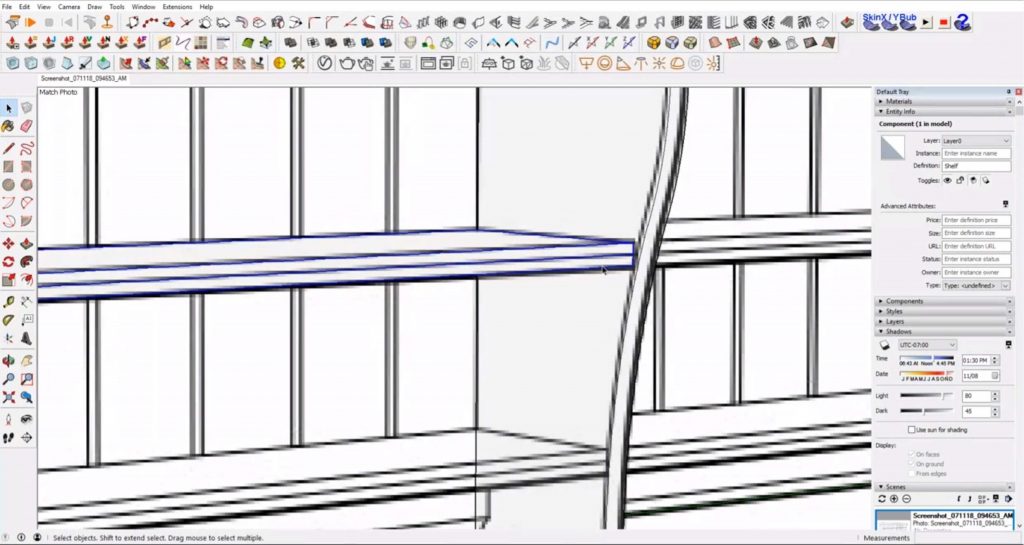
Make Component. Double click on the shelf. Right-click and select “make component.” Name the component “shelf” and hit enter.
Copy Shelf. Copy and paste the shelf to the other side. Then, select both top shelves and copy and paste them to the bottom.
Scale. Use the scale tool to push the bottom shelves so that they align with the edge of the supports.
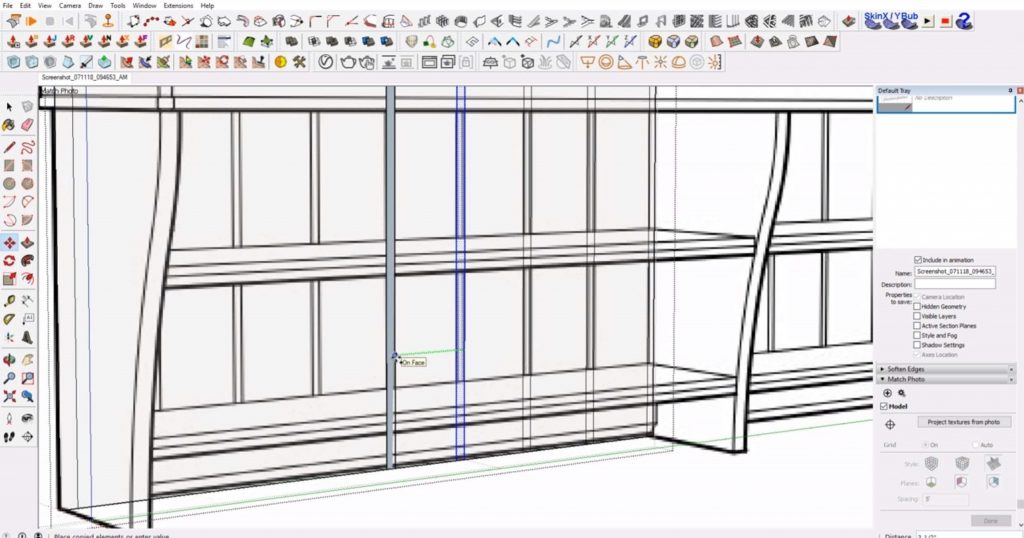
Model Top Molding
To make the top piece of IKEA furniture in Sketchup, we will need to use the detail drawings as a reference. Take a screenshot of the dimensioned image and drag it into your Sketchup model.
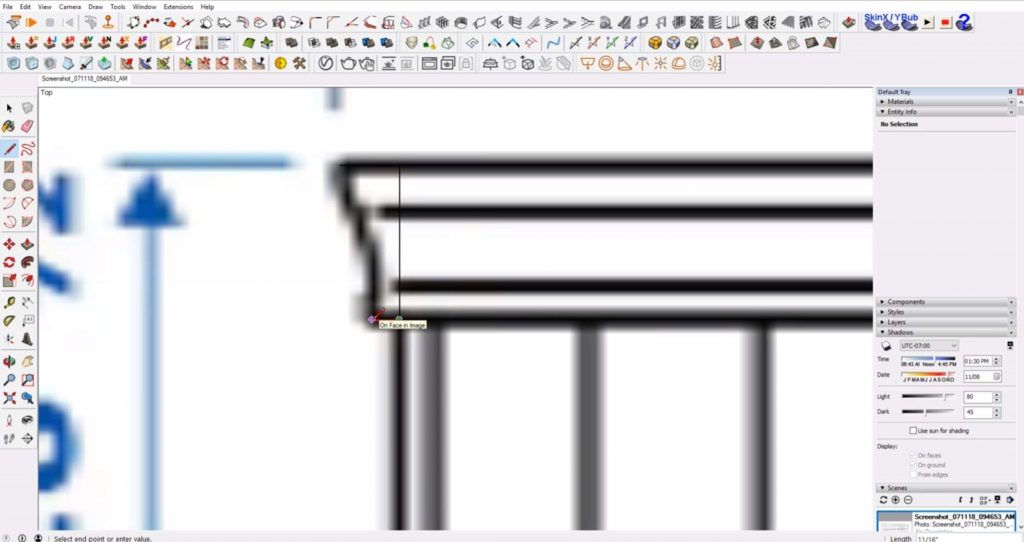
Camera > Standard Views > Top. Go to “camera” > “standard views” and select “top.”
Camera > Parallel Projection. Make sure you have “parallel projection” turned on by going to “camera” and selecting “parallel projection.”
Trace Profile. Use the line tool to trace the shape of the corner piece. Look back at the reference image to make sure you are getting the shape as close to the real thing as possible.
Scale. Now we need to make sure the shape is at the correct scale. Draw a line from the edge of the shape to the right. Then draw another line from the endpoint that connects the top and bottom of the shelf. Select the shape and the lines you just drew. Select the tape measure tool. Type 18.5” and hit enter.
Make Group. Right-click on your model and select “make group.” Double click into the group and use the same method to scale your shelf using the width to scale by.
Rotate. Use the rotate tool to rotate your profile shape so that it aligns perpendicularly to the shelves. Move it to the back corner of the side support.
Follow Me Tool. Use the line tool to draw a path from the side support, across the top, and along the other side support. Select the 3 lines. Then click on the “follow me” tool and click on the profile shape. Right-click and make the top piece a group. Then select the entire model and right-click to select “explode.”
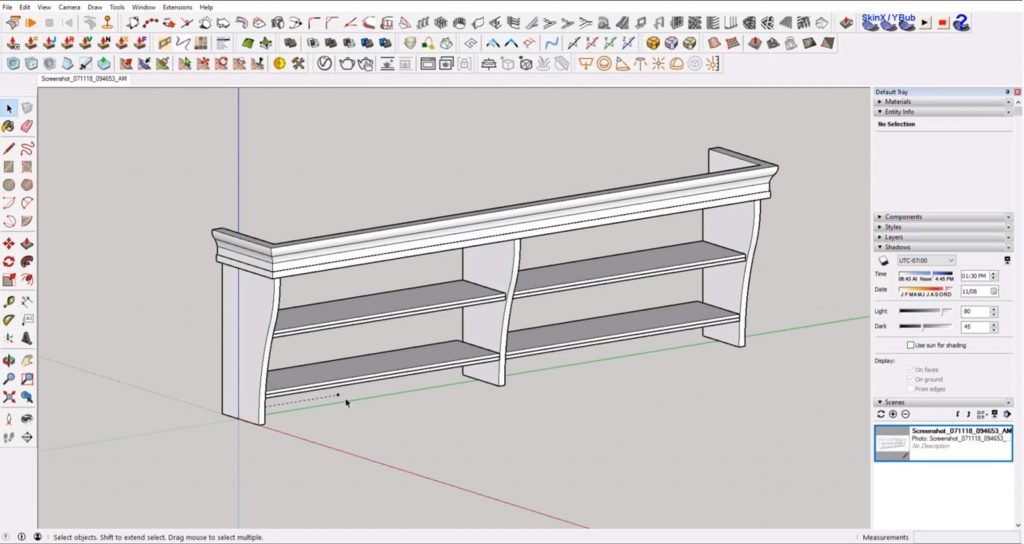
Edit Matched Photo. Your model will now be a different scale from the original image. To get it back to the same size, right-click on the top tab of your model window. Select “edit matched photo.” Click on the blue axis and drag your model along the axis to scale the model. You may need to move it back to the origin point.
Model Back Piece
Use the line tool to draw a horizontal rectangle on the bottom plane. Extrude it up so that it meets the bottom shelf. Then use the “push/pull” tool to push it back.
Use the line tool to trace the edge of the chamfer. Draw another line for the middle edge and move it back so that it aligns with the image. Double click on the shape and make it a component. Then copy and paste it over to the other side.
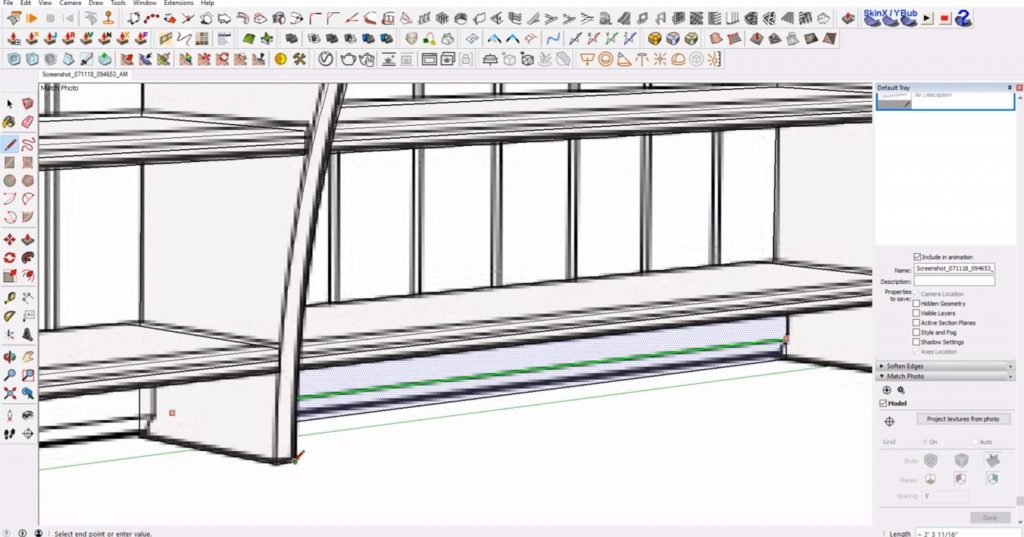
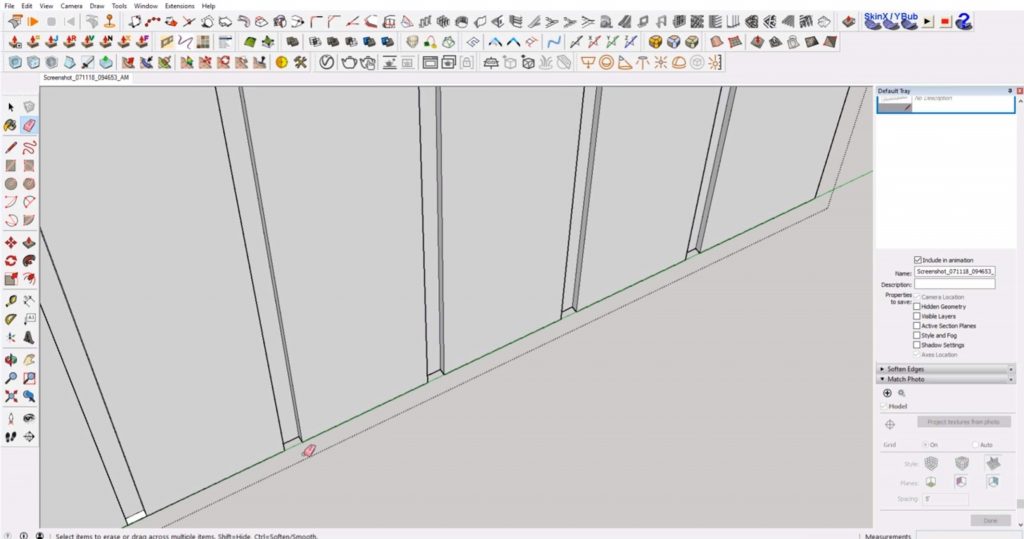
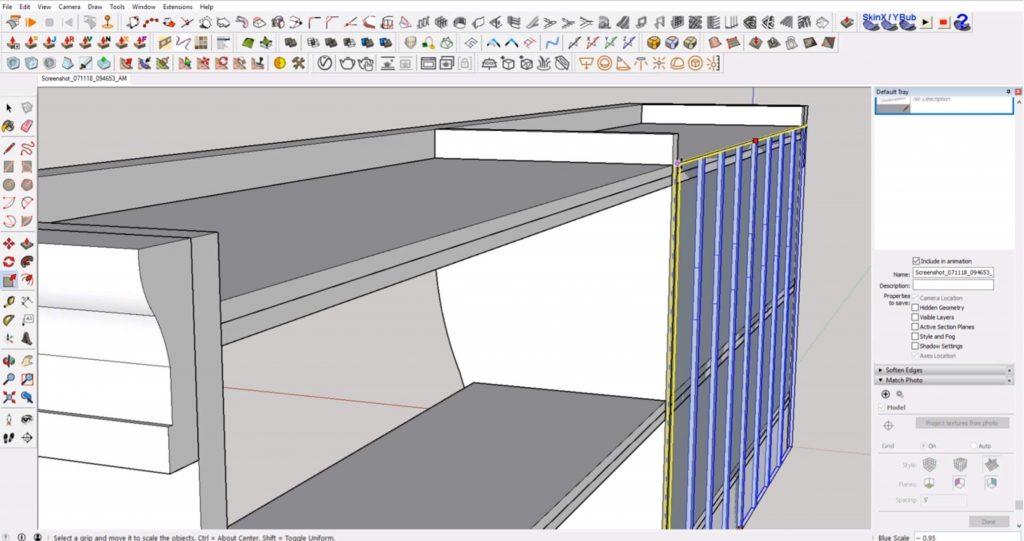
Model the Beadboard
Draw Rectangle. Draw a rectangle that covers one half of the back of your shelf. Make it a group.
Trace Gaps. Trace the gaps of the beadboard using the image as a reference. Copy and paste the lines across the beadboard, making sure you stay in the green axis.
Push/Pull. Use the “push/pull” tool to push the spaces back 3/16”.
Erase. Use the eraser tool to erase the faces between each beadboard piece.
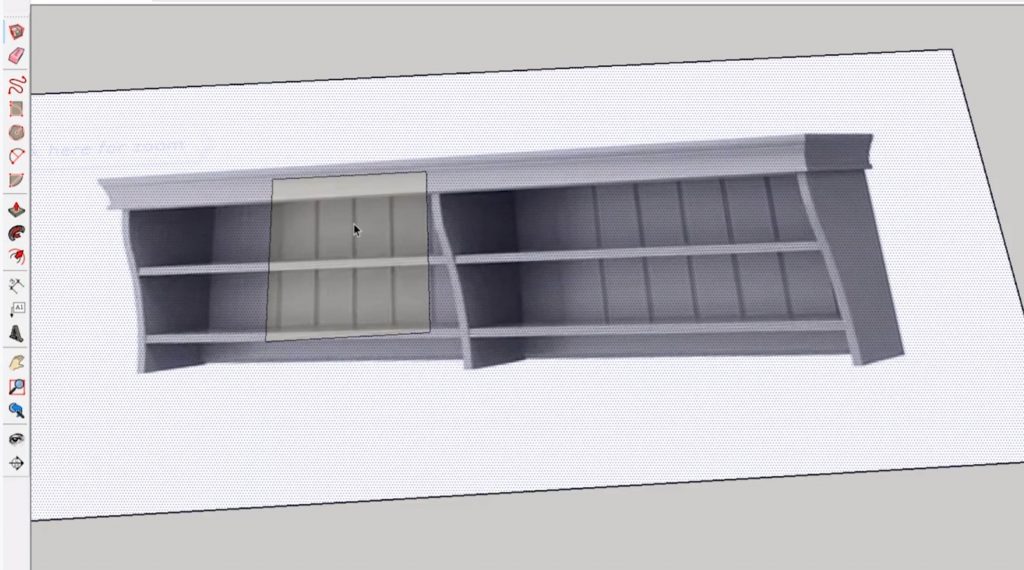
Move the top shelf up to the top edge of the model. Use the scale tool to push it out to meet with the front edge. Move it down slightly so there is a gap between the trim and the top. Then scale the beadboard down to align with the top shelf.
Draw a rectangle that extrudes ¼” out from the beadboard to cover the back. Double click on the beadboard and make it a component. Copy and paste it to the other side.
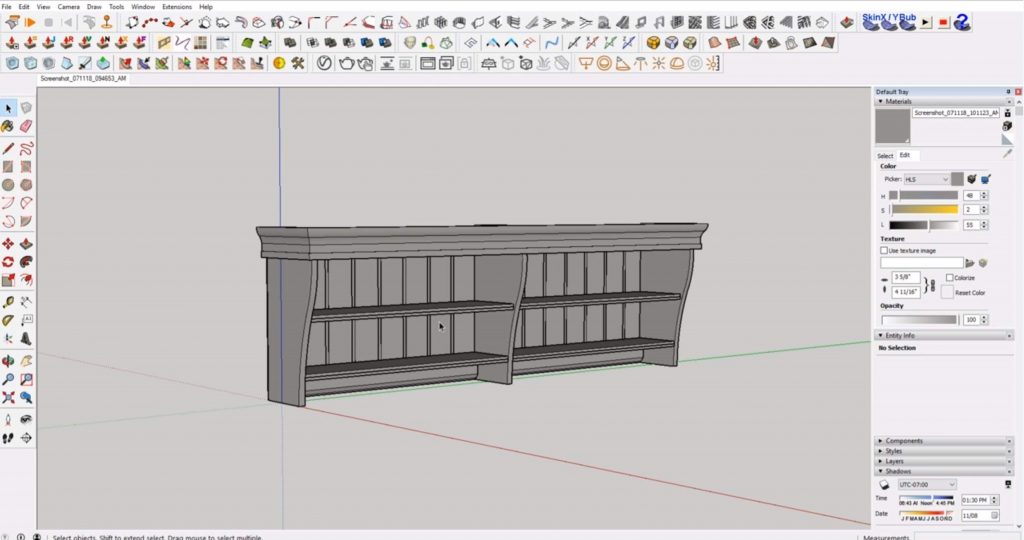
Add Color to IKEA Furniture in Sketchup
Take a snapshot of the colored image on IKEA’s website. Drag the image into Sketchup.
Explode. Right-click on the image and hit “explode.”
Make Unique Texture. Draw a rectangle over a small section of the image. Right click on the area and select “make unique texture.” Under the “materials” tab of the “default tray,” uncheck the box that says “use texture image.”
Paint. With the new material selected, use the paint bucket tool to paint your model.
Now you know all the tricks you need to model IKEA furniture in Sketchup! You can also use these tips to model any type of furniture in Sketchup! If you found this tutorial helpful, be sure to check out our full list of tutorials here. What types of furniture do you model most in Sketchup? Let us know in the comments!
Happy Hacking!
No comments yet.