
Futuristic Sketchup Interior Design | Sketchup Speed Model Lumion 9 Render

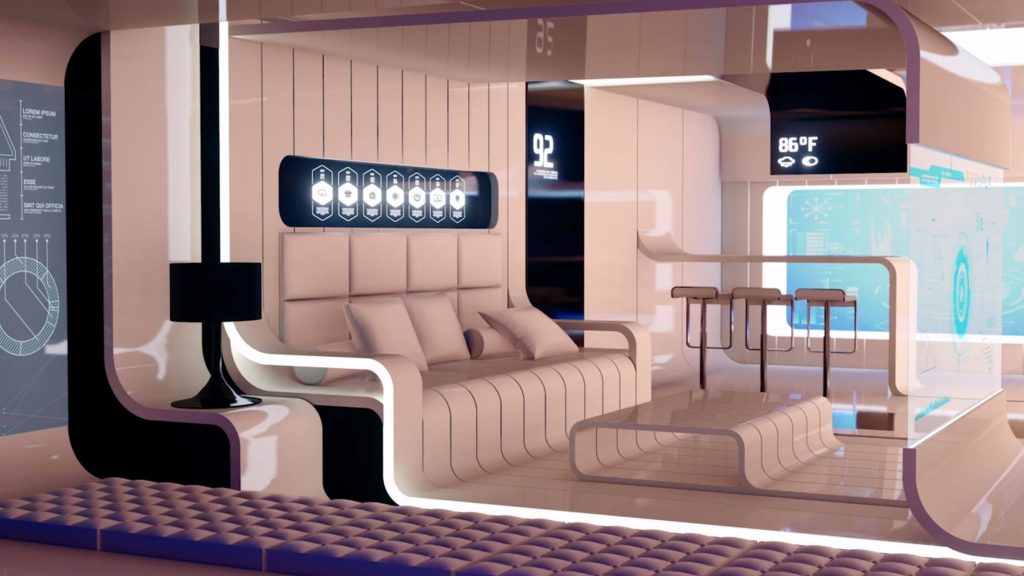
For this speed model, we’re going to show you how we tackled a futuristic Sketchup interior design concept created by Encho Enchev. Most of our speed models focus on the exterior architecture of a building, but similar to the attic bedroom speed model, we chose to use an interior space for this one. Take a look at how it was done! If you want a more in-depth tutorial on how we model in Sketchup, check out our concept modeling tutorial here.
Sketchup Interior Design Speed Model
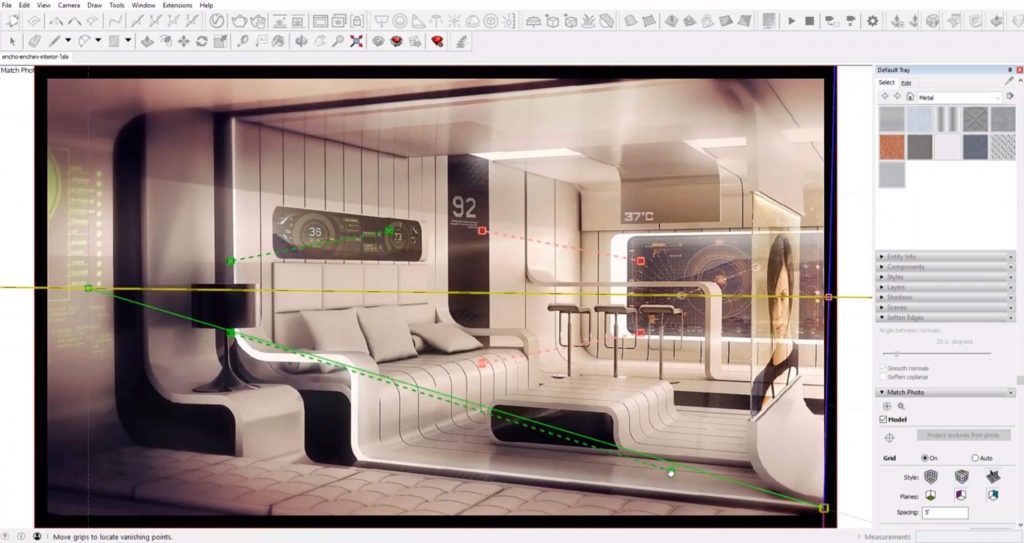
Import Image. To start, we imported the image into our Sketchup model. You want to be sure you import it as a “match photo.”
Align Perspective. Next, align the perspective lines in Sketchup with those in the image. This is an important step because the perspective lines will be the guide for your model and allow you to create a more accurate final product. Once you have the perspective aligned, you can begin to add planes for the walls and floor.
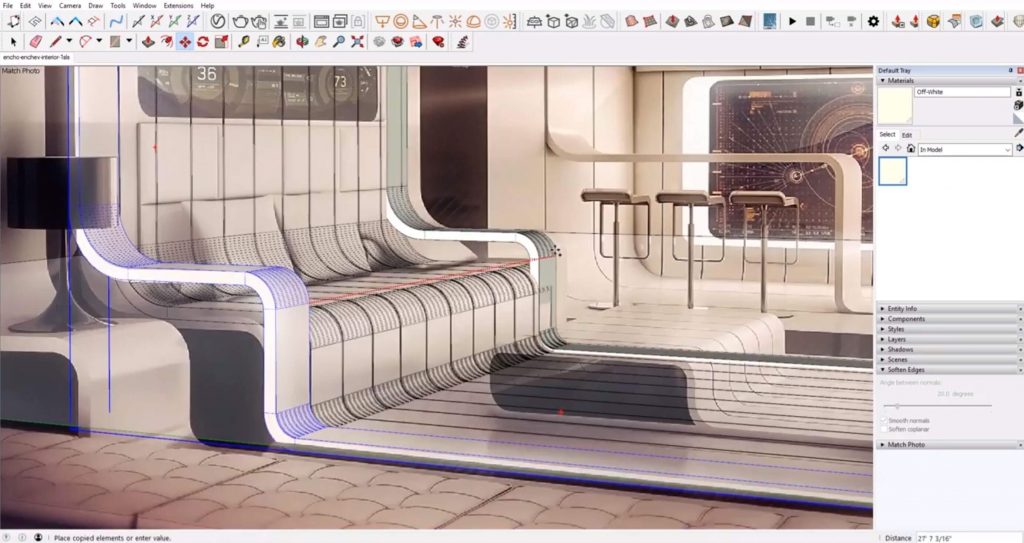
Block it Out. We drew a rectangle to create the floor plane and began blocking out the furniture from there. We started with the closest pieces to the viewer and worked our way back. Begin by blocking out the basic shapes. Then, carve into the shapes to create the curves and edges. Once we had one piece down, we were able to copy and paste it to create the seat and arm rest. We were also able to use the same piece to create the end table after a few adjustments.
Add the Ceiling. Next, we added the curved plane to create the ceiling using extrusions. Using the same technique, we created the ceiling panels in the back of the image and copy and pasted them across the ceiling.
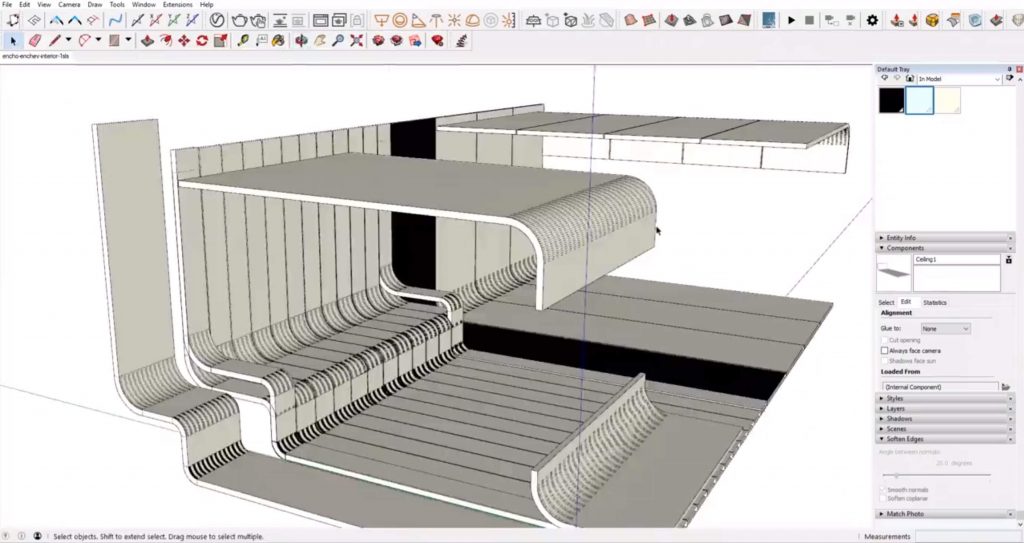
Add Walls. We used extrusions to create the panels on the back wall, and created a similar shape to the furniture to create the walls in the foreground.
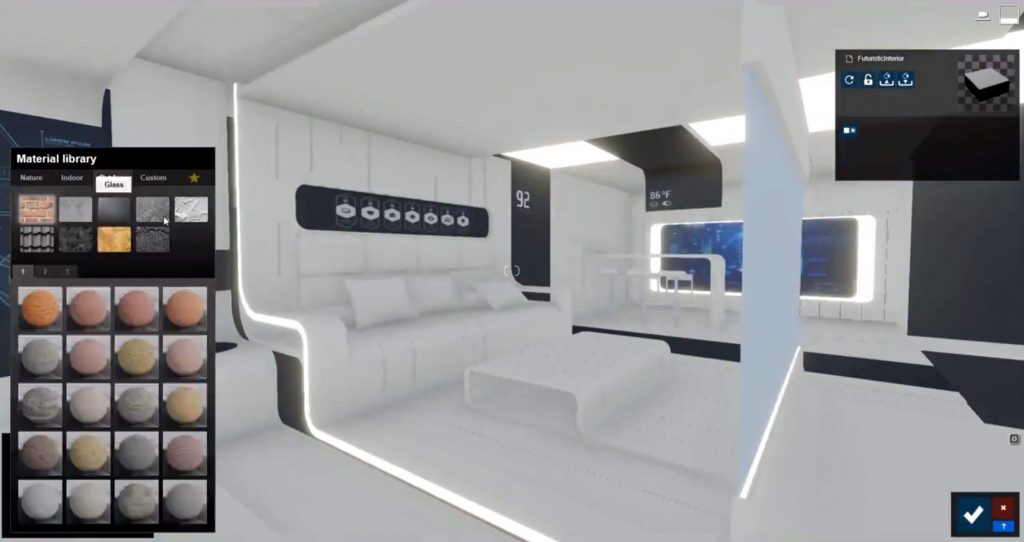
Adding Details. Once the majority of the scene was modeled, we uploaded barstools and some graphics to finish up the Sketchup interior design. We made a few adjustments to make them as similar to the ones in the image as possible. We also uploaded cushions from the 3D warehouse to add to the flooring.
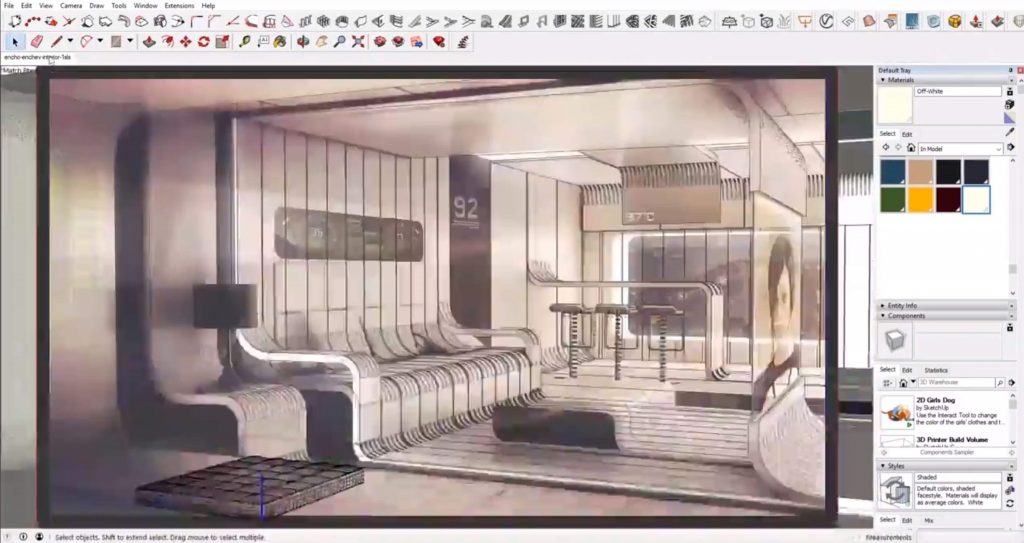
After modeling the screen in the back, we applied a material to it to give the appearance of a television screen. We used the same technique to create the screen above the couch.
Lumion 9 Render
Once we were done modeling, we uploaded our model into Lumion to take the Sketchup interior design to the next level.
We adjusted the textile materials first to give them more texture. Then we added illuminance to the screens to give them a glowing appearance. We gave the furniture and walls a glossy sheen to give the room a futuristic and clean look. Once we were done, we created a short animation to walk through the space and really make it feel dimensional.
What speed model do you want to see next? Do you want to see more architecture or more Sketchup interior design? Let us know in the comments!
No comments yet.